
One of my major projects this summer ended up being the creation of this moss covered Arm Chair. I needed it as a prop for my photo shoot for my fabric line, Curious Dream. And I decided that I should be able to create it without too much effort. Now I often underestimate the amount of work that something will take, but I truly think that this chair is very doable with the right materials.
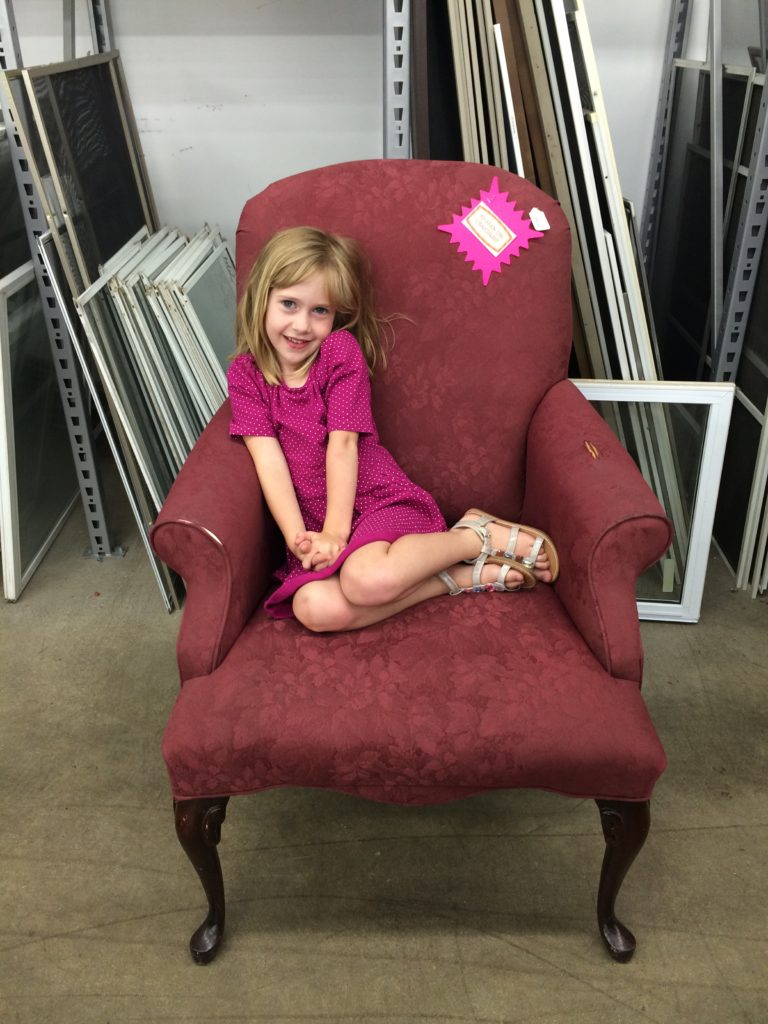
Start with a piece of furniture that has the lines that you need. Don’t worry about its condition or color. This is a prop and not a permanent installation, so keep that in mind as I give you my instructions. I chose my piece from a local Habitat Restore for $20. It had the legs I wanted and the oversized feel I needed for my cute model there.
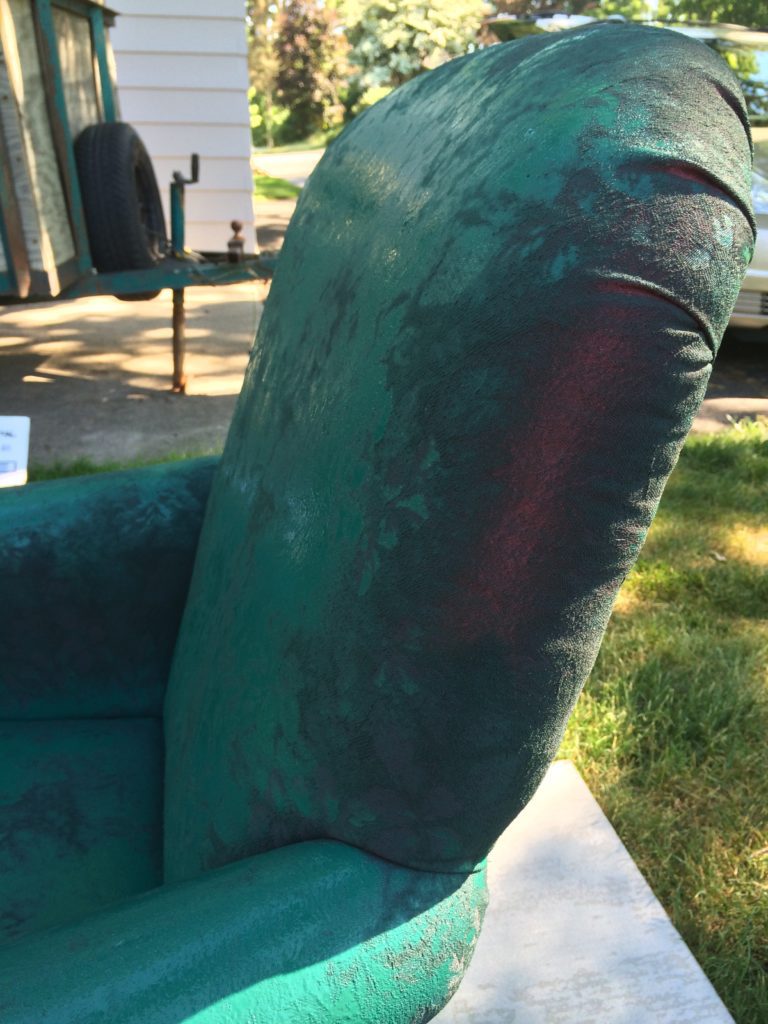
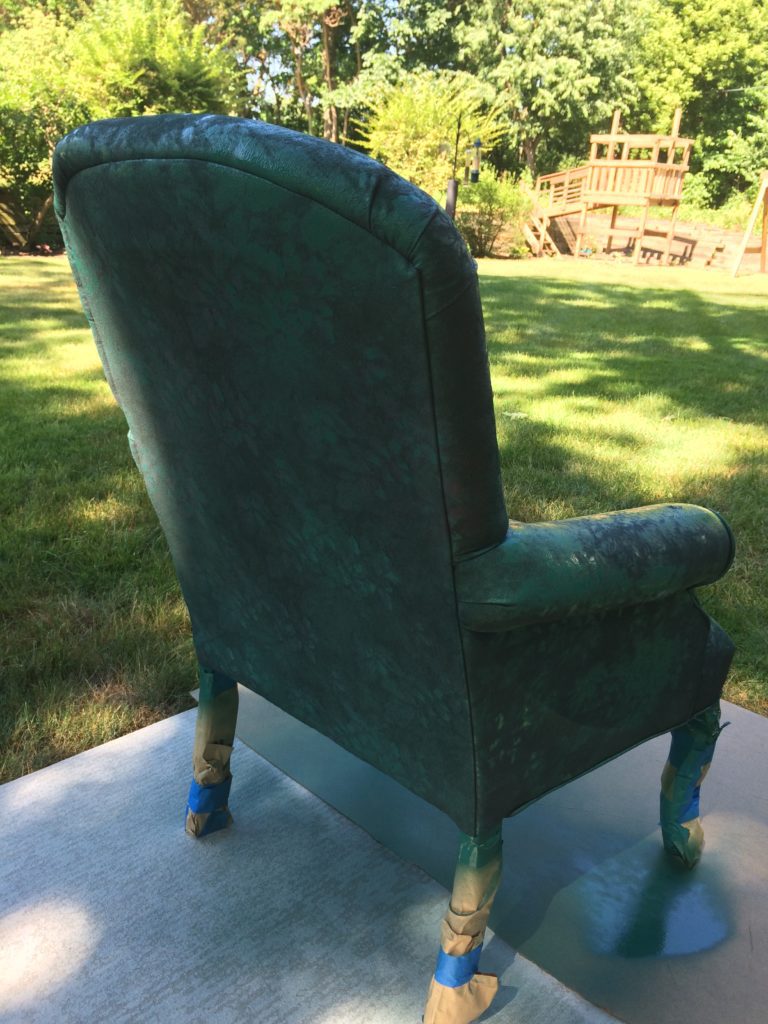
My next step was necessary because the color of my upholstery was red. I might have let another color go unpainted, but red is a contrasting color with green, the color of the moss. So it was necessary to eliminate any red that might peek out beneath the moss to hide any imperfections in my application.
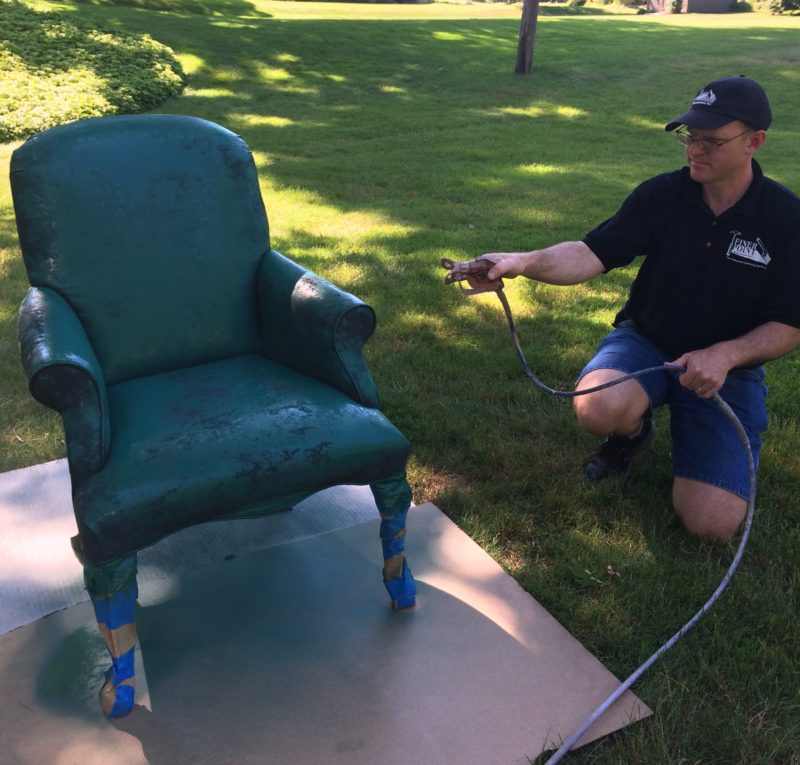
I realize that I am quite lucky in that my husband is a professional painter and could spray this out with regular latex paint easily. But I was prepared to spray paint it or paint it with a roller and brush. So regardless of application method, use any kind of green paint and just go to town covering up that color. Yes, the upholstery did dry a bit stiff but I wasn’t painting it to use it in my home. Remember, moss is the next step. Some stiff paint isn’t going to matter one bit.
Now prepare yourself for the moss. Do your best to determine the amount needed and the type of moss you want to use. I pretty much tried them all out on this chair. You can buy it or scavenger for it. For a piece this big, I needed to buy it, Use your coupons because moss can be surprisingly expensive.
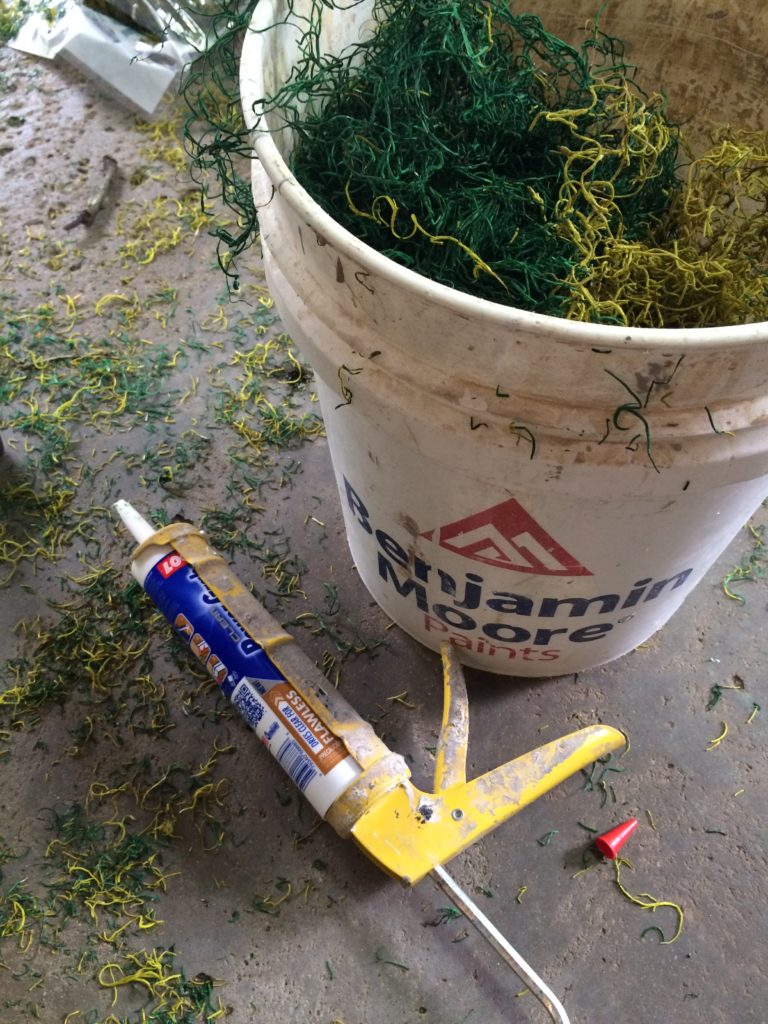
Now prepare yourself for a bit of a mess. Moss can be fun to work with, but no one ever called it a clean craft. The other trick I have to share is my adhesive I used. Again, sometimes I just luck out with my construction husband. We were discussing my adhesive needs for this chair and I was debating options like spray adhesive and hot glue. Everything seemed more trouble than I wanted.
Then he mentioned using a clear caulk. It worked like a dream. It was low odor enough. Fairly tidy with the containers and caulk gun, and no hot glue to burn yourself with. It gave me some time to worth the moss before it completely dried but was strong enough to hold it in place while I applied the moss. I went through approximately two tubes covering the front and sides of this arm chair.
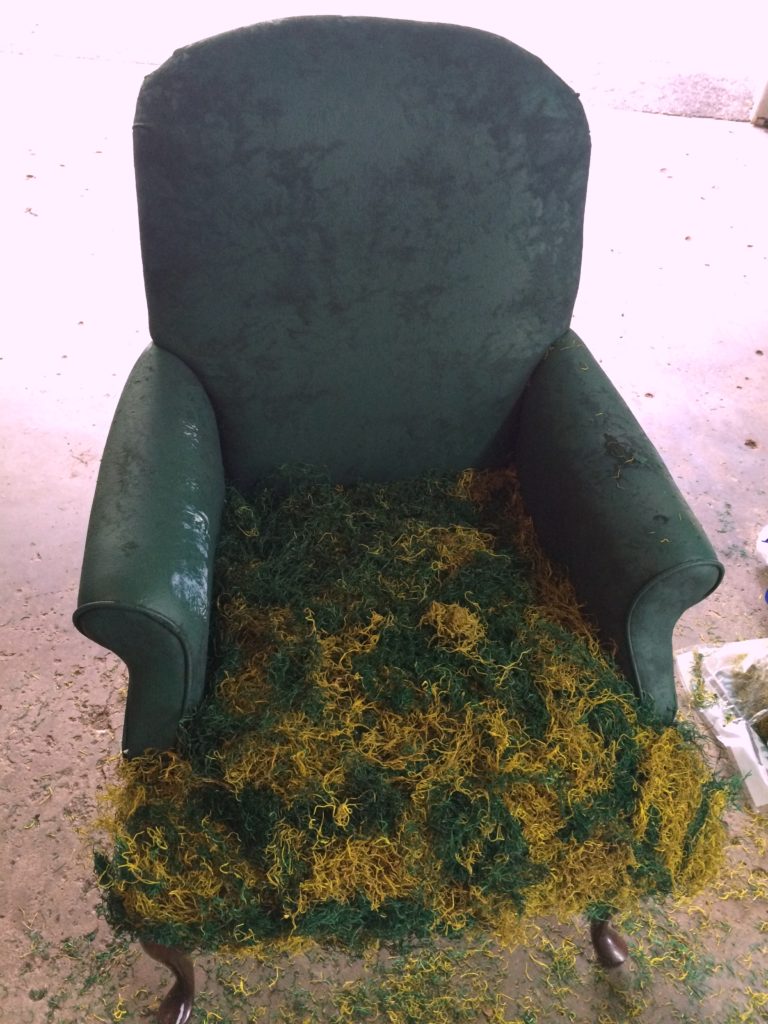
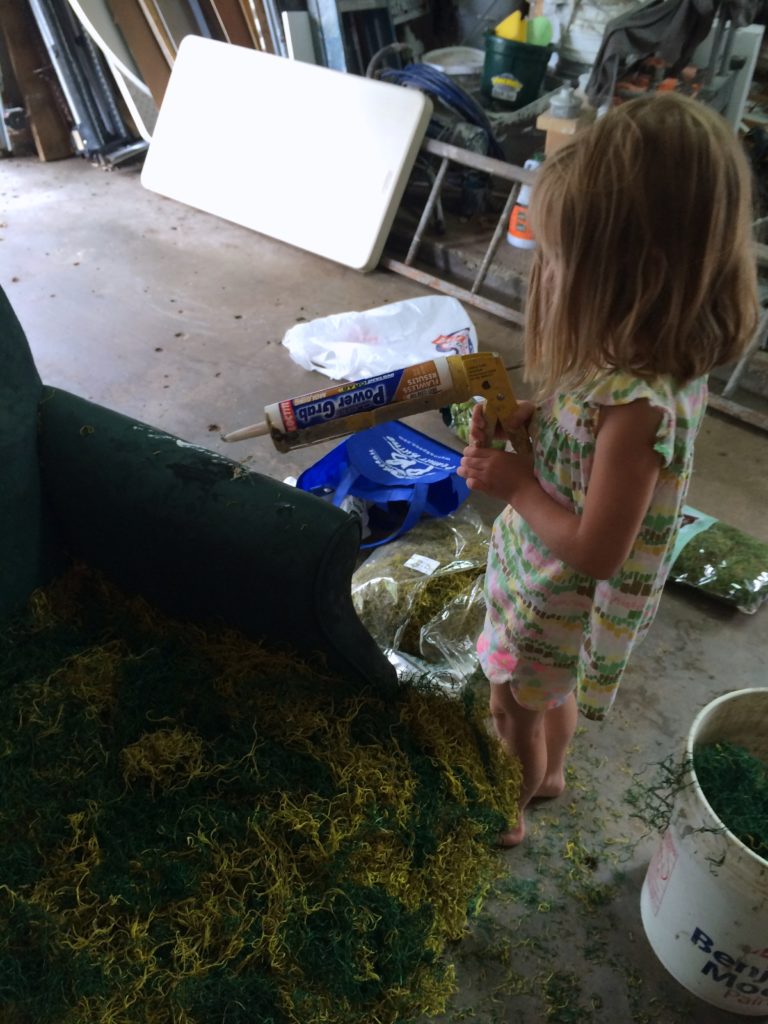
I started with the seat to give myself a bit of confidence. This wasn’t going to fall and I could easily move it. Turns out all of it was pretty easy, but this is a great starting point. I had a little helper try to work her magic, but the caulk gun required a bit more strength than she had. She loved to place the moss though.
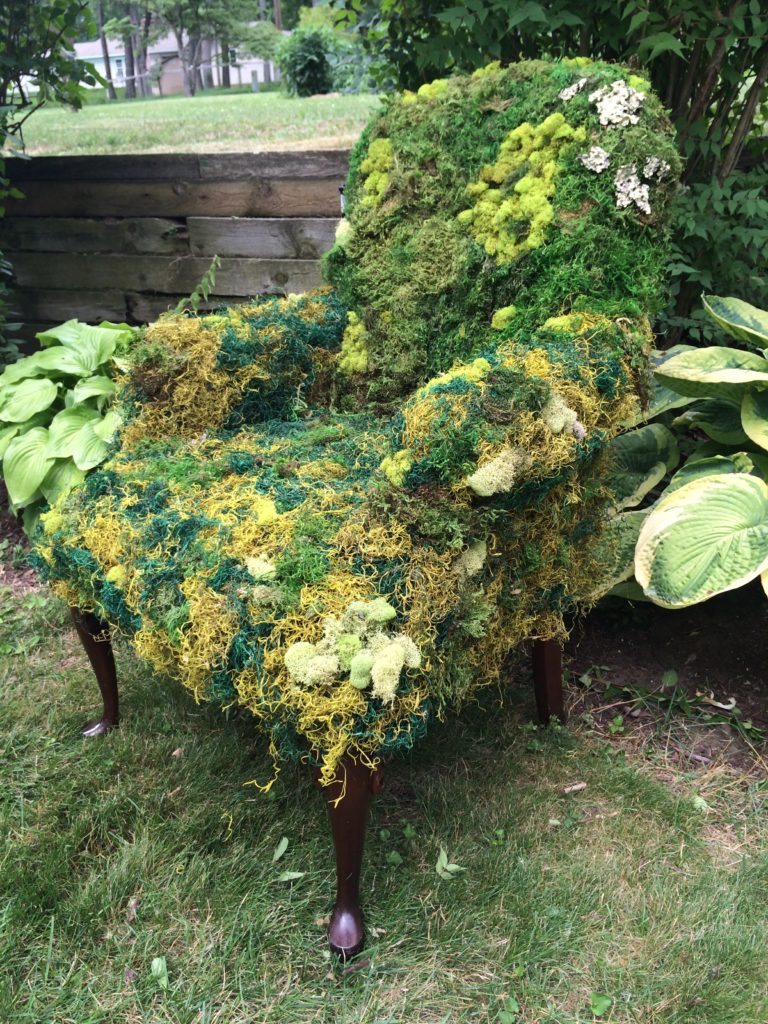
I used a variety of moss to create a more ” natural” look. I wanted the chair to look like it had been sitting in a forest and all kinds of moss had just taken over it. So I would place some moss and take a step back, then place some more…and so on.
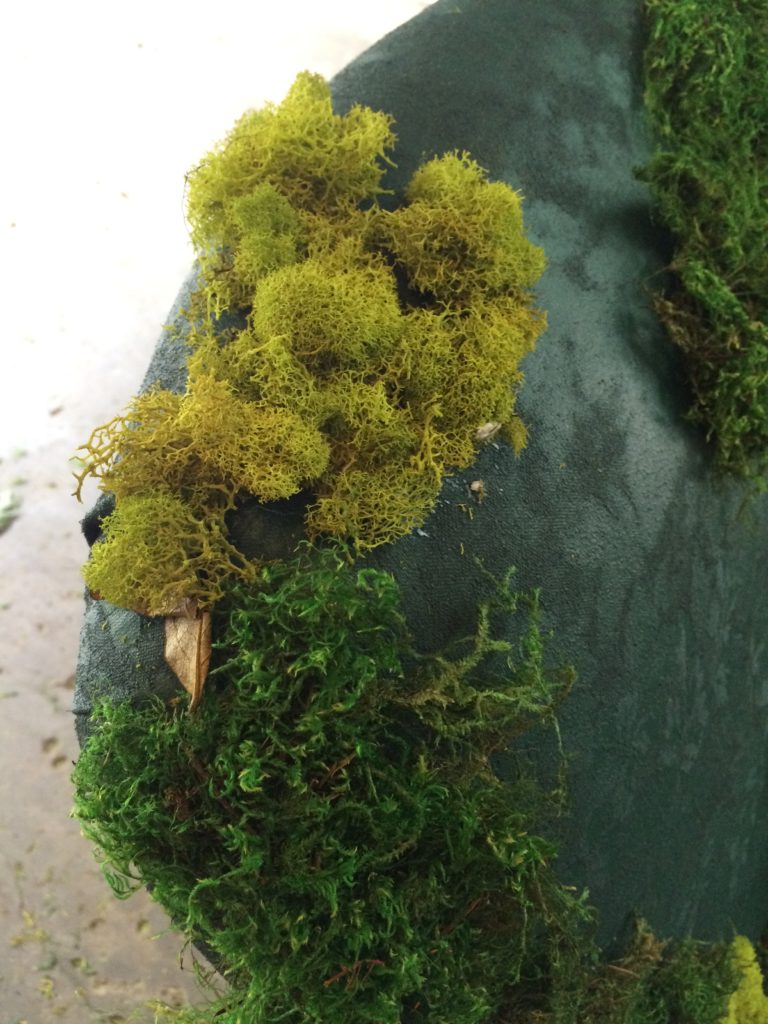
Careful details like this special white moss helped create even more drama to the piece.
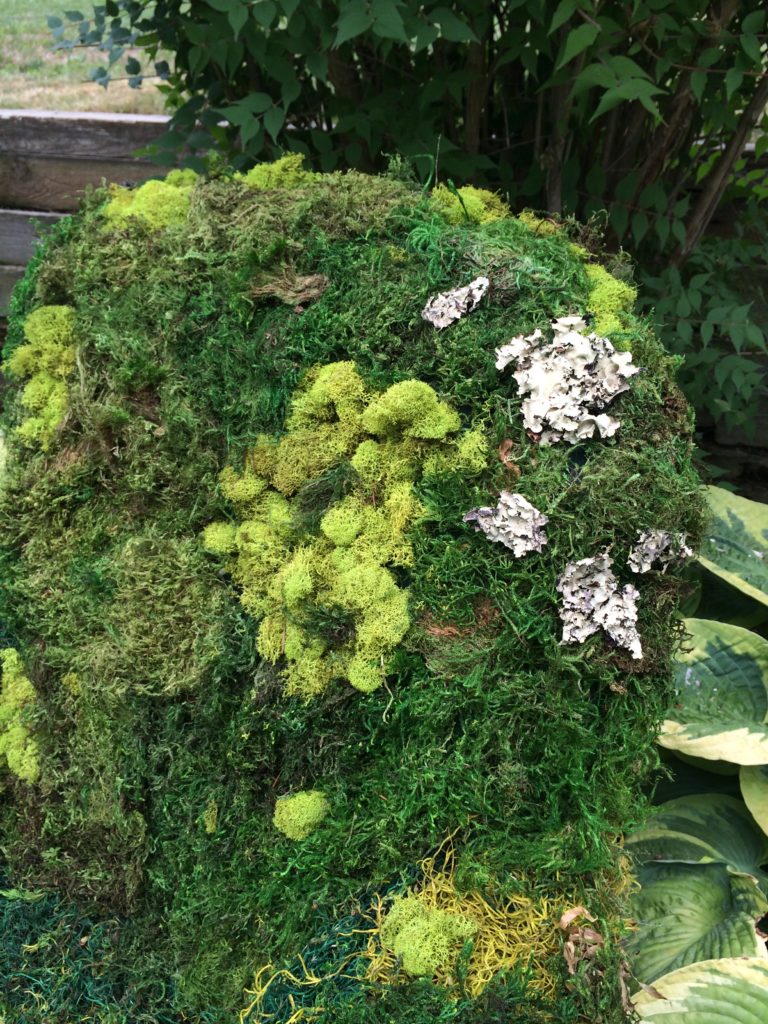
Continue to place the moss all over the chair until you are satisfied. You can layer everything as much as you want. I chose to NOT cover the back of the chair because I knew I was never shooting from that angle. But cover that if you please.
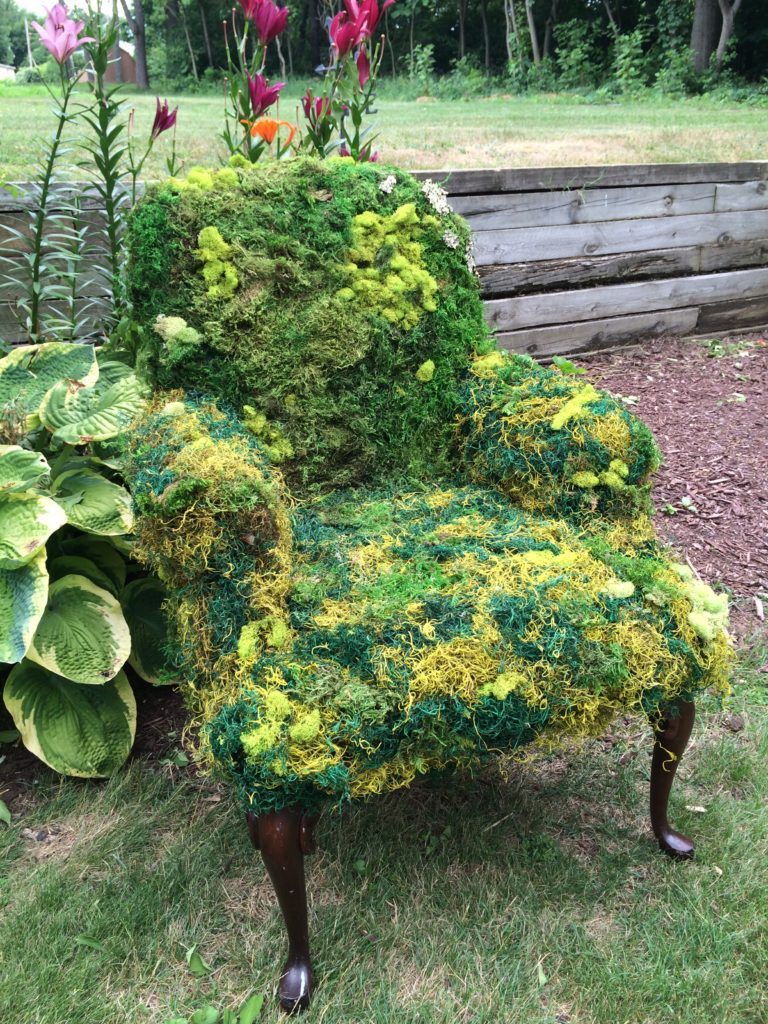
Take the chair for a spin outdoors and it will look like it belongs there! But be careful about leaving it outside if it still has stuffing in it. You don’t want any friendly animals making a home there unexpectedly. If you want to use it for props, then keep this in a well contained area. And remember that this chair is super darling if someone is seated in it. 😉 Trust me. I know!
Love, love, love this chair. Hope you can protect it and enjoy just looking at it for a while.
Wow! This chair is amazing. Hopefully you can keep it for a long time. It makes an amazing prop.
You are SO creative! And this is such a gorgeous way to upholster a chair–especially for an adorable wood nymph like yours 🙂
I’m a bit amused at the thought of how one comes about knowing they must have a moss covered armchair. It is quite whimsical and fantastic, like something out of a fantasy book. Perfect! Just like your Alice.
This is such a unique idea. You did a brilliant job creating this chair.
What an amazing photo prop Angela! Clear caulk – that’s brilliant. I love the varied textures and colors and especially I’m liken’ that lichen. 🙂
I created a chair with moss also for my daughters 15th birthday a quinceneara. and after I made it I thought is the moss gonna stick to her tulle dress? I sat in it and moss came off and stuck to me workout pants. What do I do? Is there some clear spray paint I can use or you can recommend. Or maybe there is other moss that don’t come up and stick. HELP