
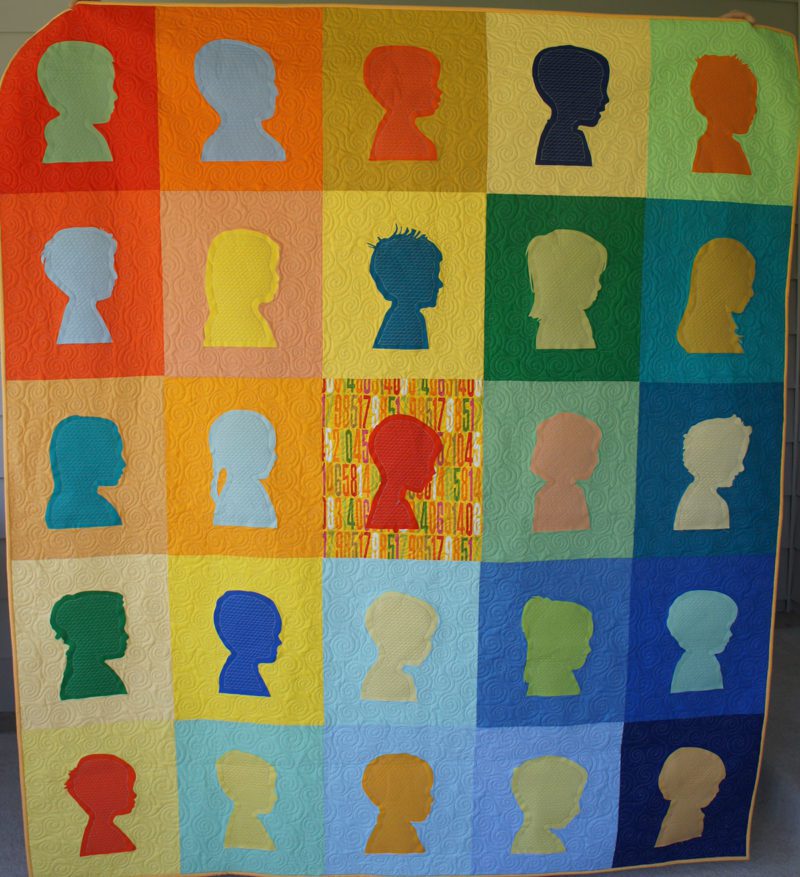
I promised you all a tutorial a while back for the profile quilt I made for a school auction for my daughter’s Montessori school…and I’m finally here to deliver. This idea is perfect for charity quilts like I did, teacher’s gifts with her students, a family tree sort of quilt, or really any way you can think of putting profiles on a quilt or frame.
This quilt can be customized to any size, given the block size, the profile size, and the number of profiles that you want to include. So my directions will be slightly generic on actual cutting instructions (though I’ll tell you approximately what I did). I just want you to know that it is adaptable to your needs.
Materials:
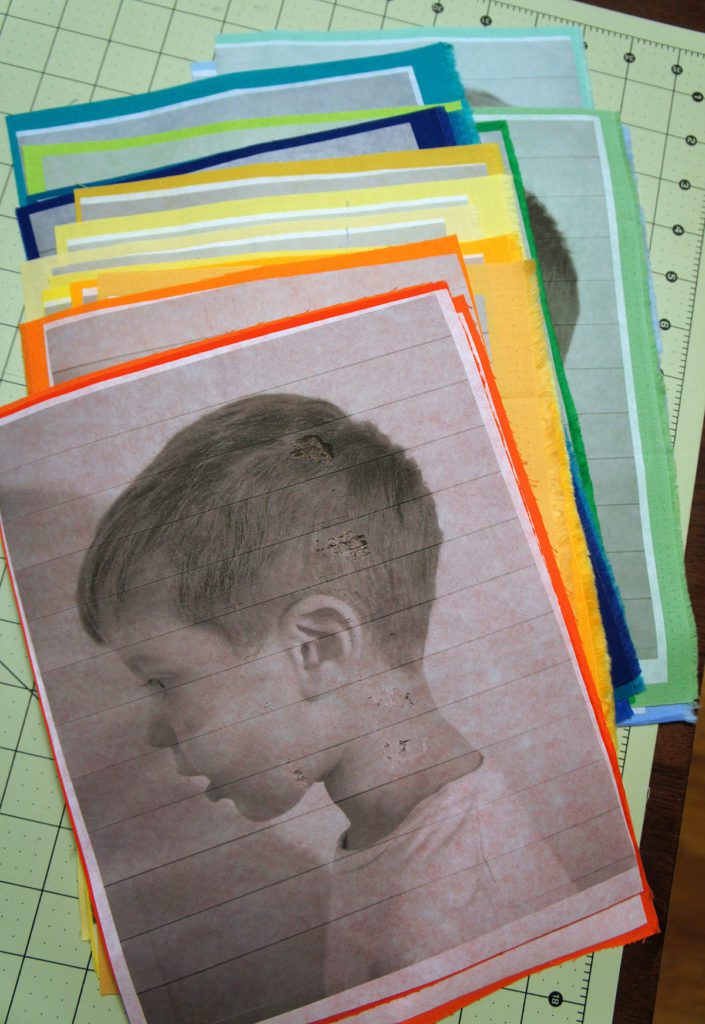
Fabric – I used a number of solid color fat quarters that is approximately 1/2 the number of profiles. So in my case, since I have 25 profiles I need about 13 fat quarters. *this size worked for the size profile I used, but remember to adjust this amount if you are drastically changing the size of anything.
Printable Fusible – I used a product by June Tailor that allowed me to print out pictures on a fusible that I could apply to the fabric. I needed a printable paper backed two sided fusible and this is what I found. It was a bit of money to get as many sheets as I did but well worth it I think. Follow the instructions on the product.
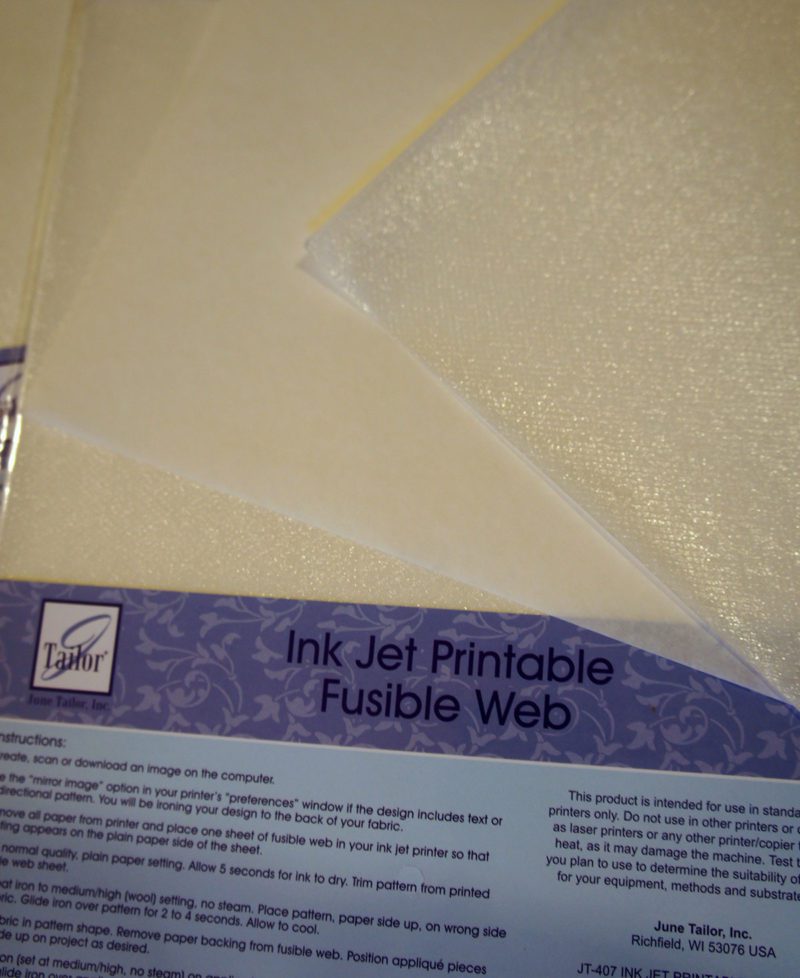
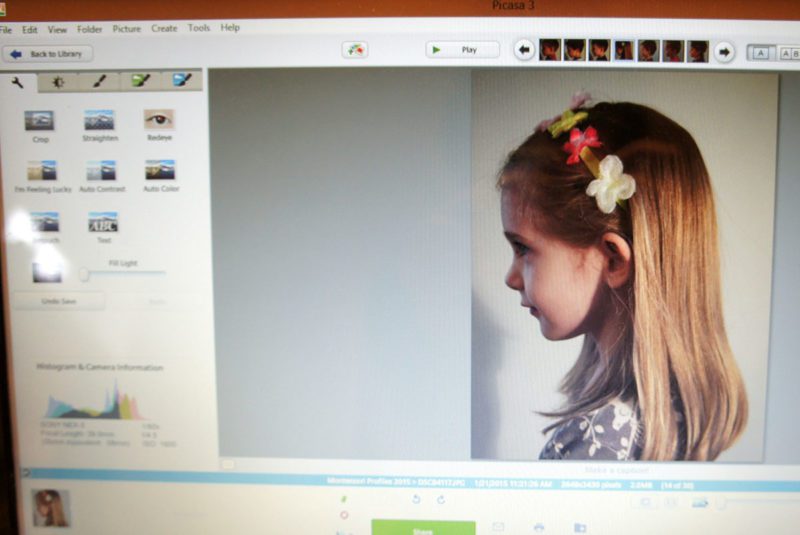
Photo Editing Software and Camera – Any camera and software will do. I took my pictures with my good camera and edited them using picasa.
Basic Sewing Materials – Iron, Thread, Scissors, etc.
Directions:
1. Take individual photos of children all facing one direction (to the side for the a profile). To make sure that the kids were all looking exactly the same way, I had another kid stand in one spot that they all looked at. It worked well and helped keep them focused.
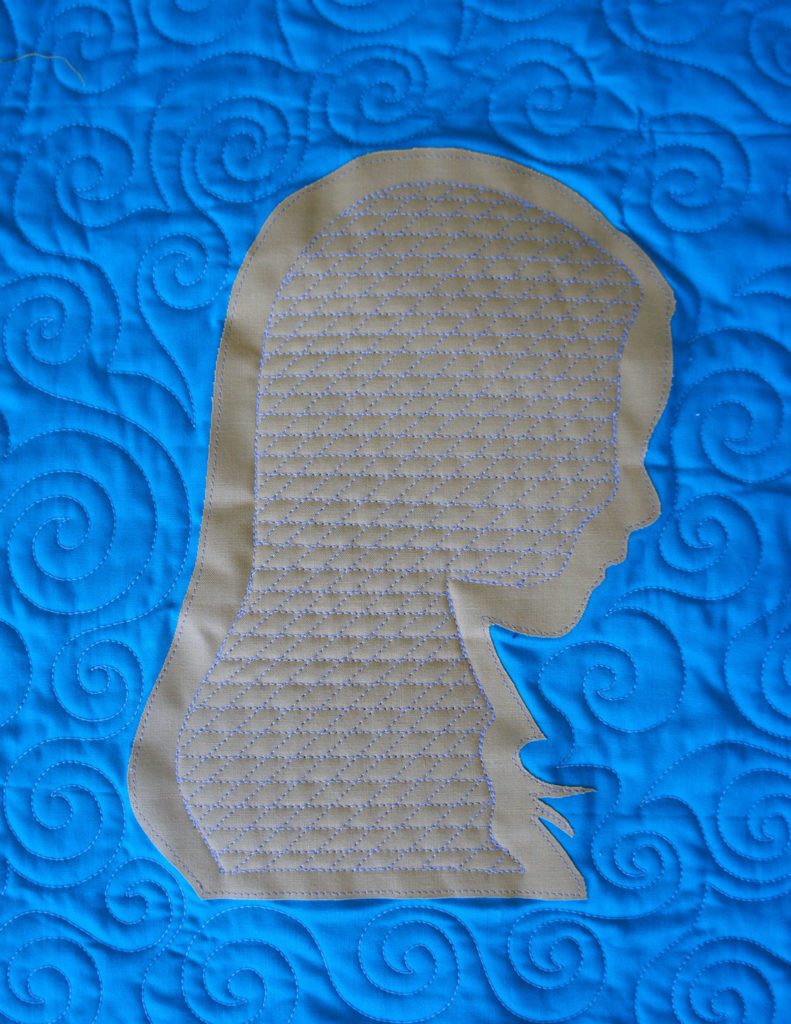
2. Edit the photos of the children so that their heads are all approximately the same size when printed on a piece of paper. I didn’t go crazy over this but just eye balled it. The pattern allows for plenty of room for error here. OR in contrast, deliberately make the profiles different sizes for another effect. *note that we will end up with the image in reverse on the quilt, so be sure you are okay with that or reverse your image digitally now.
3. Change your pictures to Black and White for easy contrast when cutting and less ink waste when printing. Be sure your pictures fit nicely on an 8 1/2″ x 11″ piece of paper (this is the size of the June Tailor printable fusible)
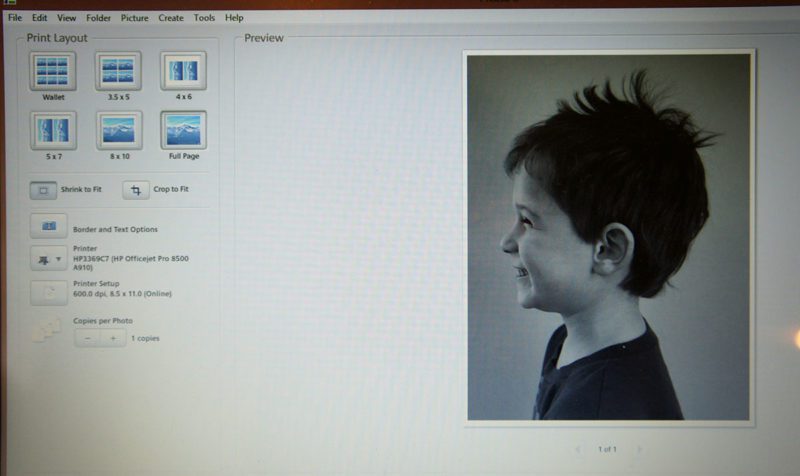
4. Print out each child’s face on the June Tailor Fusible. I found the the paper curled a bit on itself due to the amount of ink being put of the paper fusible side. So I printed one at a time and laid them out to dry flat on the floor. *Don’t worry about any imperfections in the printing. Ultimately you just need the outline.

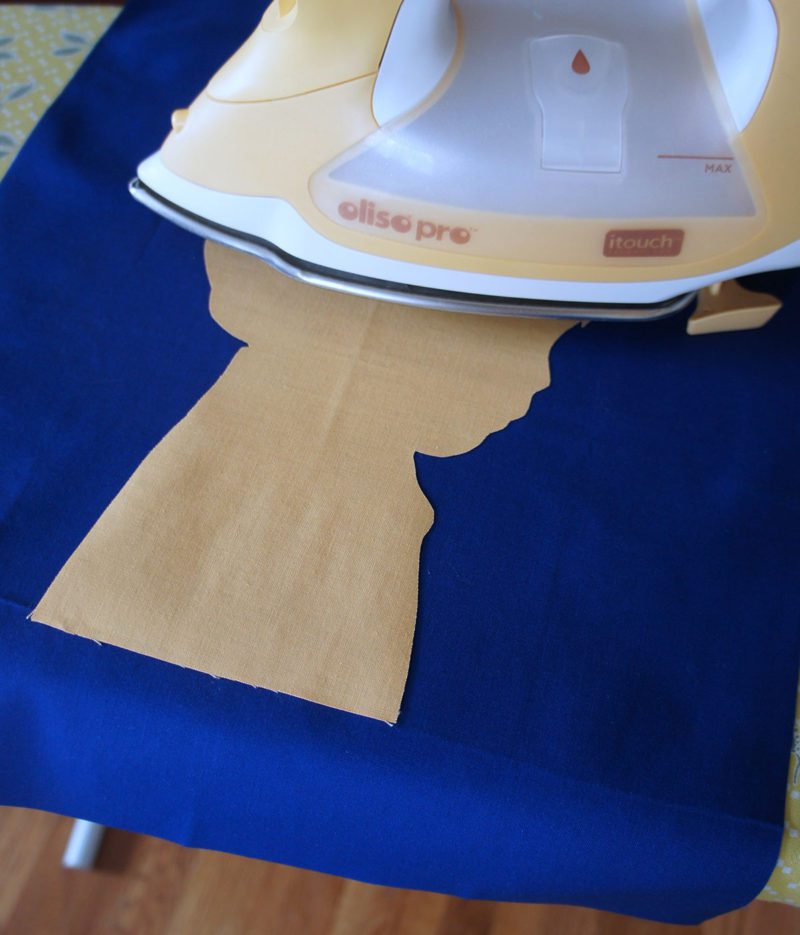
5. Follow the manufacturer’s instructions and iron on the printed profiles to a piece of fabric. I trimmed down the printable a bit to waste as little fabric as possible. I also used a pressing cloth to help protect my iron.
6. Sit yourself down in front of the tv and put on a good show and break out your cutting scissors. It is time to cut out every single profile. Try to get as much personality as possible in the profile without making pieces that will be impossible to stitch down…you might find this particularly necessary around their hair.
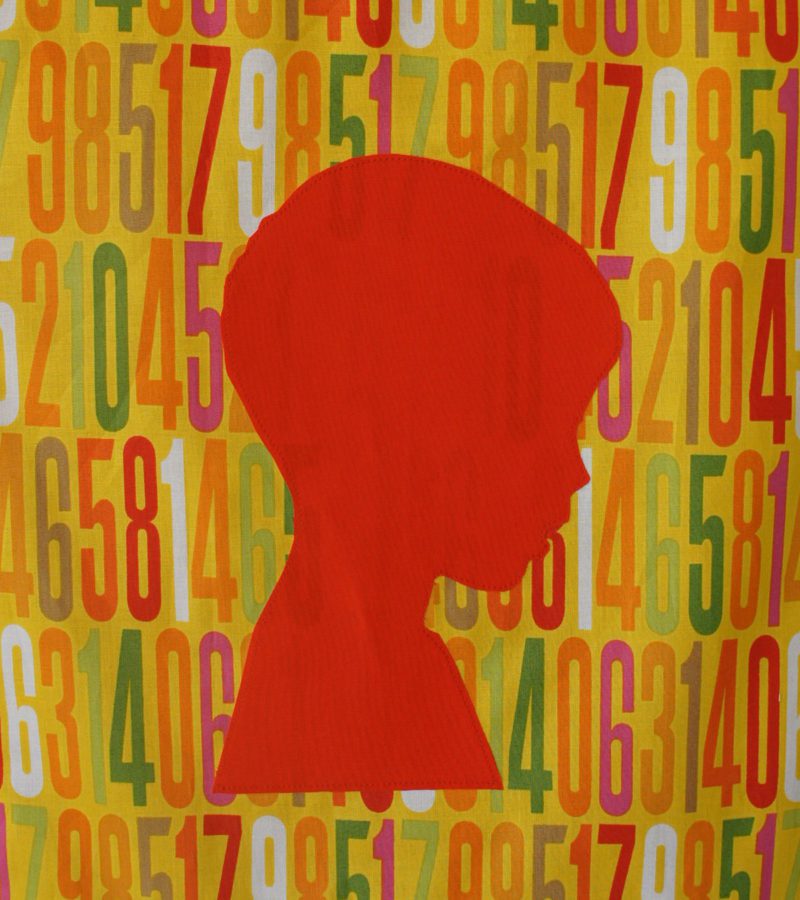
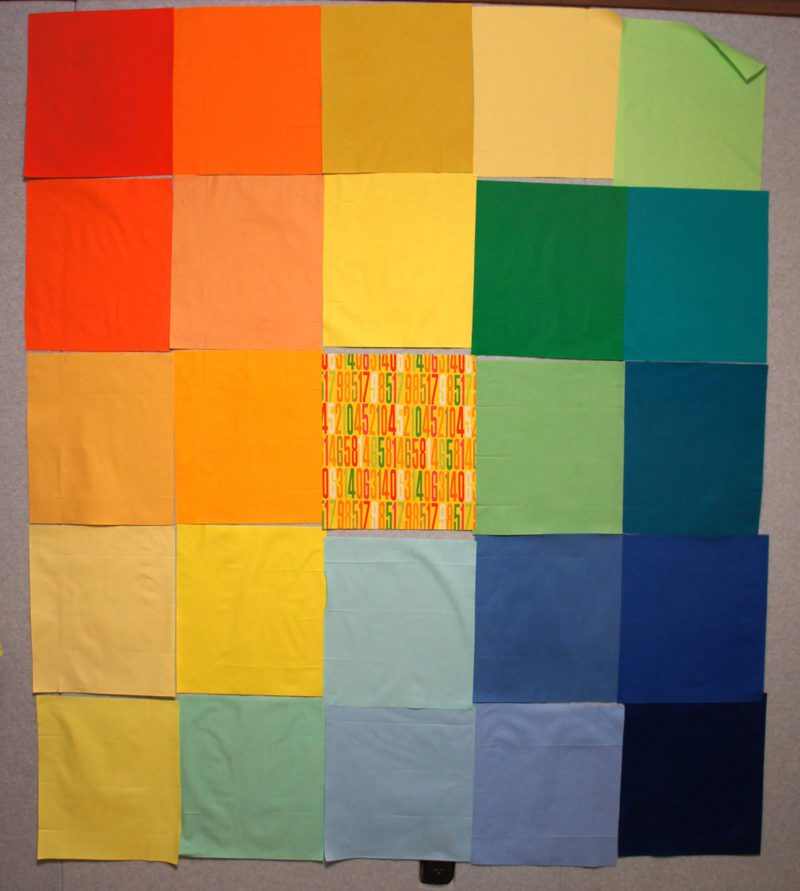
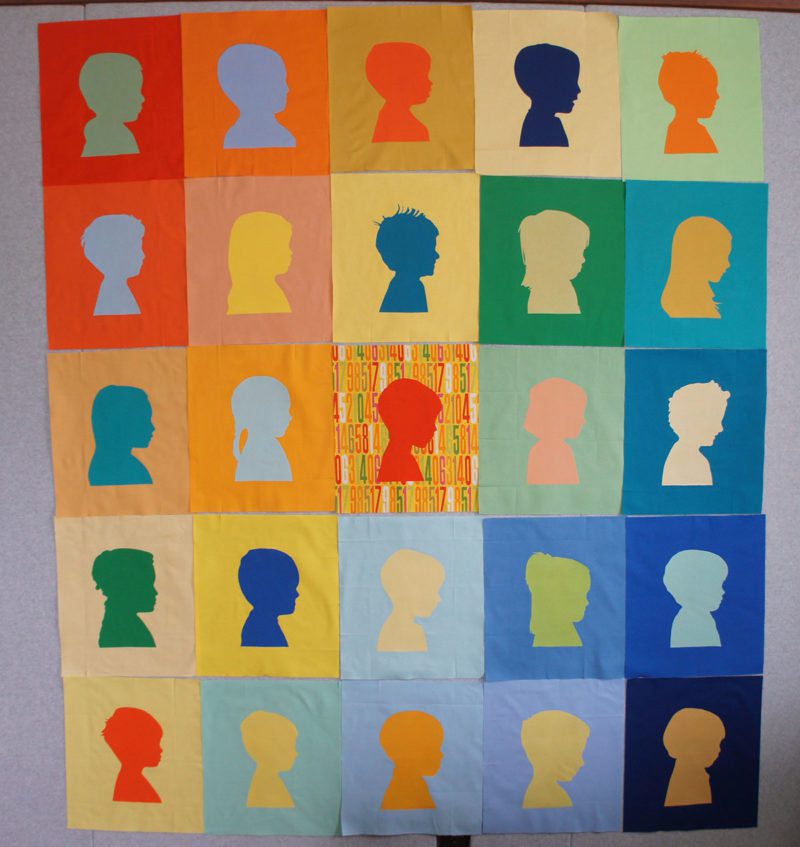
7. Lay out the placement of the blocks and colors. I used one profile per block and I *think* the blocks were 10″ x 12″ but don’t quote me on that. Whatever looks good to you. I chose to do an opposing loose rainbow theme with my colors and profiles and I really love how that turned out. But school colors would be a great idea too…or black and white. Whatever floats your boat.
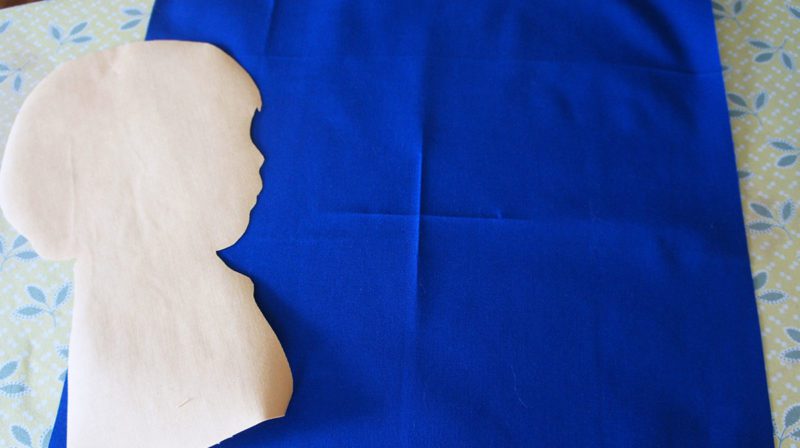
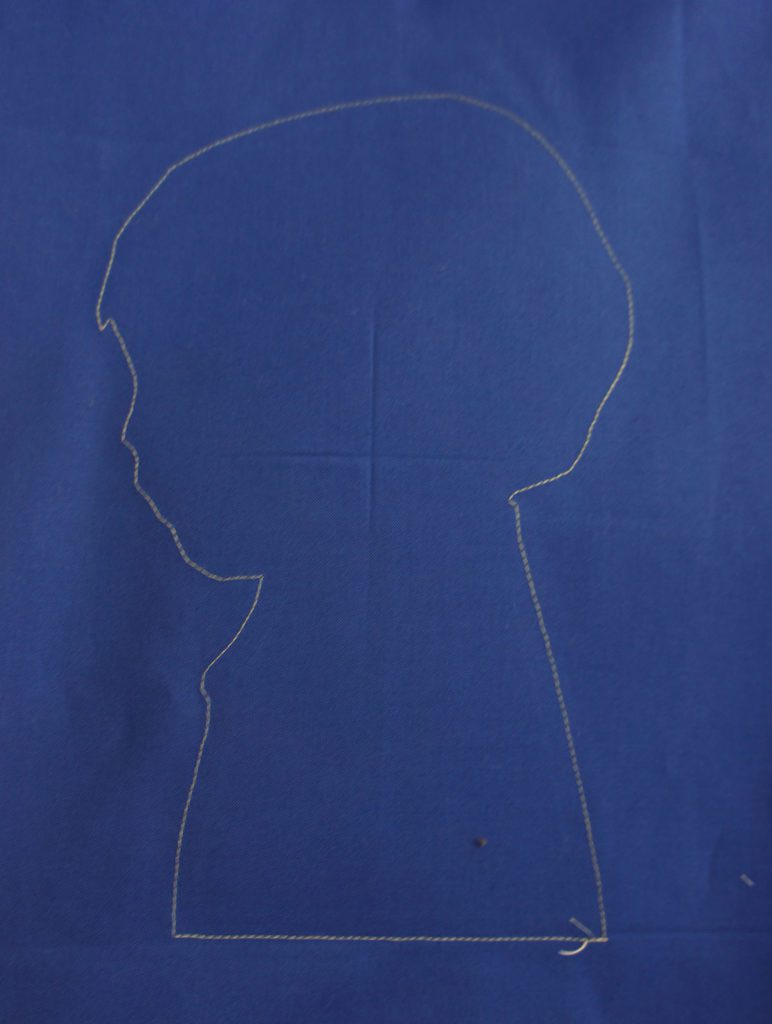
8. Remove the backing and iron profiles onto the background fabric. I centered the profiles on the blocks by marking the center on both pieces and lining them up.
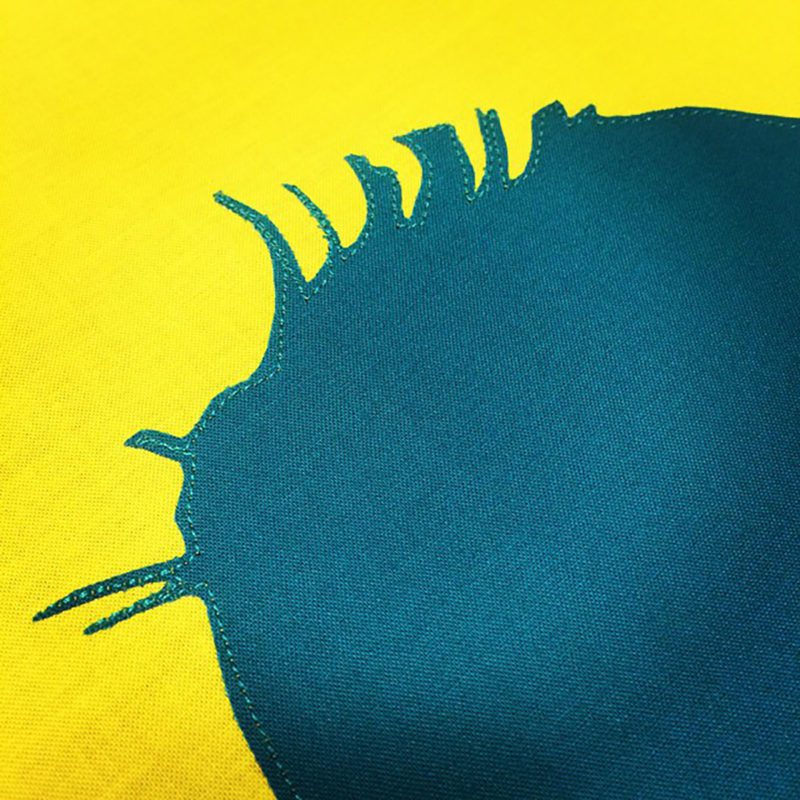
9. Then it is time for “hard” part. Stitch each profile down around the edges. I changed my thread for almost every one and just used a slow and steady hand. I find that an open toe applique foot works well because I can see where I need to go next. This is definitely the bulk of the work for your quilt right here.
10. And now an easy step! Just sew all the blocks together. Rows and columns…however you like. And you will have a finished quilt top!!

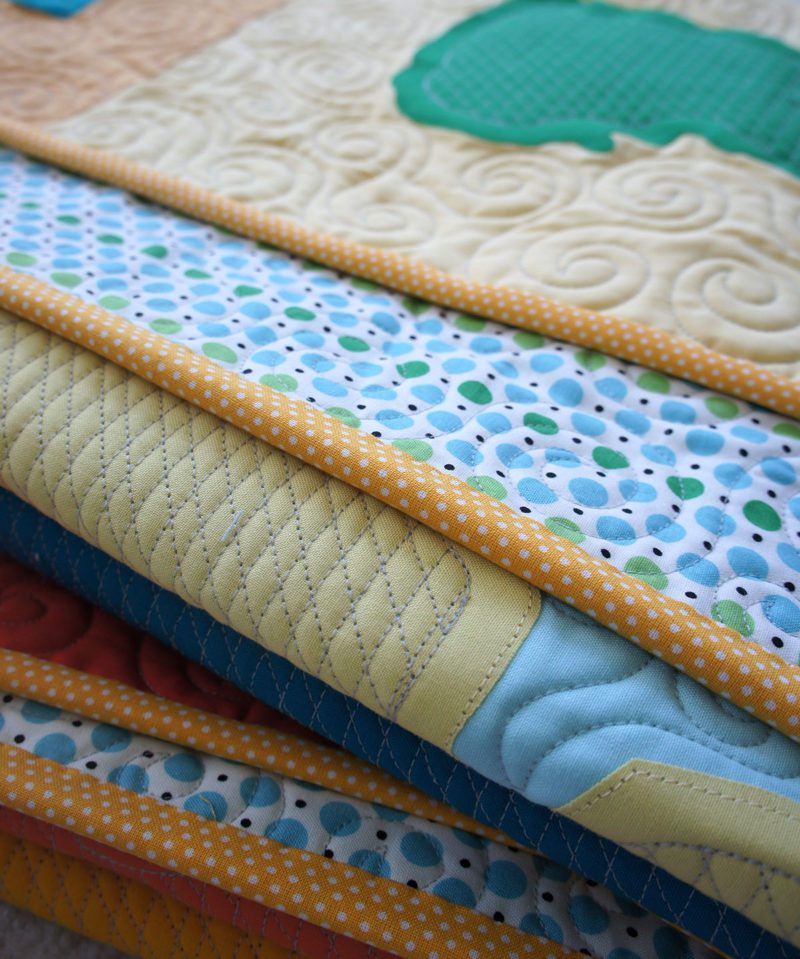
11. Then do the usual baste, quilt and bind as desired! The amazing Penny Barnes quilted this for me and has my unending gratitude. She truly has super hero powers.
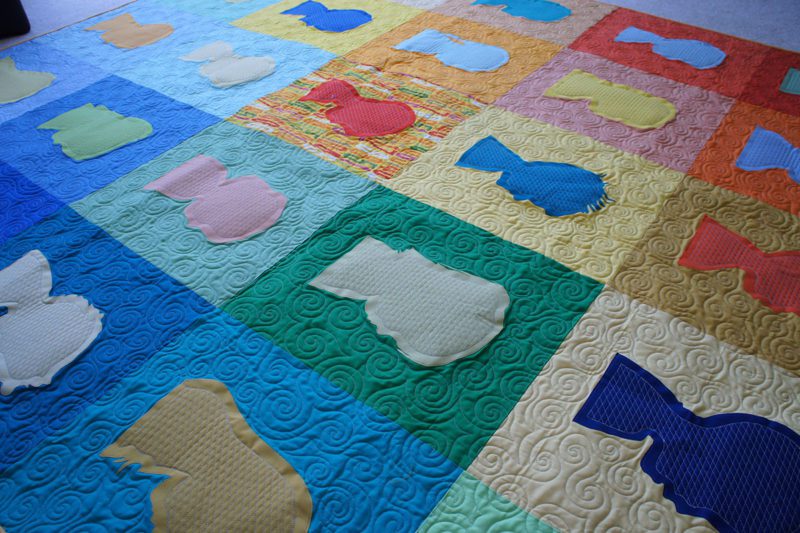

I hope you all find this useful and that there are lots of profile quilts out there after this! The teachers LOVED it and could spot each student immediately from their profile. They ended up being the ones to win the quilt and it will be at the school. I sort of totally love that.

What a SUPER idea! Thanks for sharing the construction method. How excited you must have been waiting to present it to the teacher and see their reaction.
Absolutely amazing, Angela! As a retired elementary school teacher, what a terrific gift and how wonderful that it will stay in the school where every staff member who knew these kiddos will be able to enjoy it! What a perfect quilt for a school fundraiser. Well done! (And as the mom who had 2 children in a Montessori school K-6, I know that such a close knit community will especially appreciate it!)
Thank you! I am delighted that it will be in the hands now of the teachers and be at the school at times for them to show the kids…even just for them to remember the kids of that year. It is a very small close knit group for sure.
Great tutorial, Angela. You continually amaze me as well as others. Thank you for sharing.
oh that is so sweet of you to say! Thank you so much!
This is amazing. As a preschool teacher I would love one of these.
Well I hope you get one one day!! Find a super grateful crafty parent 😉 That's what my school did. lol
THis is such an awesome and super cool idea! I need to put one of these on each of my niece and nephews quilts. Great memorabilia as well!