
This post is part of an ongoing series of posts for A Zig and A Zag Quilt Along I’m hosting here on my blog. You can join in at any time! You will find the links to all previous steps in my sidebar.
I know. I know. You probably have all thought that I’ve forgotten about my quilt along. But I promise I haven’t! I’m all caught up now with it. If you recall, I admitted that I incorrectly cut half of the pieces for the quilt in my rush to get it done before I moved from NOLA. Well…it took me a bit to get my ducks in a row and get all those fabrics out and recut. But I’ve done it! And now I’m ready to share that with you all and make sure that you don’t make the mistakes that I did. 😉
So, we’re on to the second set of cutting instructions. Yep. No sewing this week. Just cutting.
You should have ended the last set of directions with a big pile of white background squares and a whole bunch of sewn strips.
Divide your strips into two piles. Put the light-colored strips in one set and the dark-colored strips in another. Let’s start with the light-colored strips. Disclaimer: clever eyes will notice that the following photos of “light” fabric turn out to actually be a dark fabric in my quilt. The cutting directions ARE correct, so just pretend these are my light orange fabric. 😉 Live and learn.
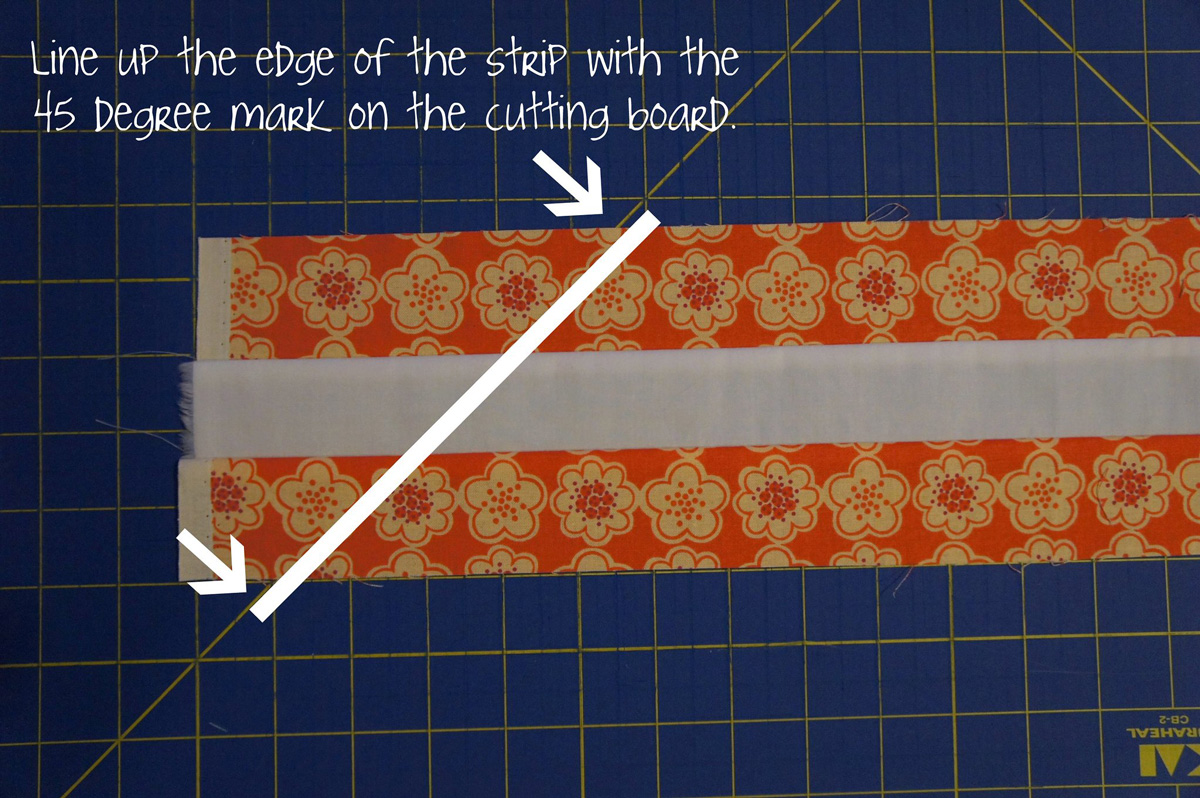
The following instructions are completely dependent on your ability to cut a 45-degree angle. I do this using the 45-degree mark on my cutting mat, however, some of you may find this easier to do with a special ruler. So use whatever method works for you.
Place your first light-colored strip on the cutting mat and line it up with the long edge along a straight horizontal line. Find the 45-degree mark on your cutting mat and move the strip so that one edge is near it. The 45-degree mark should be angled as shown, going from the bottom left in towards the top right.
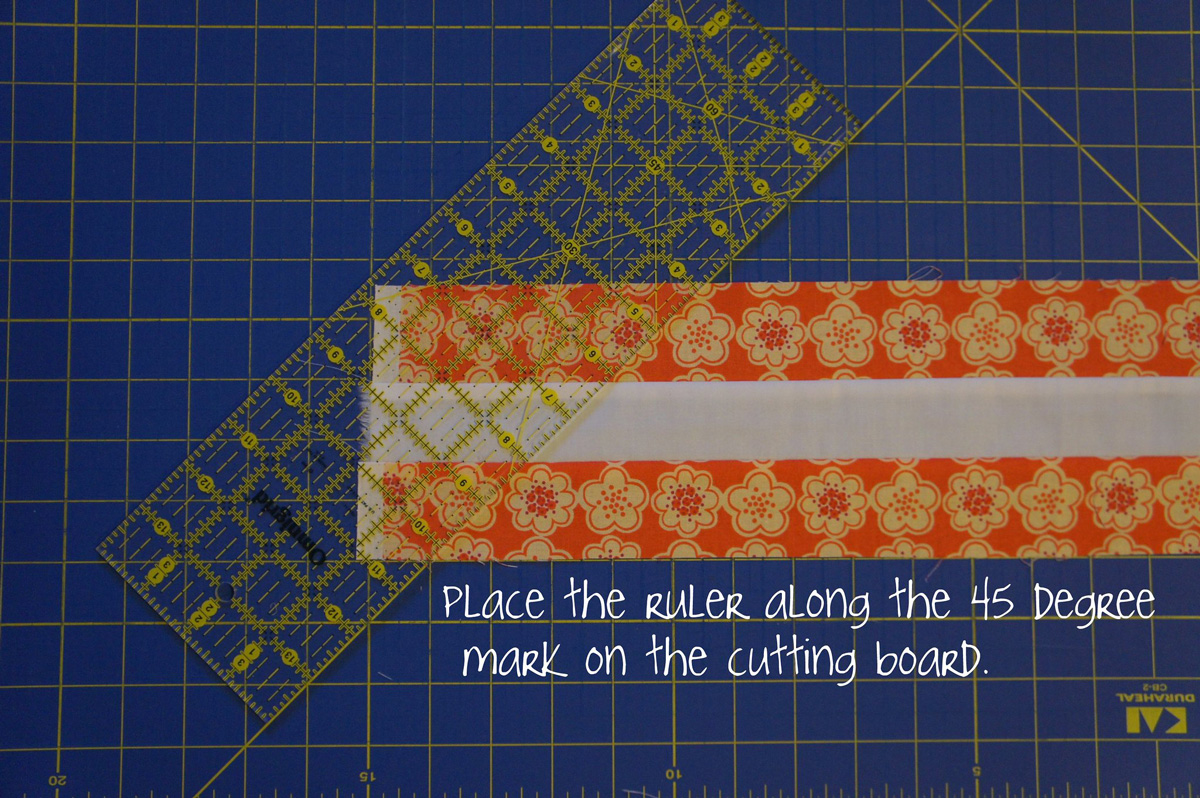
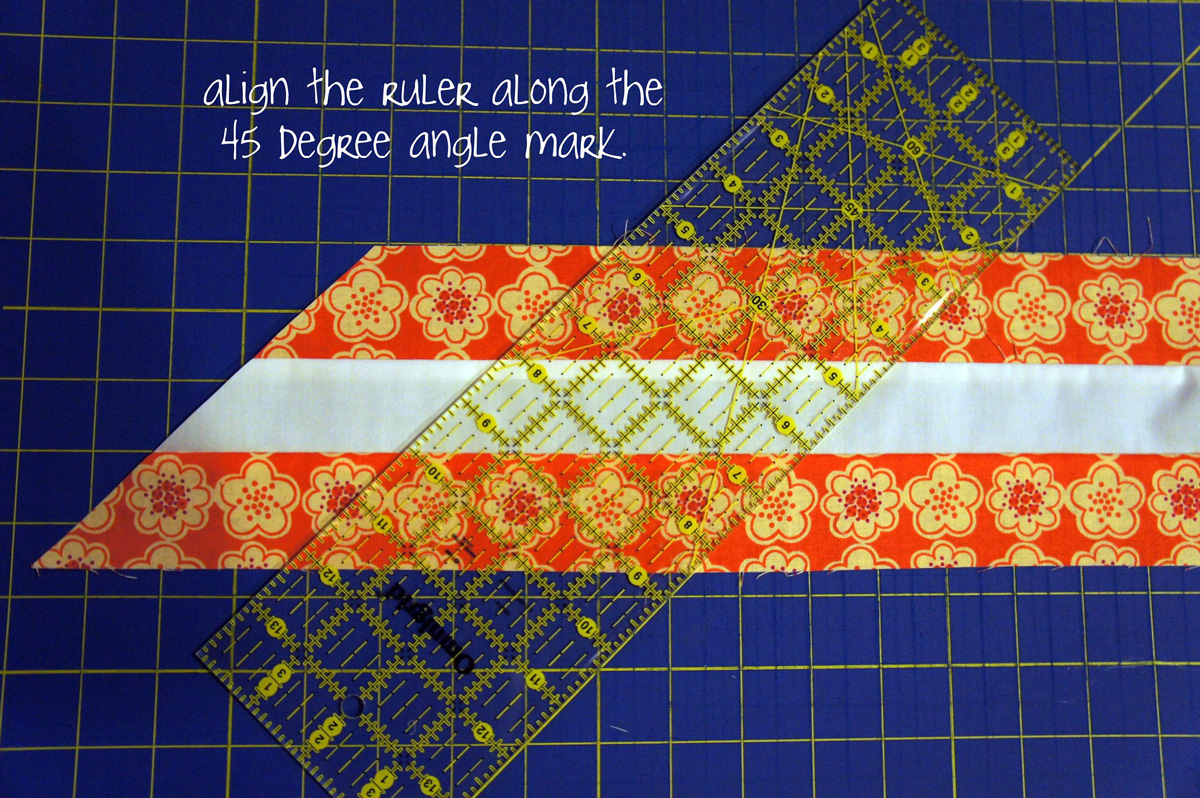
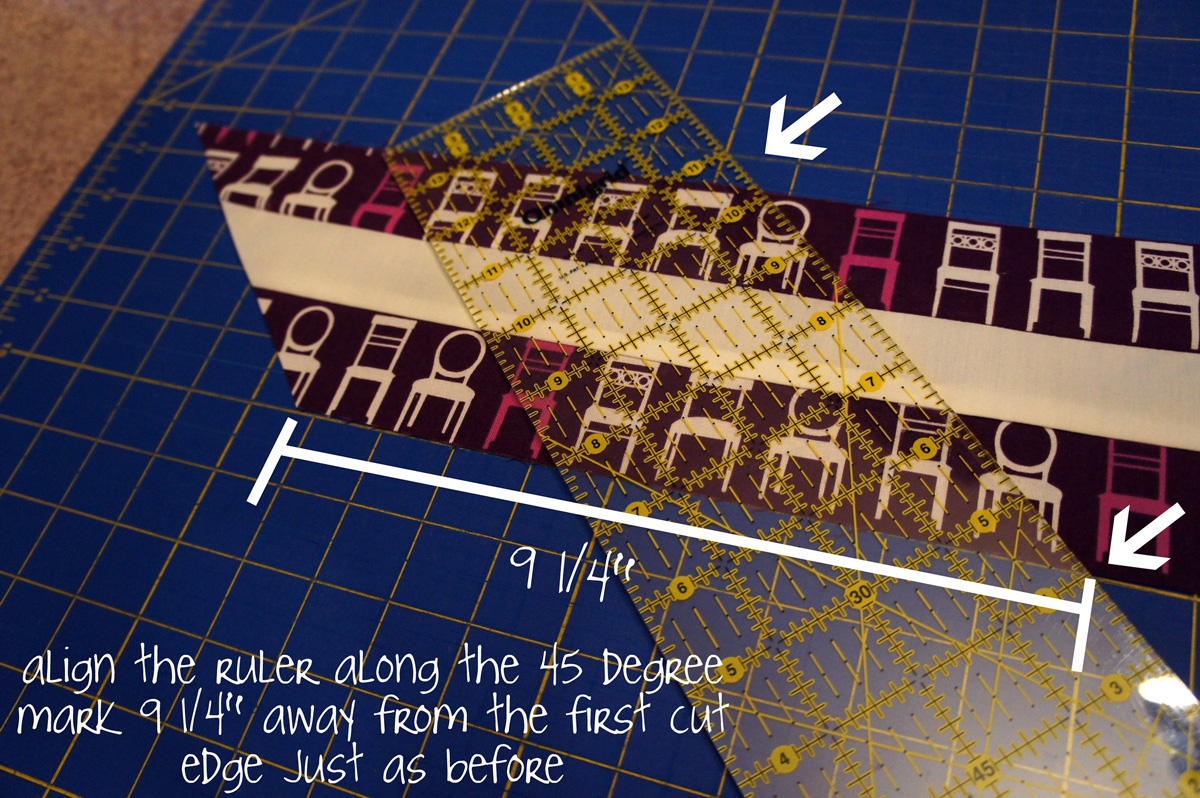
Place your ruler along the 45-degree mark on your cutting mat.
Cut along the 45-degree mark.
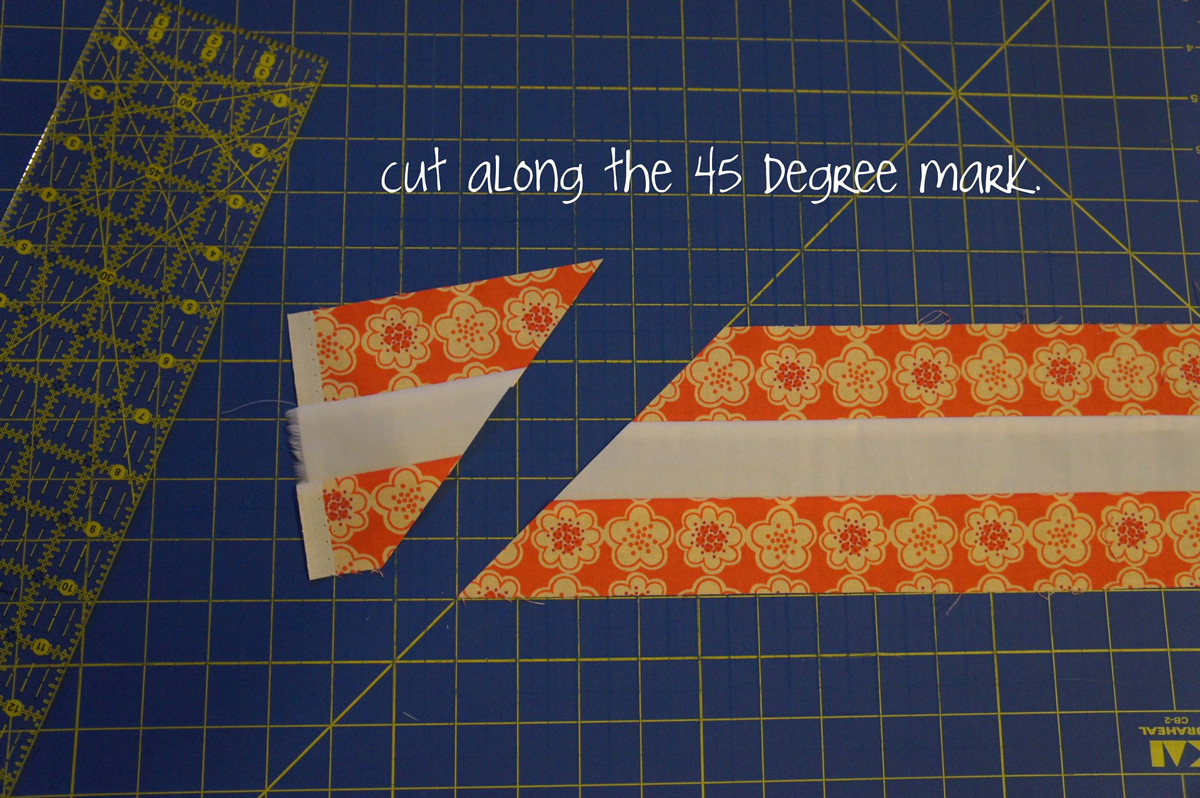
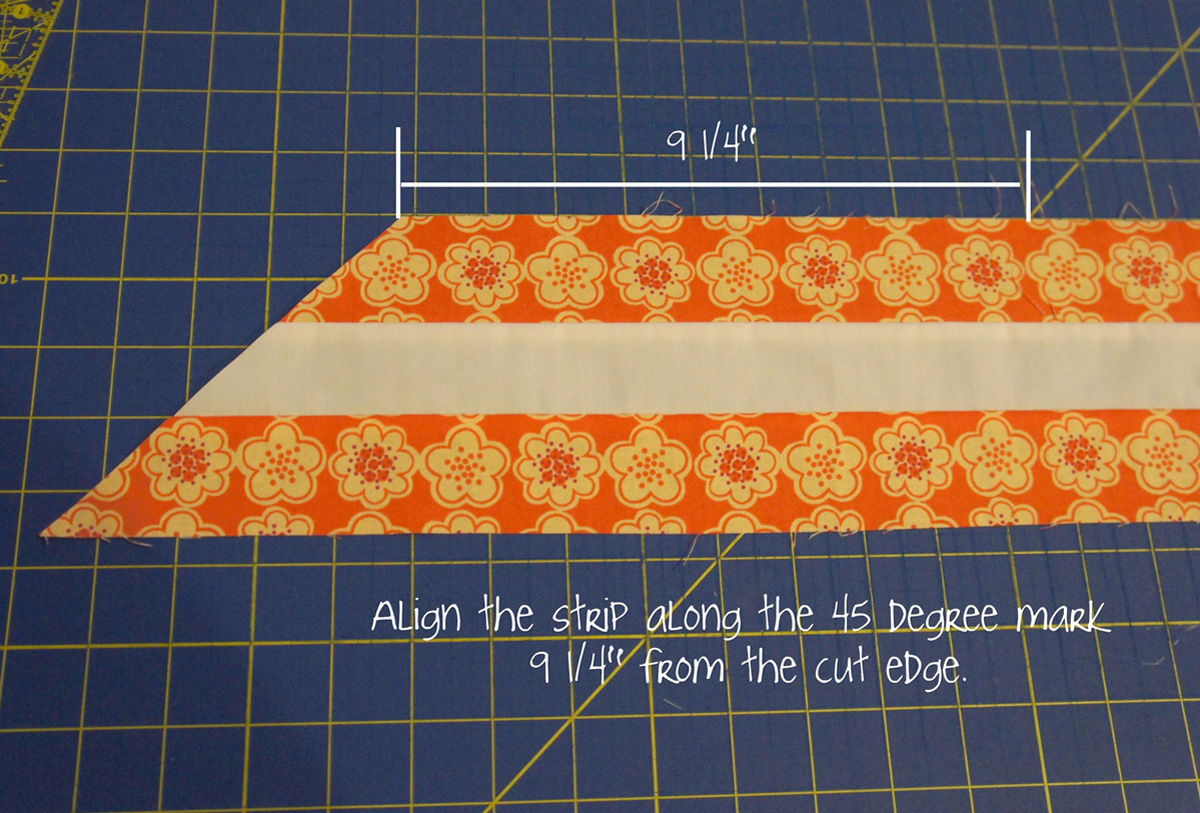
You have one angled edge! Now move the strip on the mat so that a new spot is along the 45-degree mark. The next cut will be 9 1/4″ away from either the top or bottom edge (it doesn’t matter which you use).
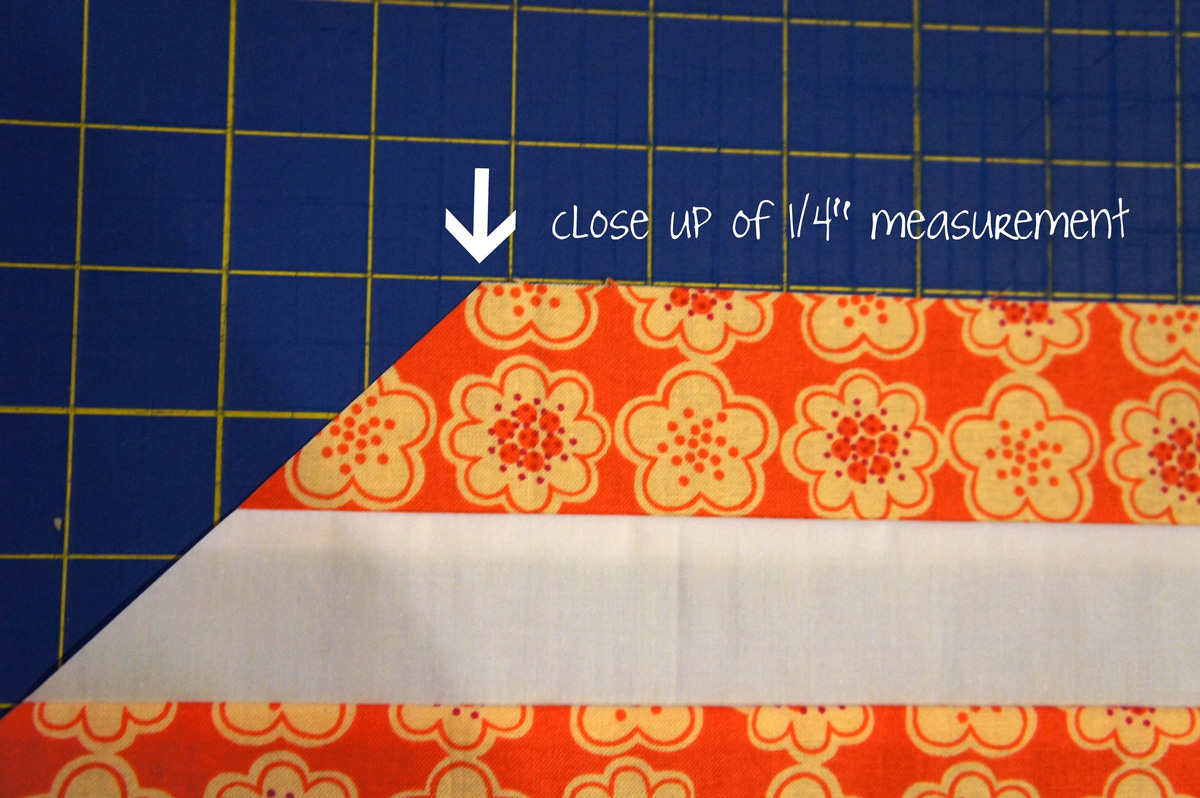
That 1/4″ may be the trickiest part to see, so here’s a little close up. I have used my cutting board so much that it’s pretty easy for me to find a 1/4″ on the board, but just do your best.
Place your ruler along the new 45-degree mark.
And make a second cut. Tada! One diagonal piece!

Continue moving the strip along the cutting mat making the same cut at 9 1/4″ away from the angled edge. I can get 3 and sometimes 4 pieces out of one sewn strip. You will need 6 pieces all together of each color, so feel free to just cut 3 from each of the two strips you should have in each lighter color. There will be some excess fabric leftover.
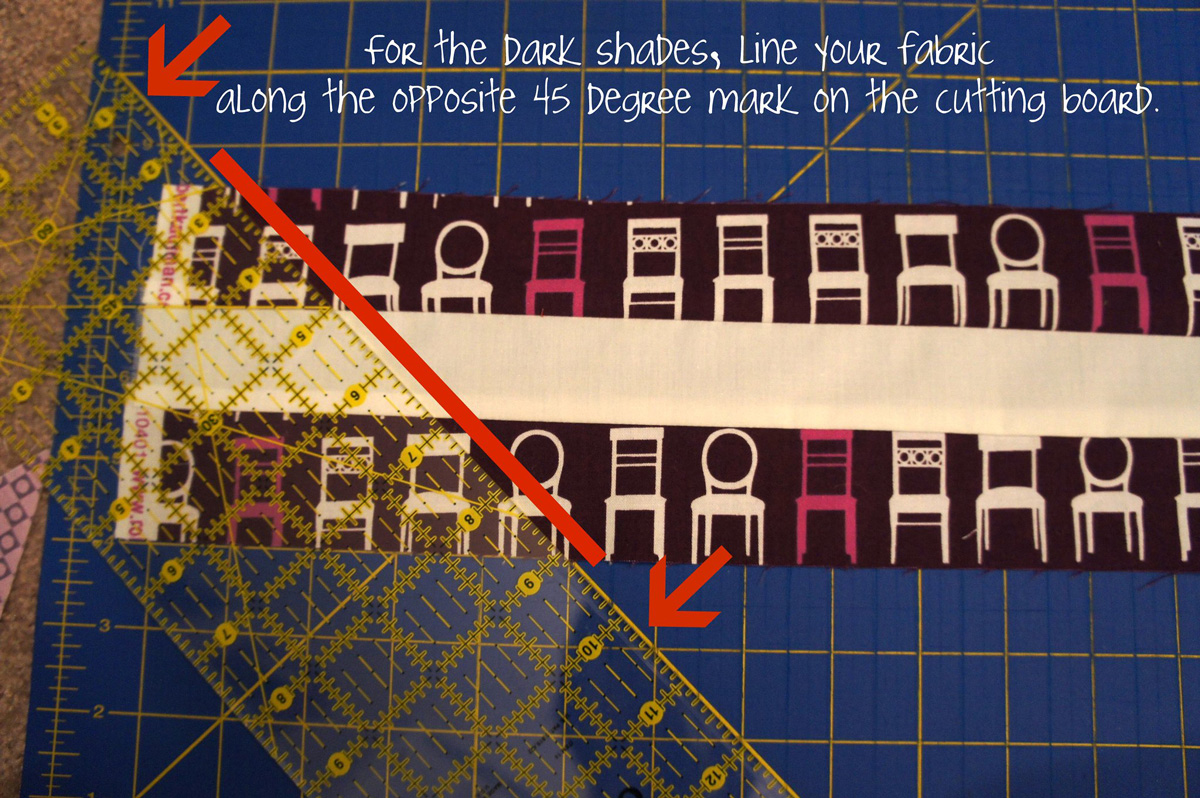
Now, here’s where you don’t want to make the Angela mistake. The mistake that made me have to redo half of my quilt pieces. DO NOT cut your darker strips along the 45-degree angle that you cut the lighter strips on. You will need to cut them in the opposite direction. This means that you want the 45-degree mark to go from the bottom RIGHT out towards the upper left this time.
Find the 45-degree mark on your cutting board, but align your board so that it is facing the opposite way as before. (some mats may have a line going in both directions, so you will just want to use the other one.)
Place your ruler along that edge and cut, just as before. Then again, move the strip 9 1/4″ along the cutting board and cut along that new edge.
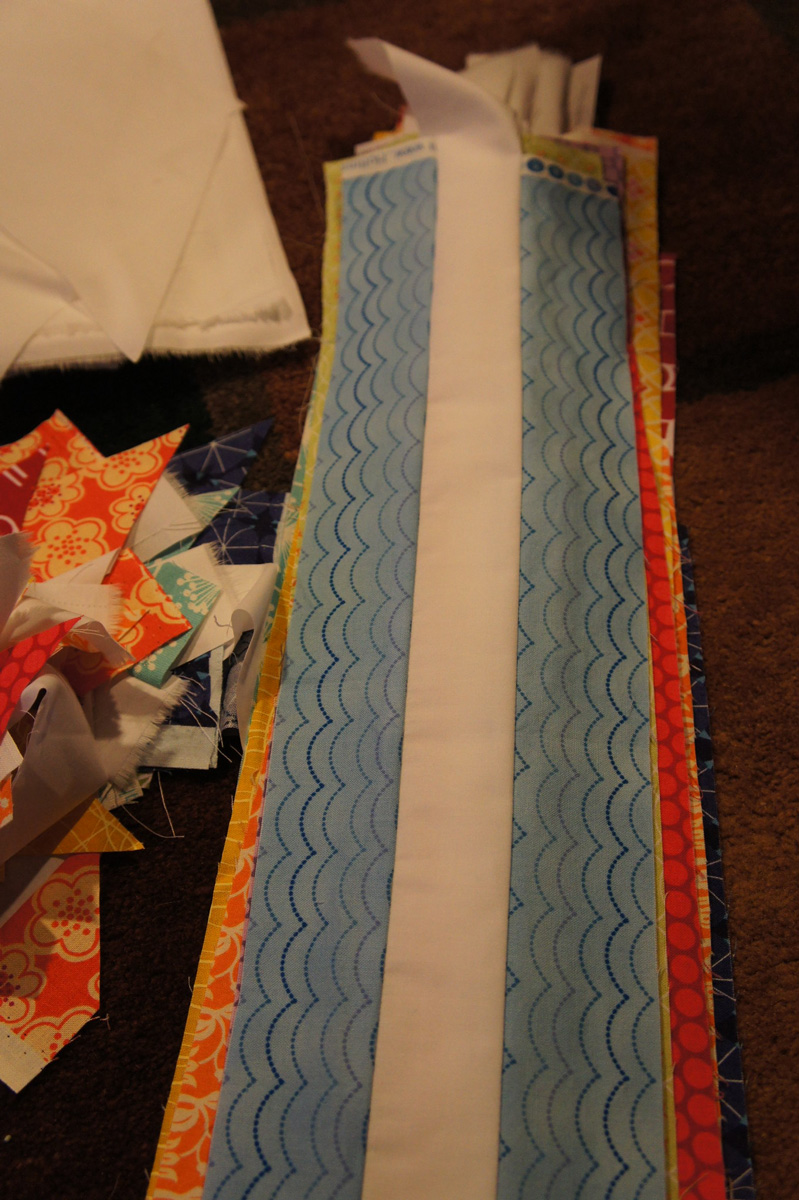
You use the exact same steps for the darker strips, you are just getting the opposite 45-degree angle on the pieces. In the end, you should be able to line up your light and dark strips as shown below.
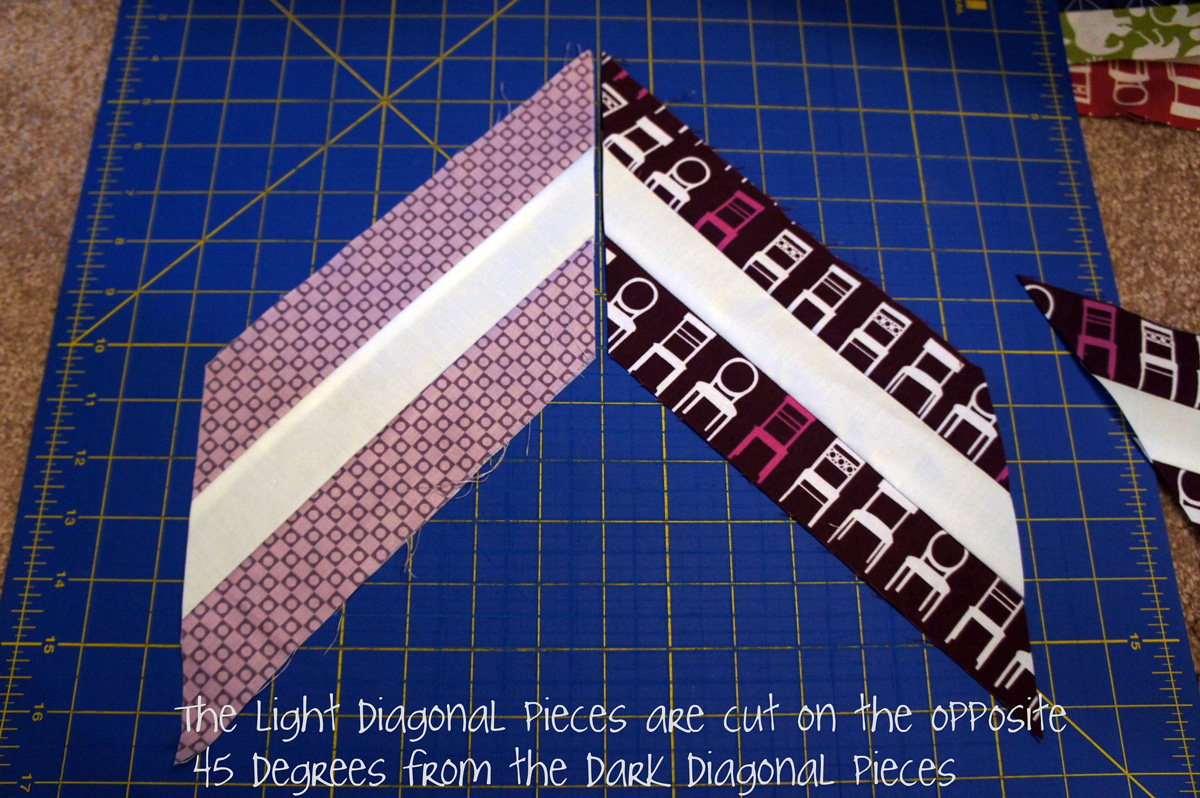
Again, you will need 6 pieces of each color with the light colors angled in one direction and the dark colors angled in the other. All the pieces should measure 9 1/4″ along the long straight edges.
All you need to do to the white background squares is cut them diagonally in half from one corner to the other. So you will get two triangles from ONE square. If anyone is going all fancy on me and using a directional background print, let me know. But otherwise, you should all be safe just picking a corner and cutting to the opposite diagonal corner. To avoid possible errors, cut all of these the same way. (It shouldn’t matter if you are using a two-sided solid fabric, but I know not everyone is.)
Okay?! Clear? I hope so. PLEASE let me know if you have any questions. This is the second and only cutting step…from here on out it is just sewing the pieces together. Yay! After this, you will have all the pieces cut for your whole quilt. Now that is awesome.
I'm up at the lake for a week, with my sewing machine. Sure wish I had remembered to bring my fabric for this quilt…
This is such a great tutorial! I never knew what those lines on the cutting mat were for! Thanks
I just want to say thank you for taking it slow with this. I'm so behind with this and think about it and a couple other projects while I'm at work.