This post is part of an ongoing series of posts for A Zig and A Zag Quilt Along I’m hosting here on my blog. You can join in at any time! You will find the links to all previous steps in my sidebar.
I hope that those of you playing along are having a good time with the zig-zag quilt. We are getting to the rewarding part where we will actually see zig zags! Woohoo! Today we are going to start sewing together all those pieces we have cut and start getting some blocks and even some rows!
You should have a number of piles that look like this one: angled striped pieces in a light and dark colorway and half-square triangles of your background fabric.
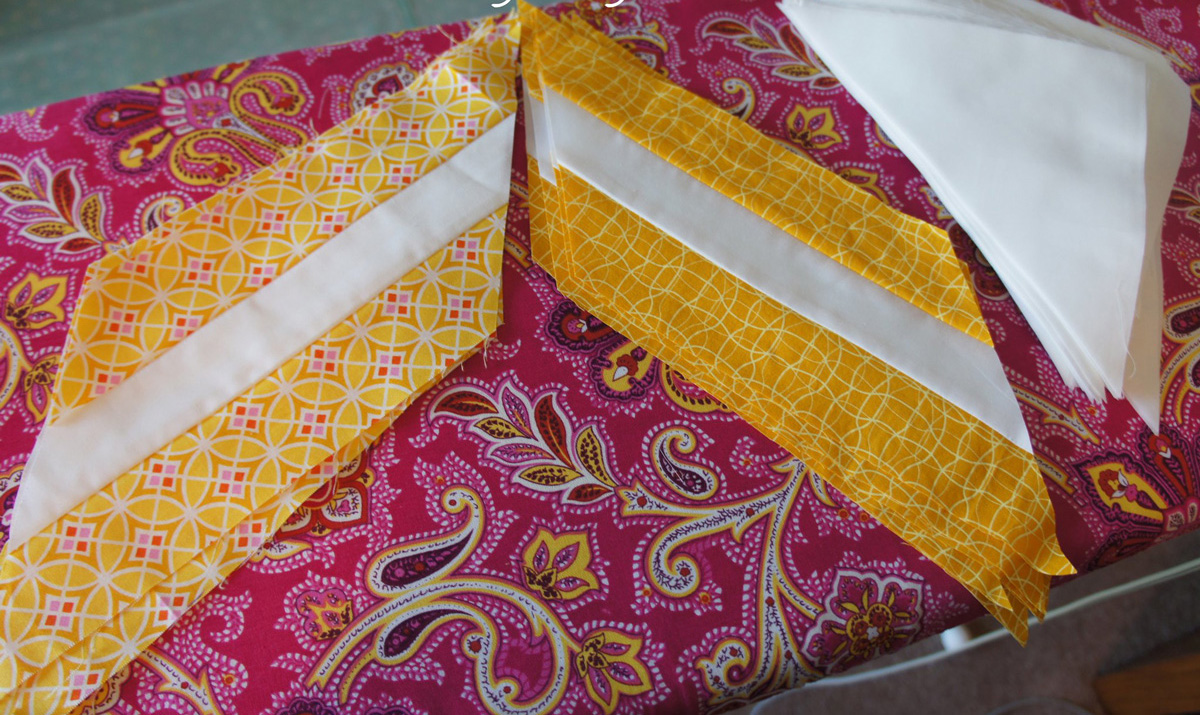

The first step is to sew a triangle to either side of each striped piece. Sew the long bias edge of the triangle to the long edge of the striped piece on both sides. This is a pretty straightforward step with only one slightly tricky part…and if you have worked with triangles before, you will not be surprised.
Unlike sewing square pieces of fabric together, when you sew angled pieces together (for example, a triangle) you need to pay special attention to the seam allowance. If you try to line up the pieces directly on top of one another, you will find that once you sew them that your pieces in fact DO NOT line up. That’s because of that pesky seam allowance. So we need to compensate for that and put our pieces right sides together with a little 1/4″ overlap. You can see below in the following pictures what I mean by this. You will have a little “tail” of white triangle sticking out over the edge of the striped piece.
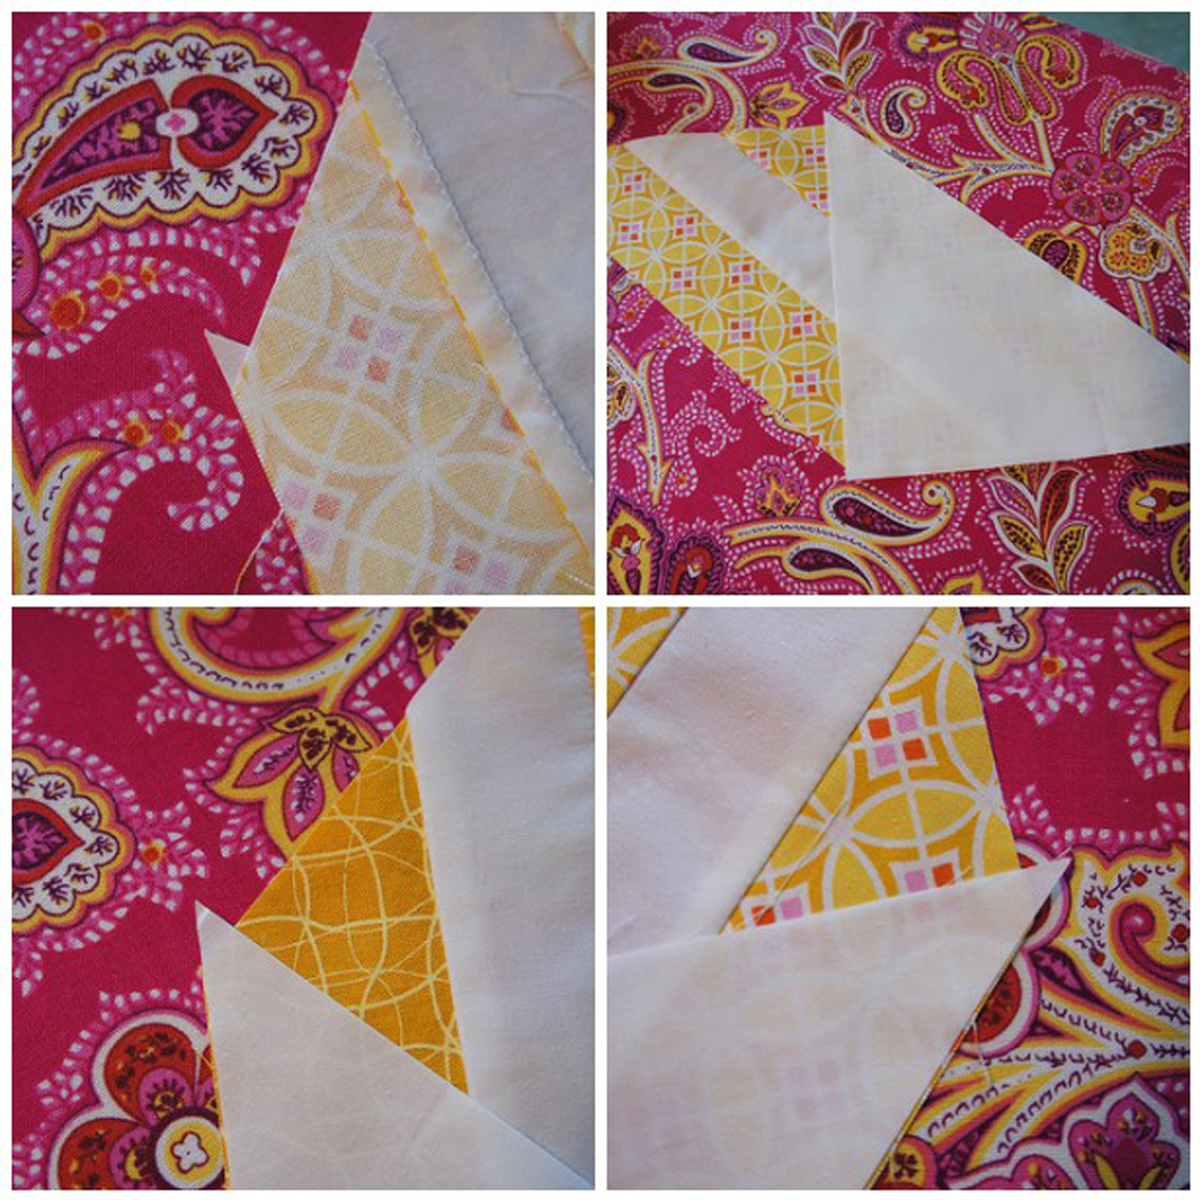

You will do this for both sides and both colors. You do want to make this as precise as possible, but the fact that the background triangle piece is cut on a bias gives you a little breathing room. You can stretch that piece just a bit if you need to make it line up on that first edge. Be careful though that you don’t stretch the fabric too much! Those bias edges can get all funky pretty quickly.
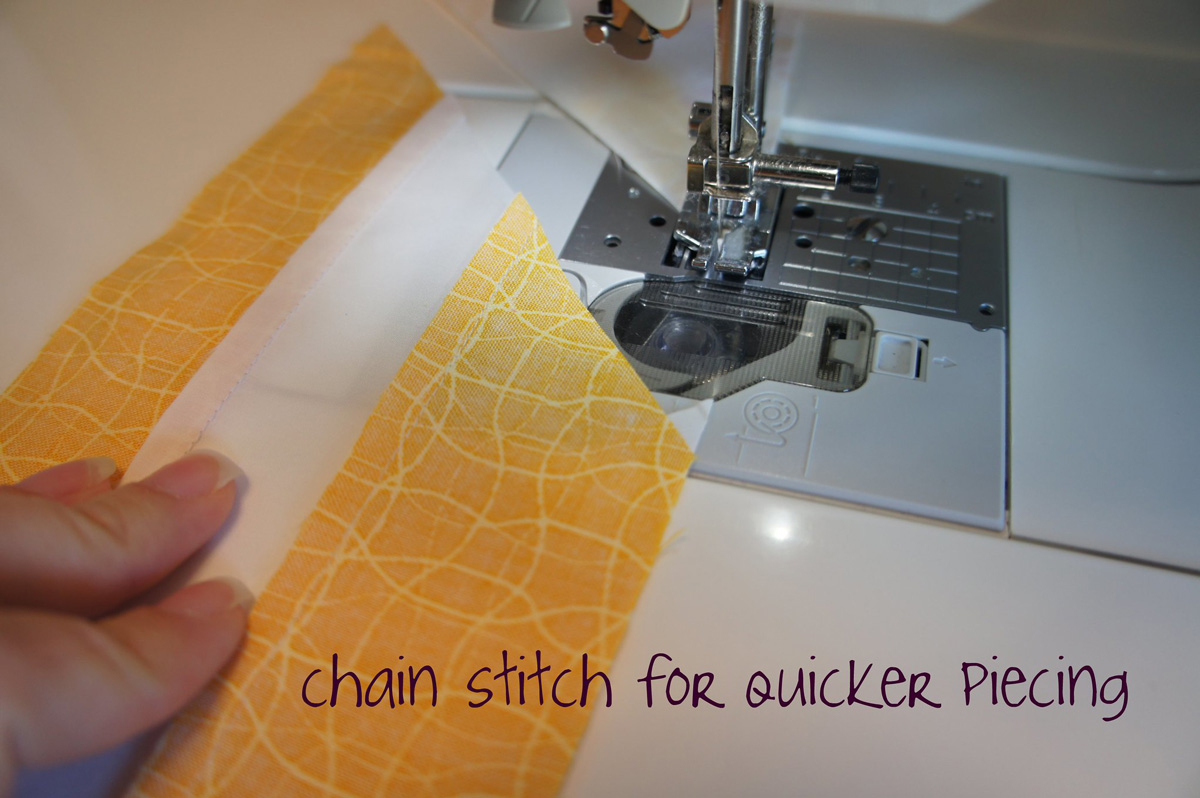
I like to chain stitch the triangles to the striped pieces at this point because it just goes so much faster.

When you have sewn one triangle to your angled piece, you end up with a funny piece like this one.

You want to check that overlapping your seam allowance has worked well by checking the point where the two pieces come together. It should look like this!
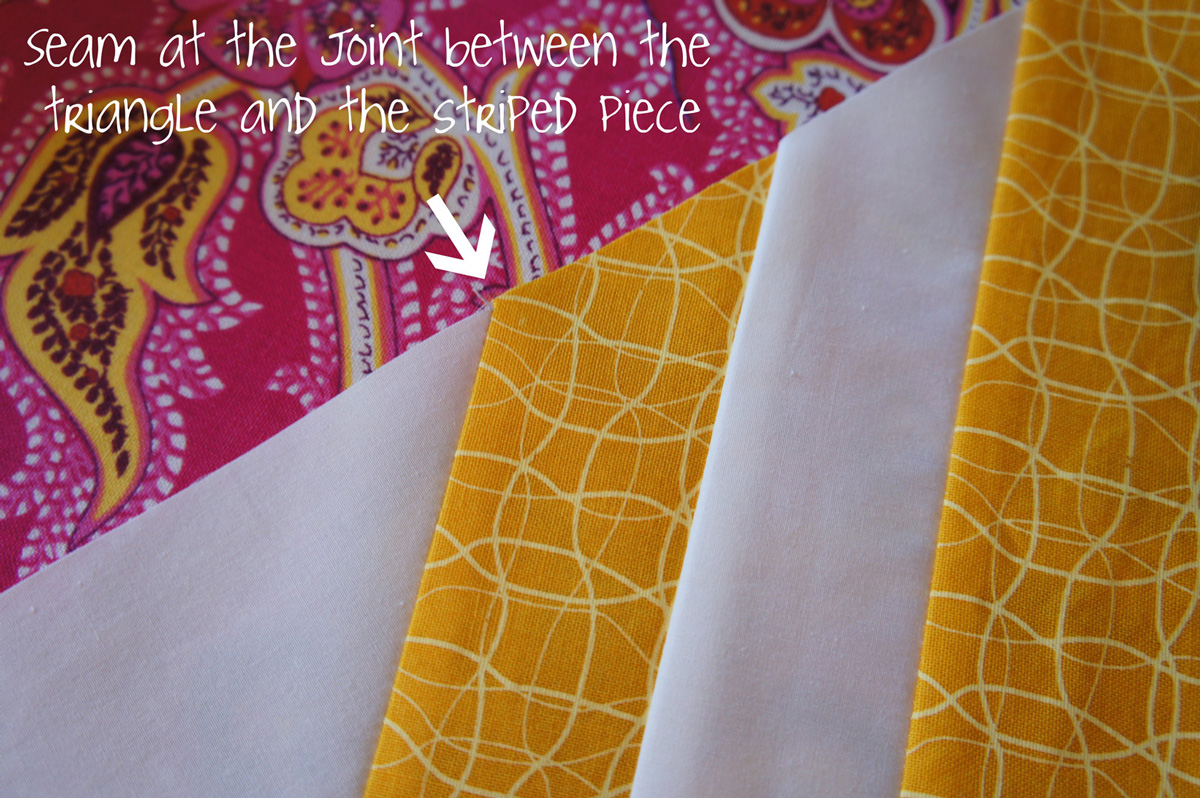

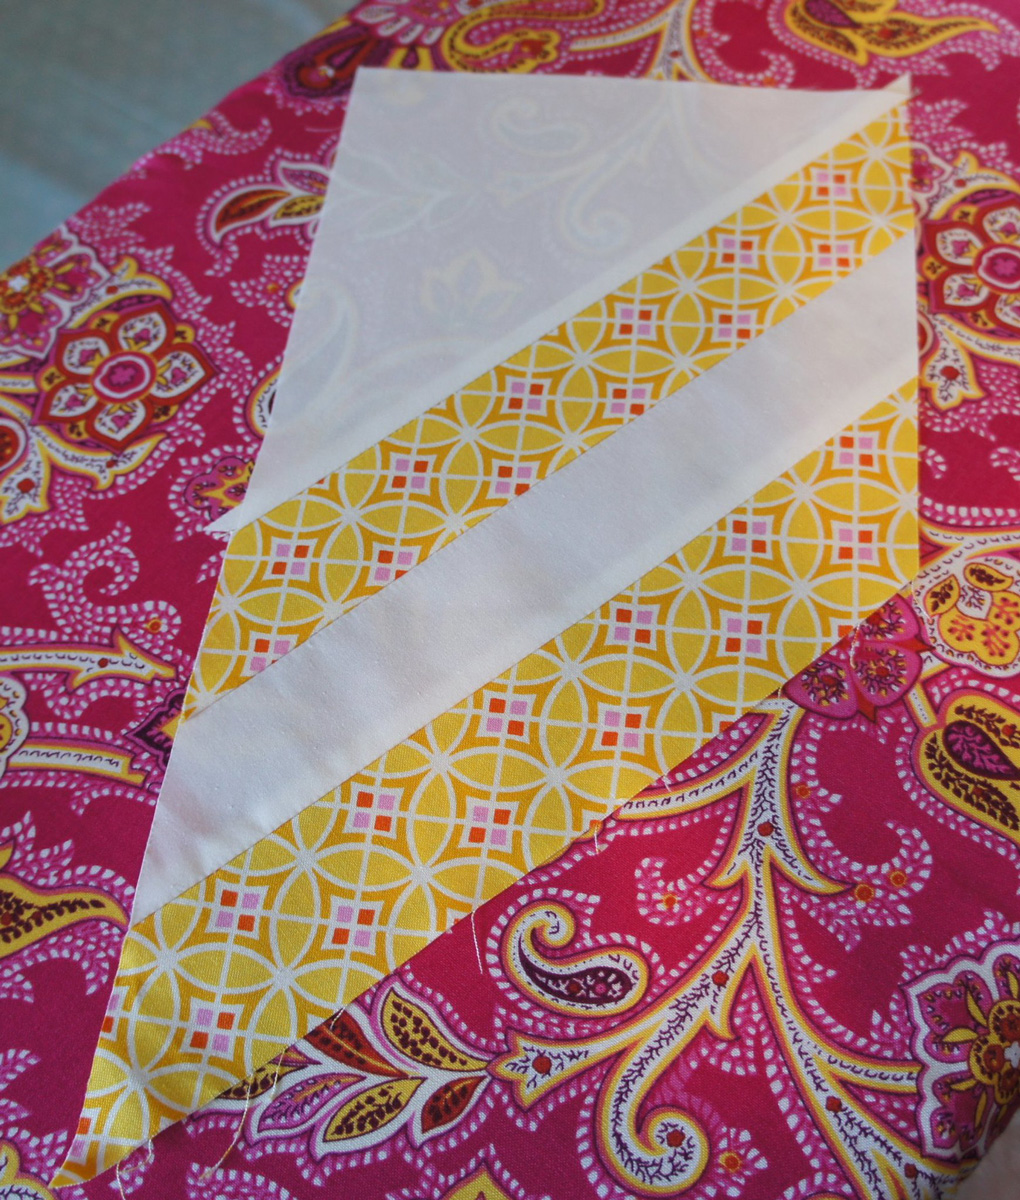
Happy with how that looks?! Great! Now you can start sewing triangles to the other side of the striped piece. Follow the same procedure as with the first side and you will end up with a rectangular piece that looks like this!
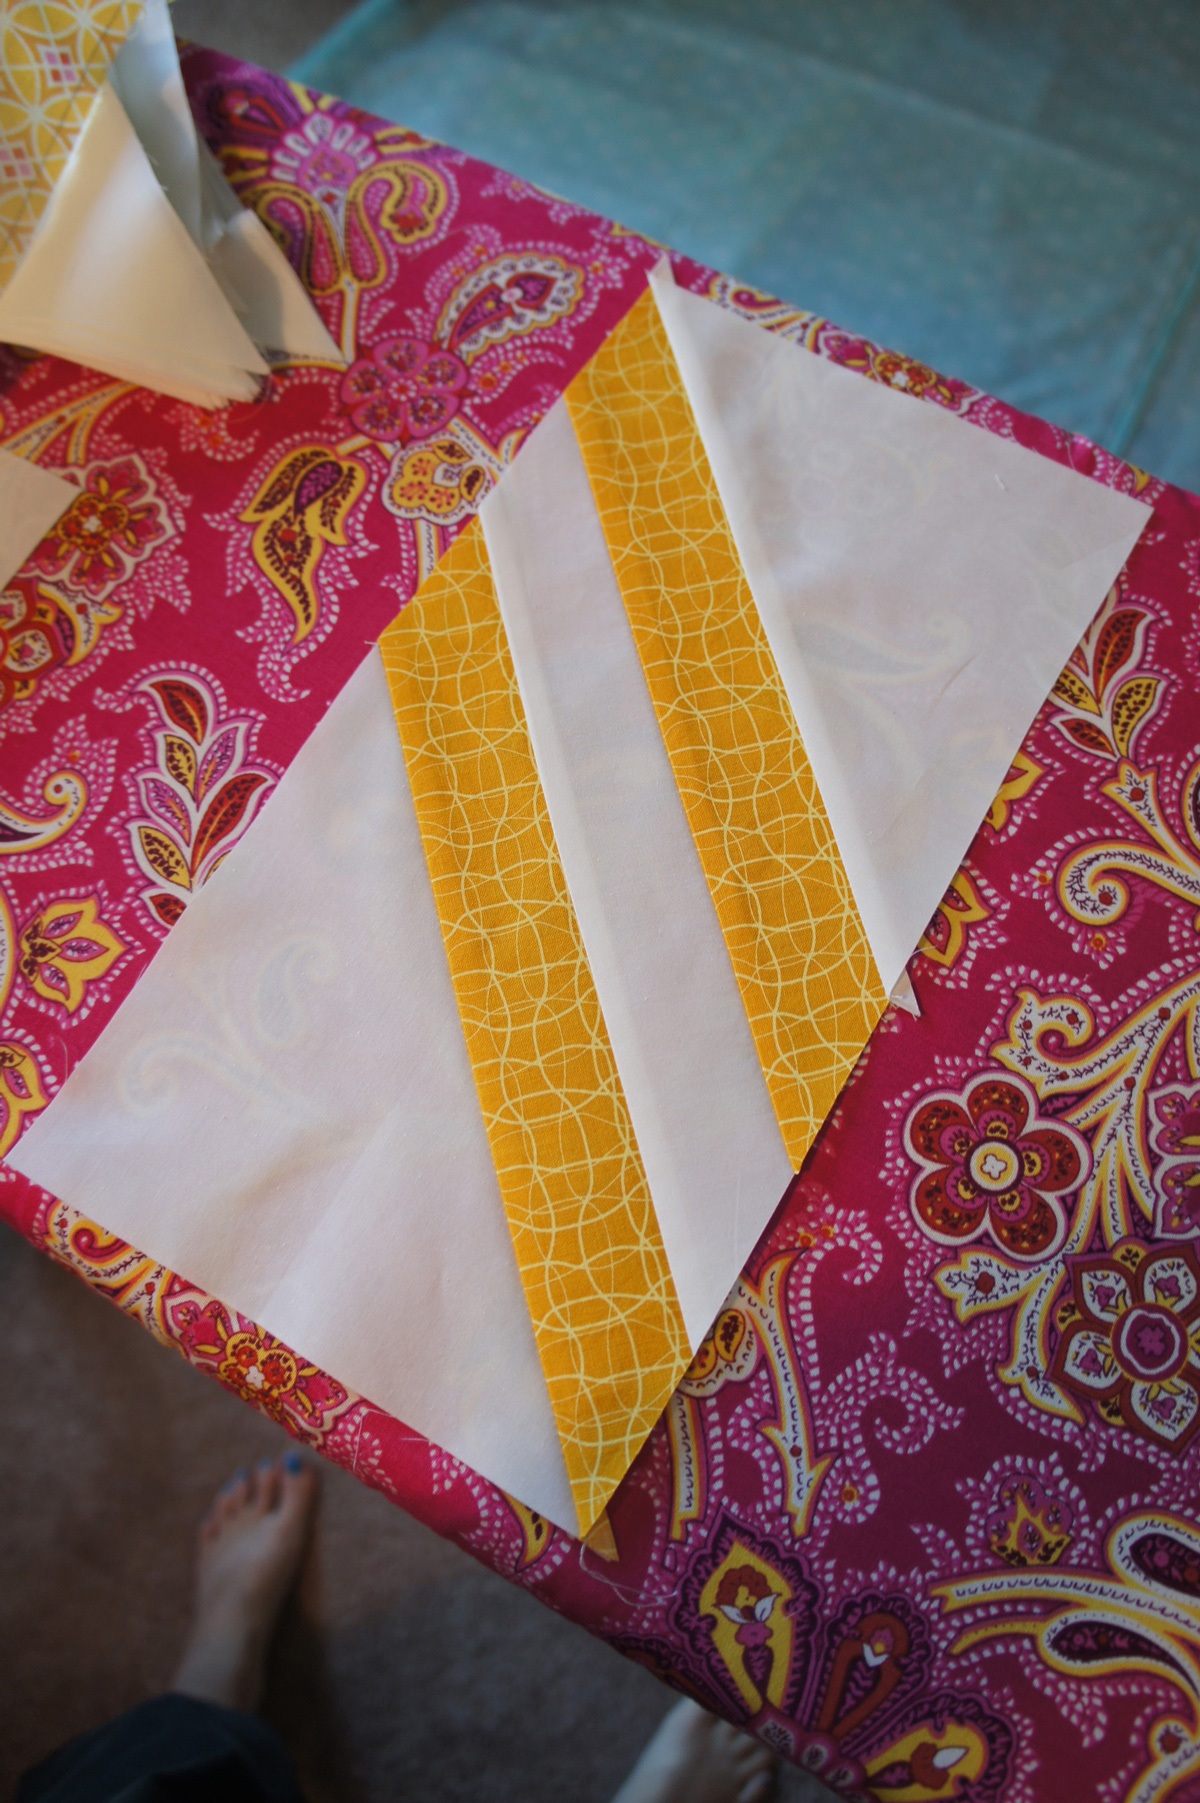

You have completed one half of one block! There will be a light piece and a dark piece to make one complete block. It takes a bit of time to sew all those background triangles onto every single angled piece, and let’s face it…that can get a little boring. So I won’t leave you with just that as your sewing instructions. Personally, I get worn out after just working on one row…that’s 12 striped pieces and you are sewing a triangle to each side…so 24 seams. After that, I’m ready for some gratification of zig-zag rows! But before we get a row, we need to get some full blocks. And that is where our most important seams of the whole quilt are!
Your seams should be pressed in the same direction as your original striped piece. Remember that we pressed the light pieces one way and the dark pieces the opposite way. So your two half blocks should look like this from the back.
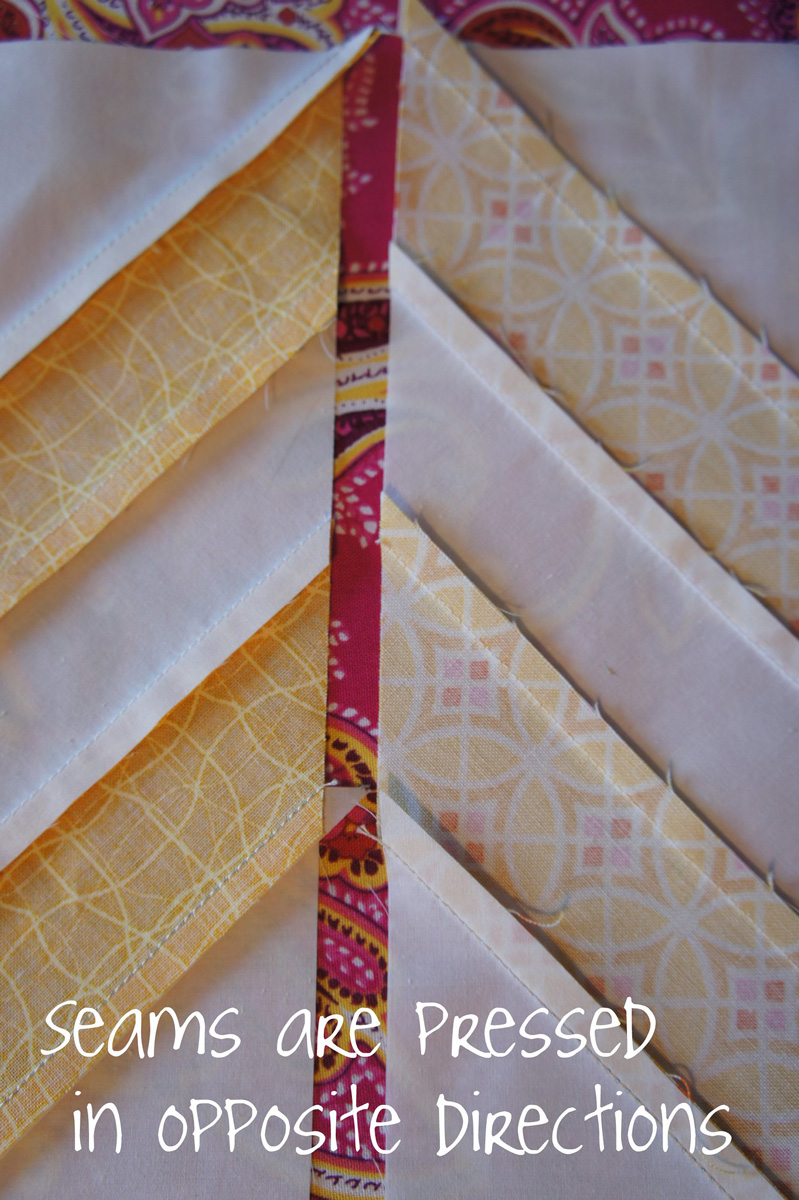

This helps us line up the points of the zig-zag and ease over the seams more easily with less bulk.
I like to line up the pieces from the front so that I can check the direction of my blocks. Then put the two pieces right sides together, butting up the seams of the zig-zag. I flip back a bit of the seam allowance to check that I am on track with lining up my pieces and then pin that sucker together.
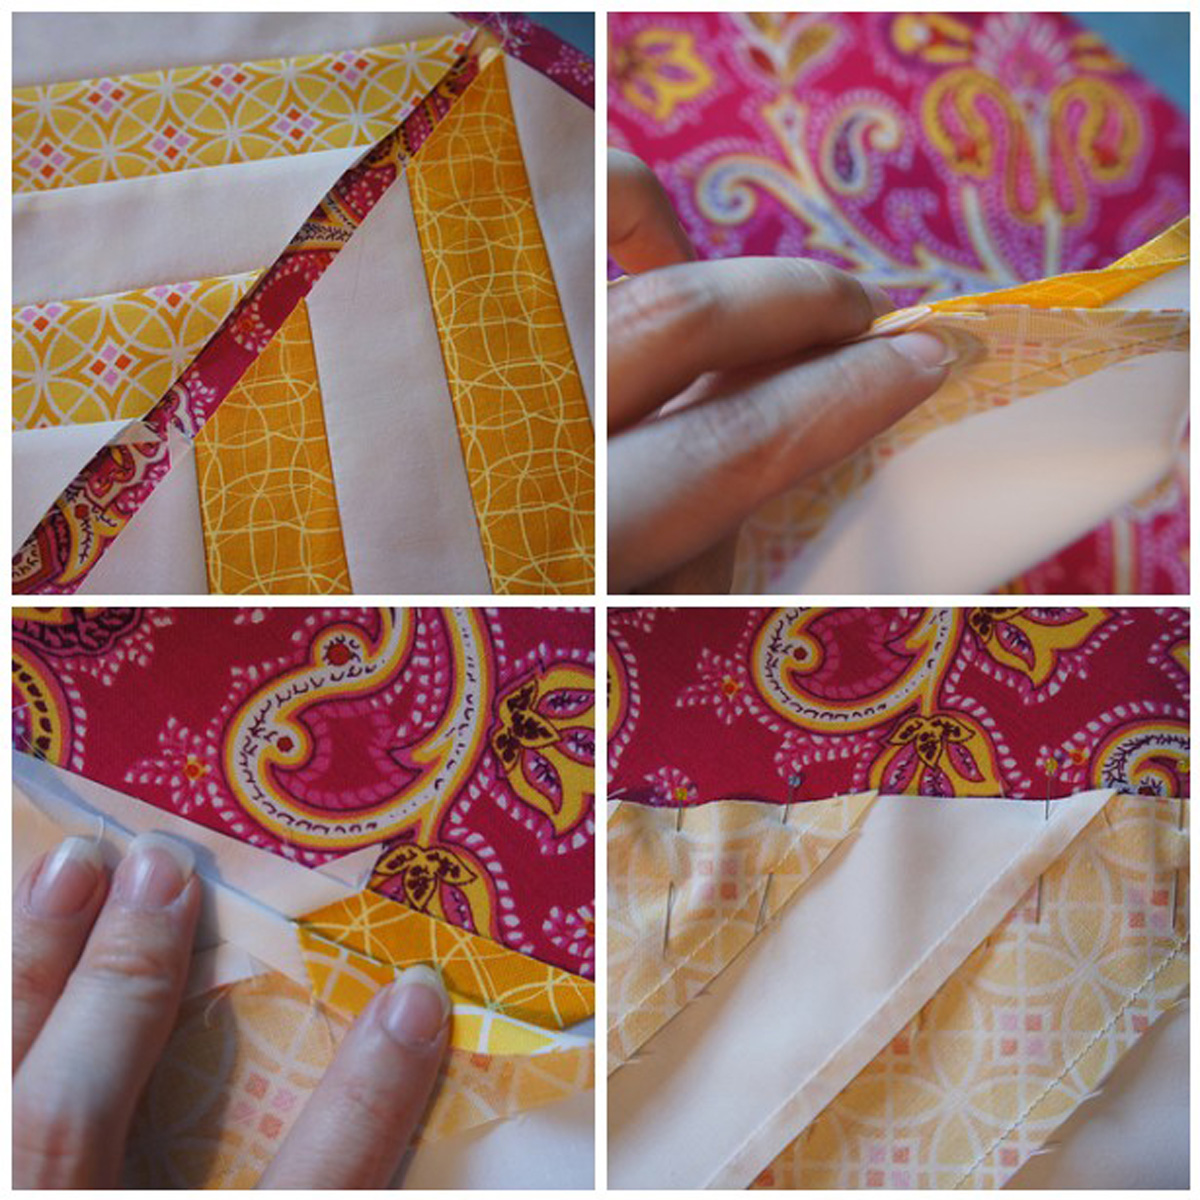

Again, the bias edges can be your friend here but tread carefully. This time it is the original striped piece that has some bias edges (your triangle piece no longer does!). So that gives you some ability to manipulate the pieces so that they line up. Remember that it is more important that they line up a 1/4″ in than that the line up along the edge…once again the joy of sewing angled pieces!
Sew the two pieces together and press the seam open. You can check at this point whether those zig-zags line up.
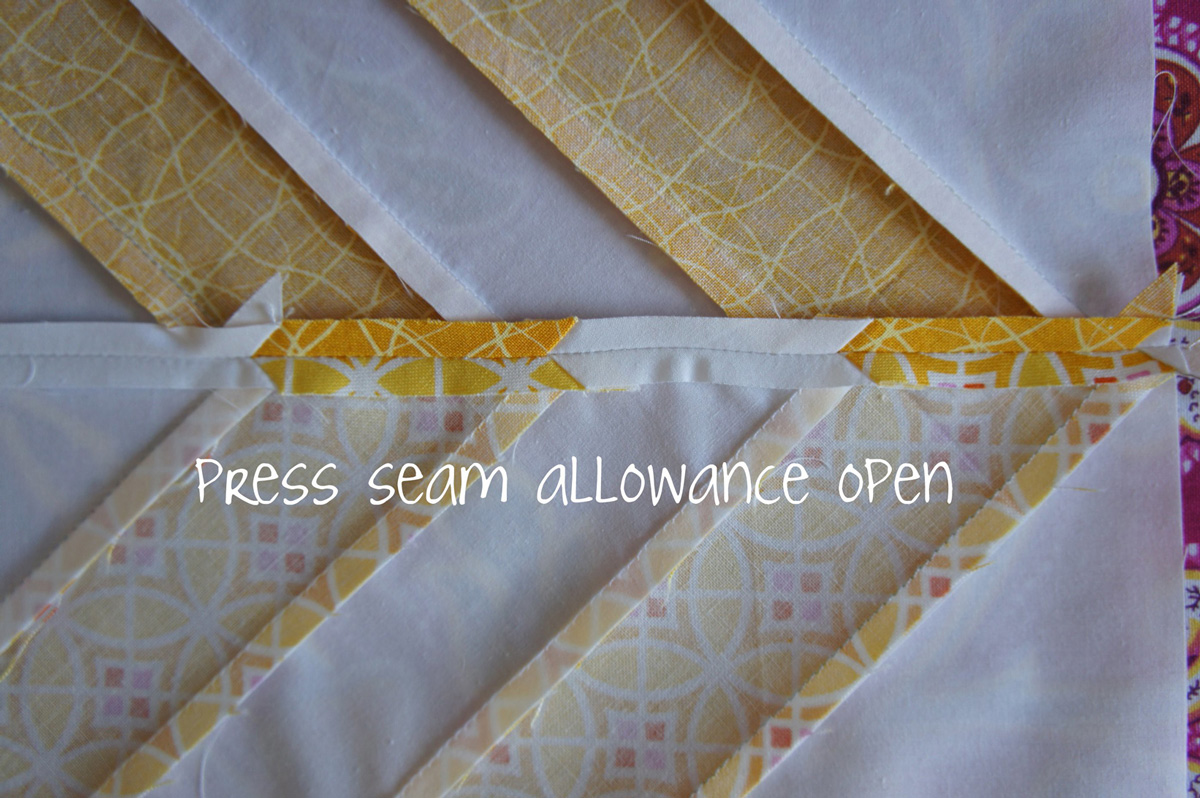

But I always hold my breath while I flip the piece over to see how it really looks from the front…because that’s the part that matters more! You will want to check the following points to make sure your zig zag is coming together.
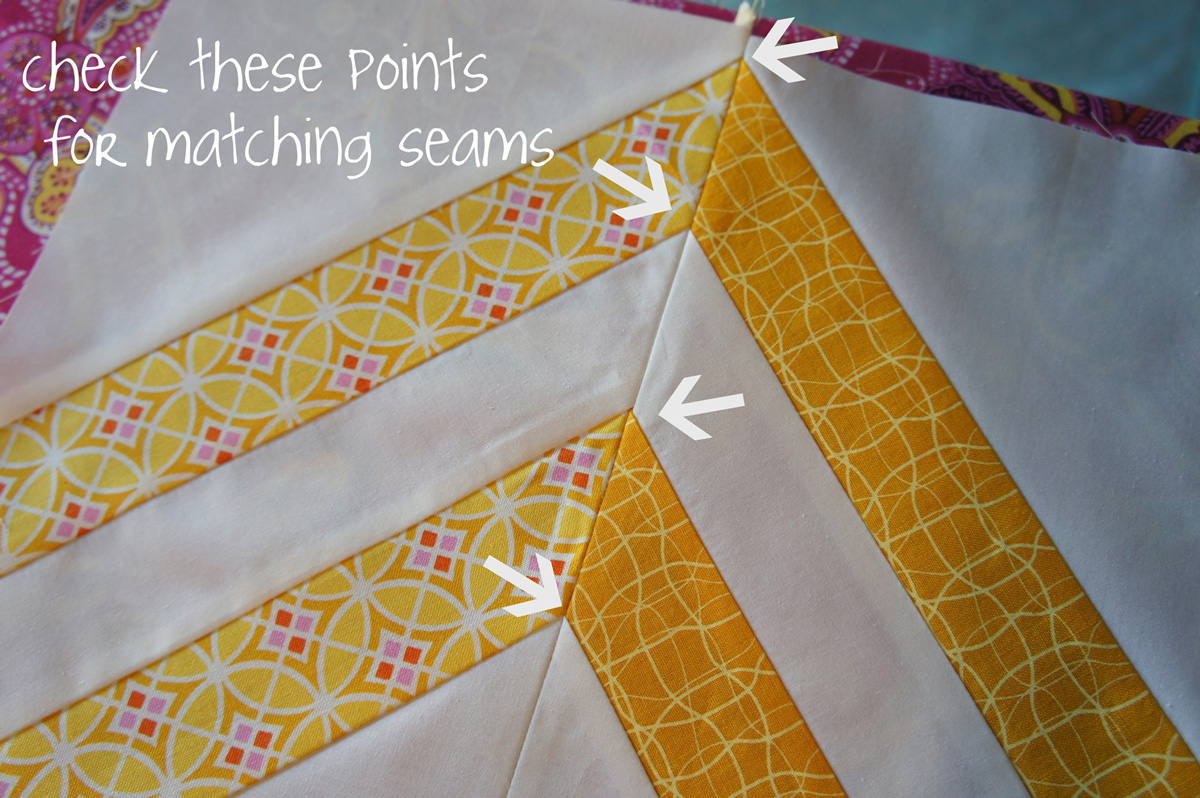

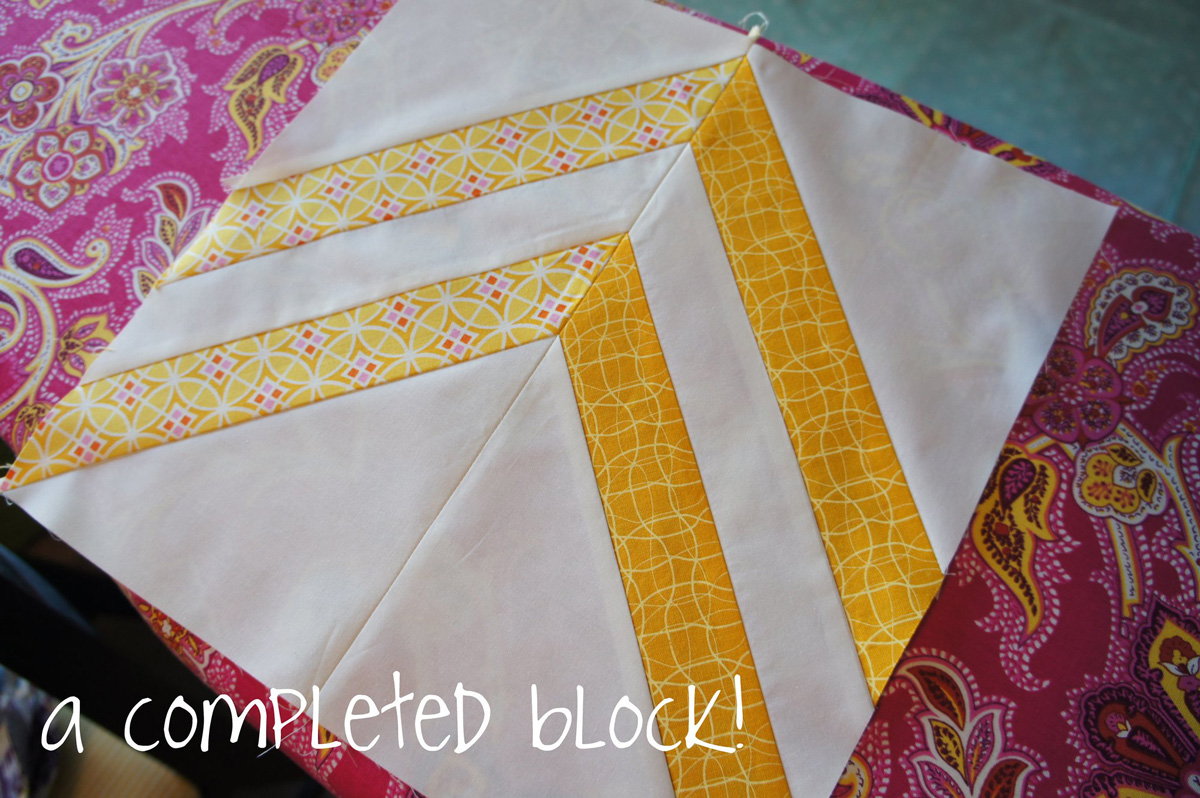
Phew! It worked and now I have one beautiful block with a light piece and a dark piece. Now you just have to do that 41 more times. 😉

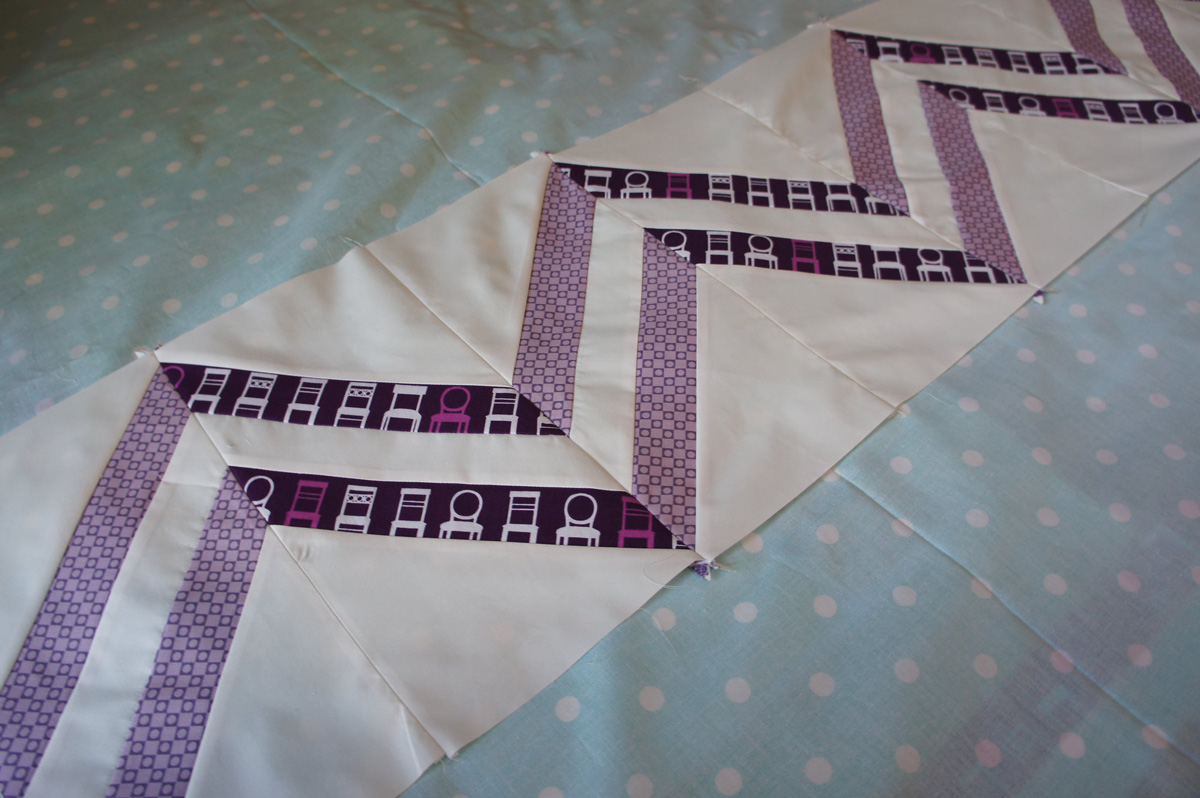
From there, it doesn’t take too much to create a finished row. And that is REALLY satisfying! Just join each block together with the same way that you joined each HALF block together. And before long you will have each block attached, light to dark, and a beautiful zig zag will appear.
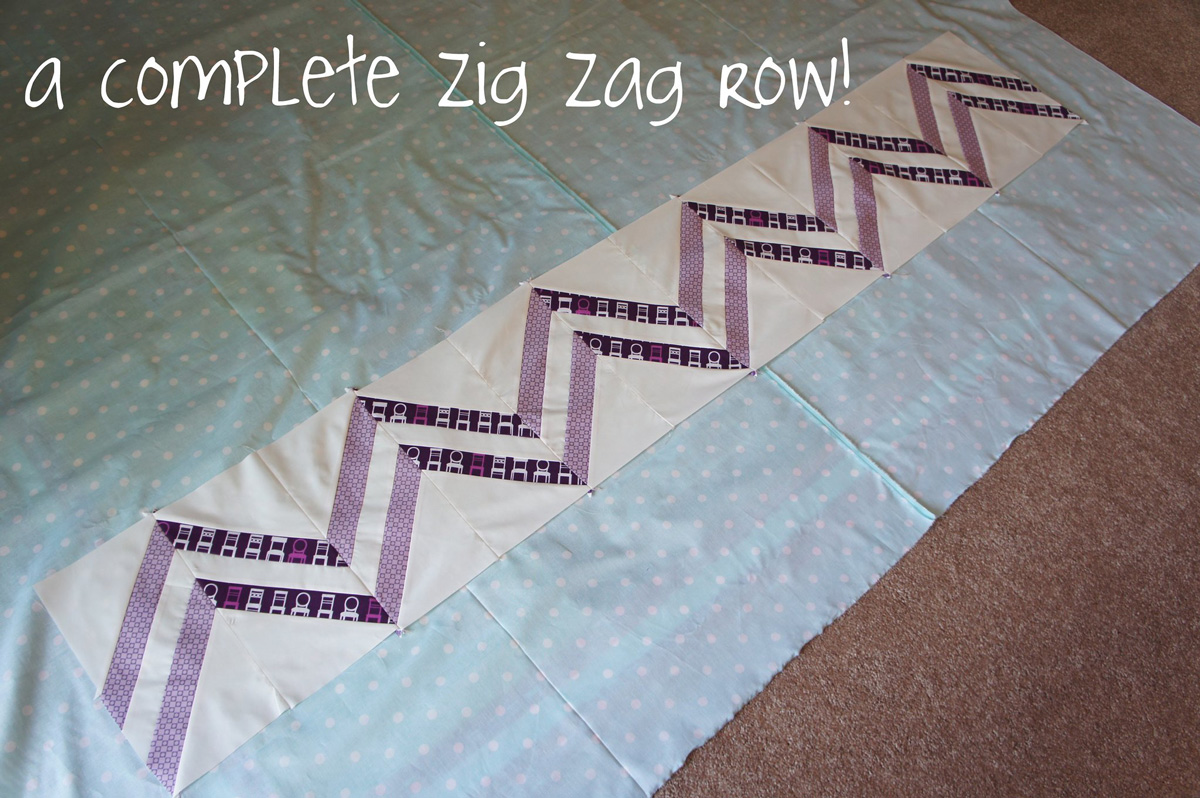

I get so excited just seeing that one purple row!! Woohoo! It really will be a beautiful quilt. It won’t be too long before we have a whole quilt top.

As always, please feel free to ask questions! And I’d love to see anything that you are all working on over in my flickr group, Cut To Pieces.
Thank you for such clear instructions. I am hoping to get to work on my zig and zag this week.
This is agreat tutorial. I just posted about a similar design on my blog a few days ago. I like how you have space between your rows of color. And I know what you mean by holding your breath…. getting all those seams to match can be tricky.
Marianne
stop by if you get a chance.
http://www.sewruffhaven.blogspot.com.
oh and feel free to delete my comment and this one too. Since my chevron is a bit different, you might mot want your readers getting confused.
I LOVE the fabrics you picked. Orange and pommegranate make such a fresh and cheerful combination. Bold and beautiful, haven't had the courage to try it yet… 🙂
Great tutorial! I think the finished product will look cool. 🙂
Have a great week!
God bless and keep you,
Sonia