
I know I’ve been doing some of my own tips and tricks on the blog here, but today I’m joining in on Amy, Diary of a Quilter, series of QUICK Quilting Tips and Tricks. She’s been accumulating lots of great tricks from bloggers from all over and I’m sure you’ll enjoy them. Be sure to check out her blog for the other great tips that bloggers have shared.
For my quick tip, I wanted to share with you my quick and dirty way that I sew together backings for quilts that are made from a single large yardage cut of fabric. It’s lovely when I have the luxury of actually owning those 4+ yards that large quilts need and can whip out a quilt back with one fabric and single seam.
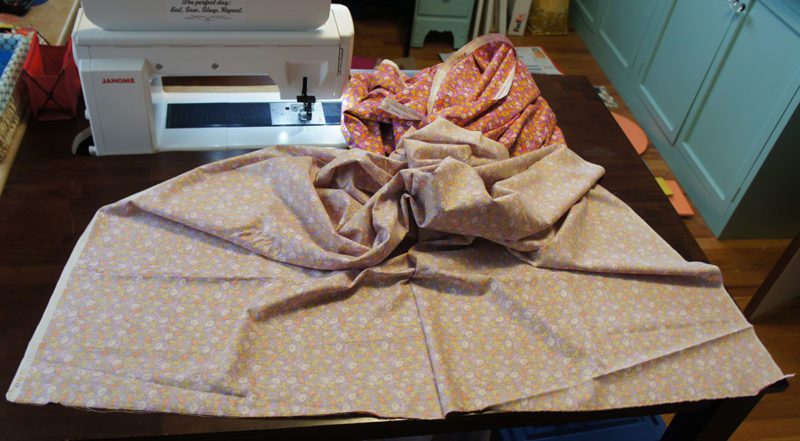
I start with a long multiple yard cut of a single fabric. I’m talking about 4 – 6 yards depending on the size of the quilt. You know…that huge amount they give you in the directions and you say “whatever, I can piece together a backing and use up my stash too”. Well this time we are NOT doing that. lol We are using that great big long cut of fabric that you got at a screaming deal from someone’s sale section and thought “I’m going to use that for quilt backs!” But there is no denying that working with that much yardage at a time can be cumbersome. So I’ve developed a method that has eliminated the pain of this piecing by so much that I actually enjoy making that quilt back and am happy with it!
My trick is to keep the piece as one long cut for the entire time I sew the back together. For years I would cut the fabric in half and then sew the two pieces together, desperately trying to match up the lengths of the long pieces. I would get annoyed by the weight of working with fabric cuts that long and would even pin these pieces together. (Pinning is still a great method if you want to perfectly match a large motif on the back, but remember…this is a QUICK tip).
Well, no more. Now I use the one piece and I open it up entirely to the full 45″ width. From one selvage side (I always choose the cute side and I’ll tell you why later), I match up the two ends of the fabric, right sides together.
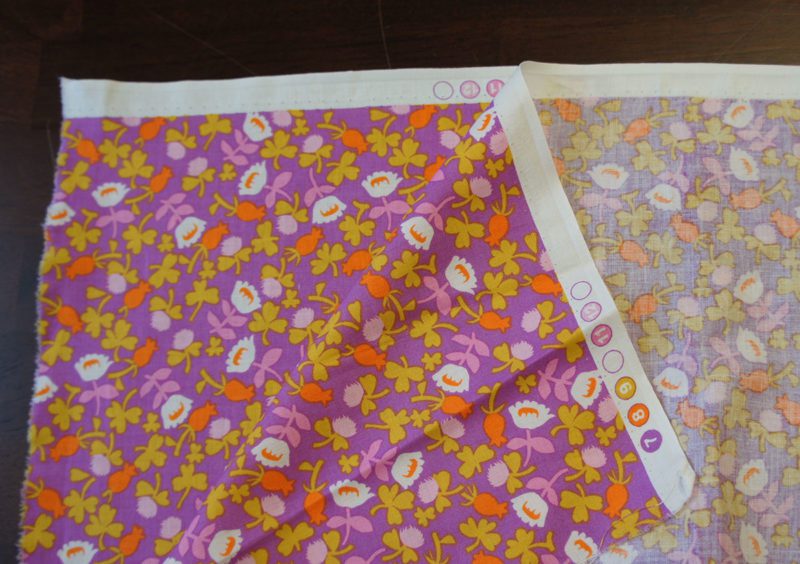
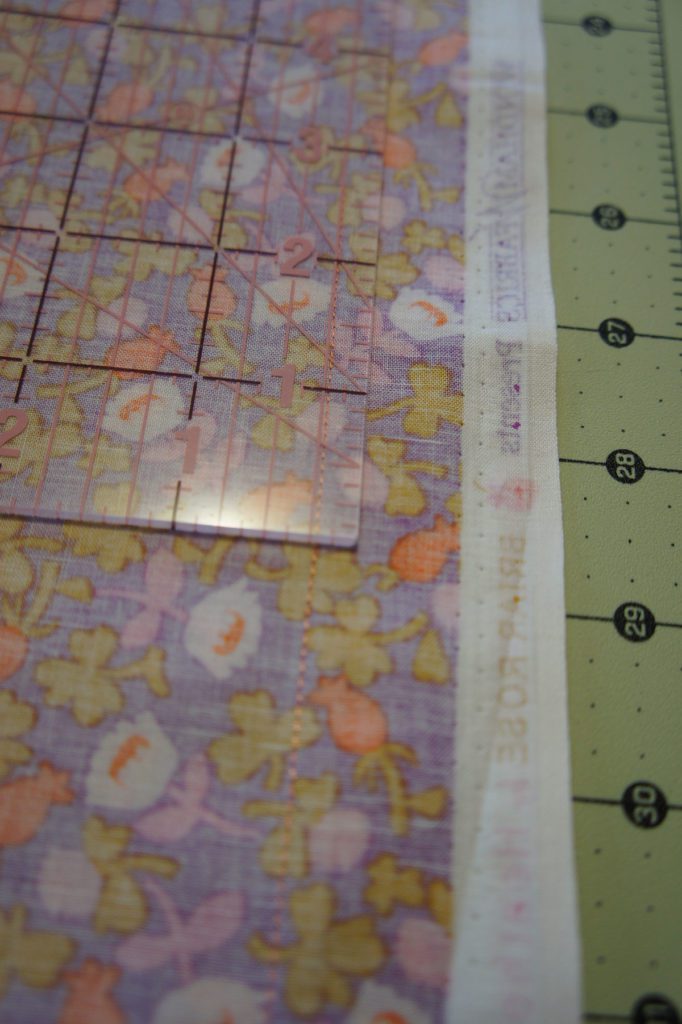
Just line up that initial end to end and take the whole big piece over to your machine. Give yourself a generous seam allowance so that you can trim it down to a 1/4″ seam allowance AND give you extra on the side of the selvage (this is for all of you selvage users out there). I never sew on the selvage itself because the weave is drastically tighter there and it needs to be cut from the rest of the fabric for a smooth backing.
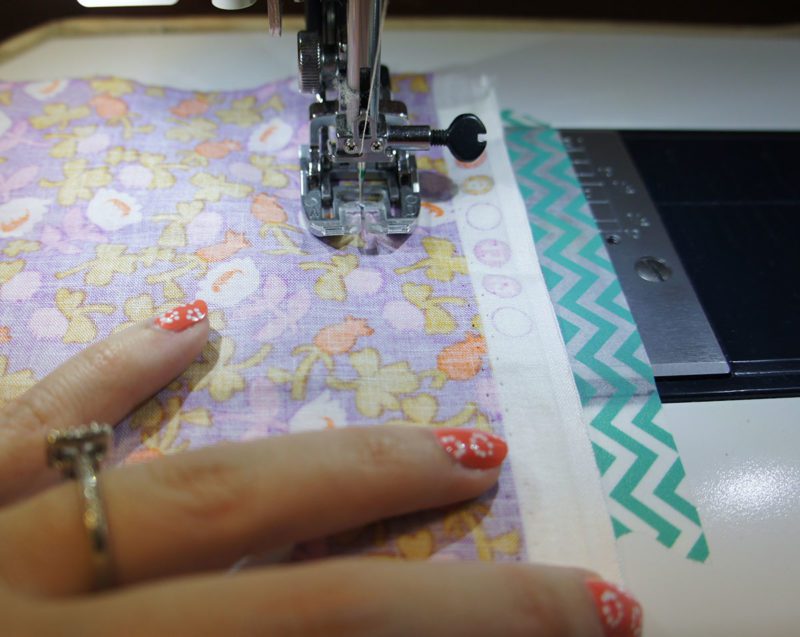
I use the selvage edge as my guide and it’s a perfect way to hold on to those yards of fabric because you can’t pull it or distort the seam even with the weight of all of those yards of fabric…it’s simply woven so tight. I move along the length of the fabric and continue sewing the two edges together aligning those selvage edges.
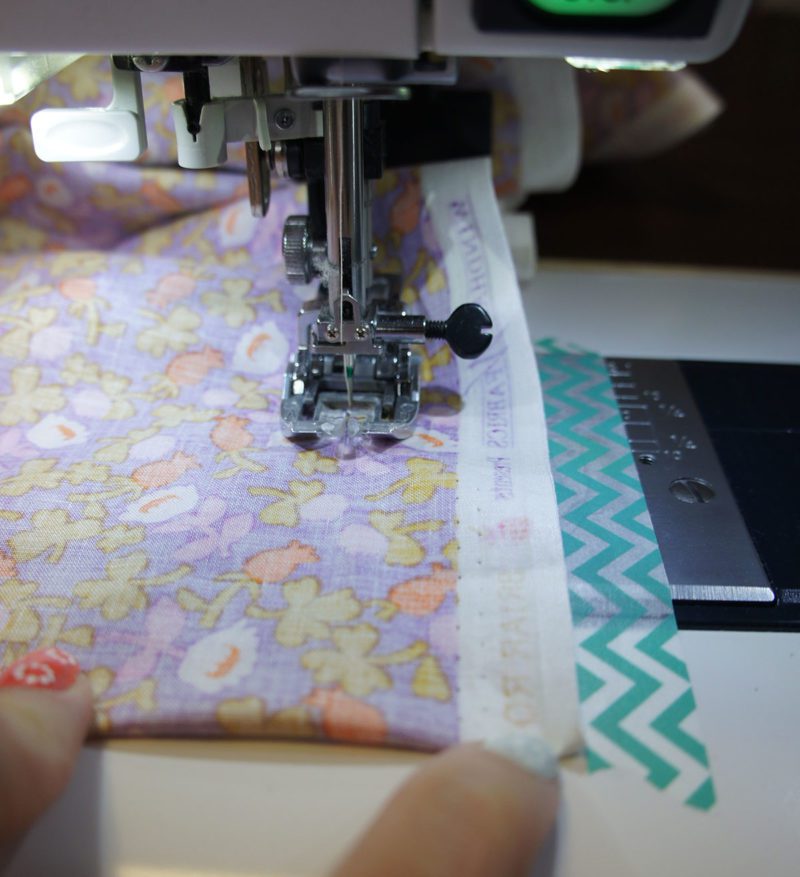
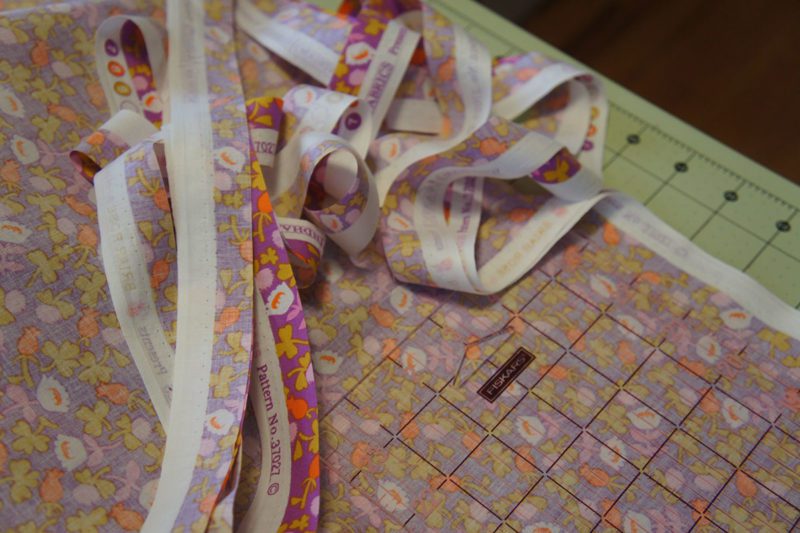
I eventually near the end and you can see that I will have sewn the fabric to itself until it meets at a fold, which is, low and behold, the exact middle of the length. And you didn’t have to measure to get there! I’m done with stitching and now it’s all about ironing and trimming.
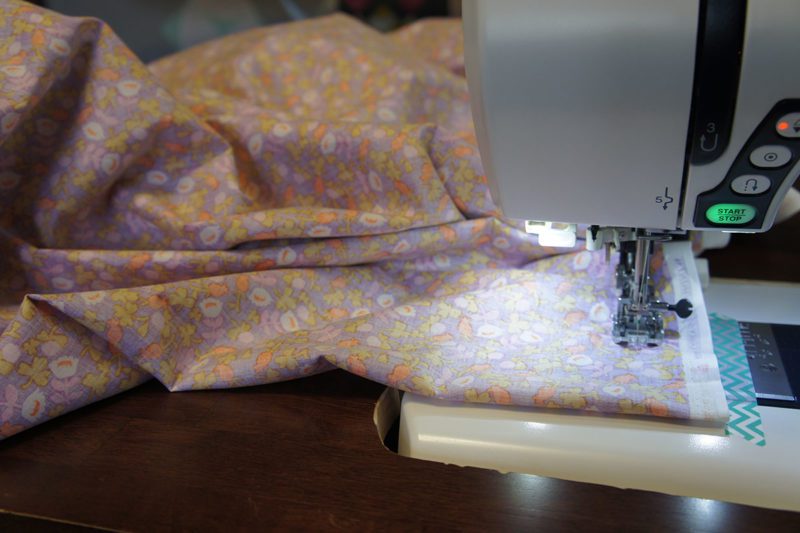
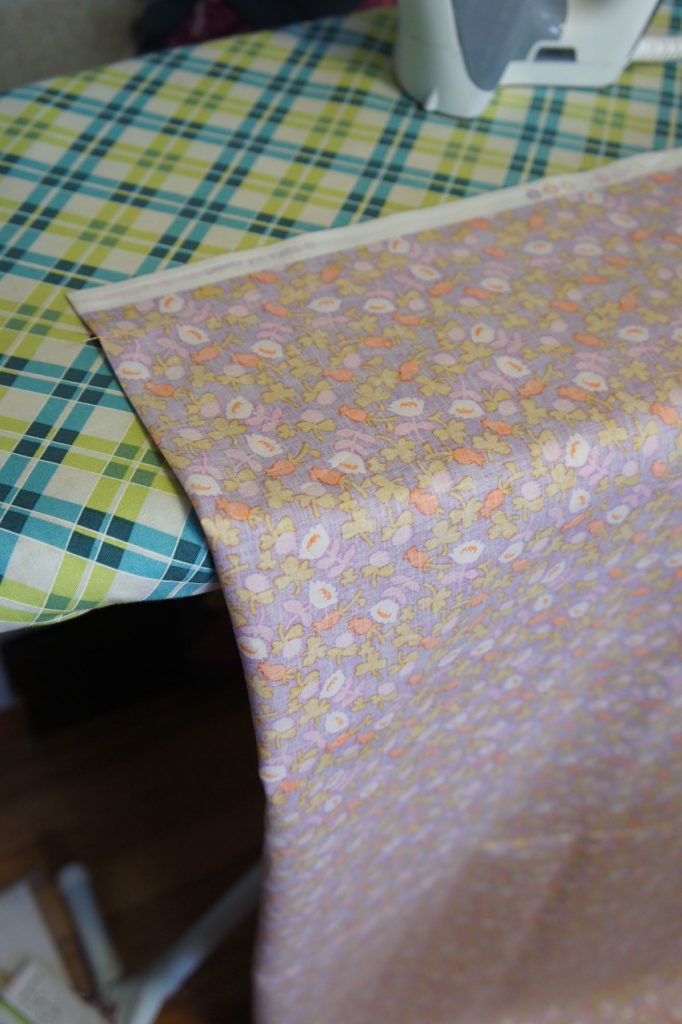
I take the backing to the ironing board and give the long seam a quick press to set the seam and then lift up the middle fold. I make sure that this is a nice fold across the whole length and give it a quick press as well to create a crease to trim away later.
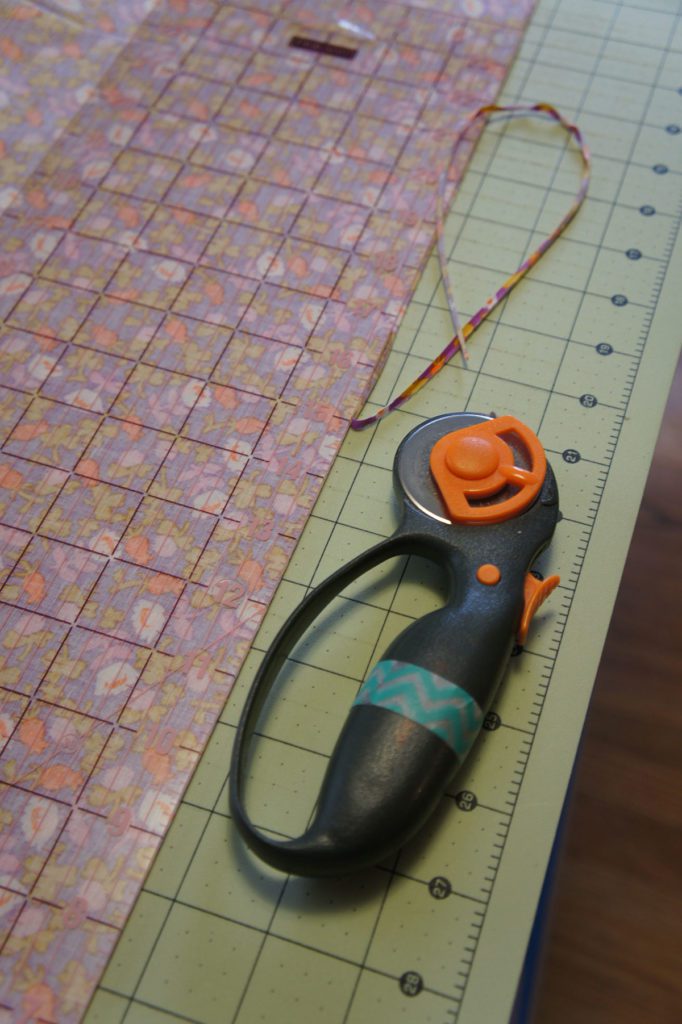
I take my long piece to my cutting mat and get out my longest ruler. I line the ruler up with a quarter inch left next to my seam and trim along the entire long seam.
You will see that as you do this you are trimming away the selvage edge with plenty of fabric next to it! So all you selvage project lovers out there will be gaining that in the same step as piecing your back. Two great things for the work of one!
And then I take the folded short edge and line it up along my mat. I use my ruler to trim away just the slightest amount to separate the two pieces (I cut fat quarters this way too if that helps anyone visualize it better). When you have trimmed away the whole edge, you can now completely open up the fabric and you have one beautiful quilt back.
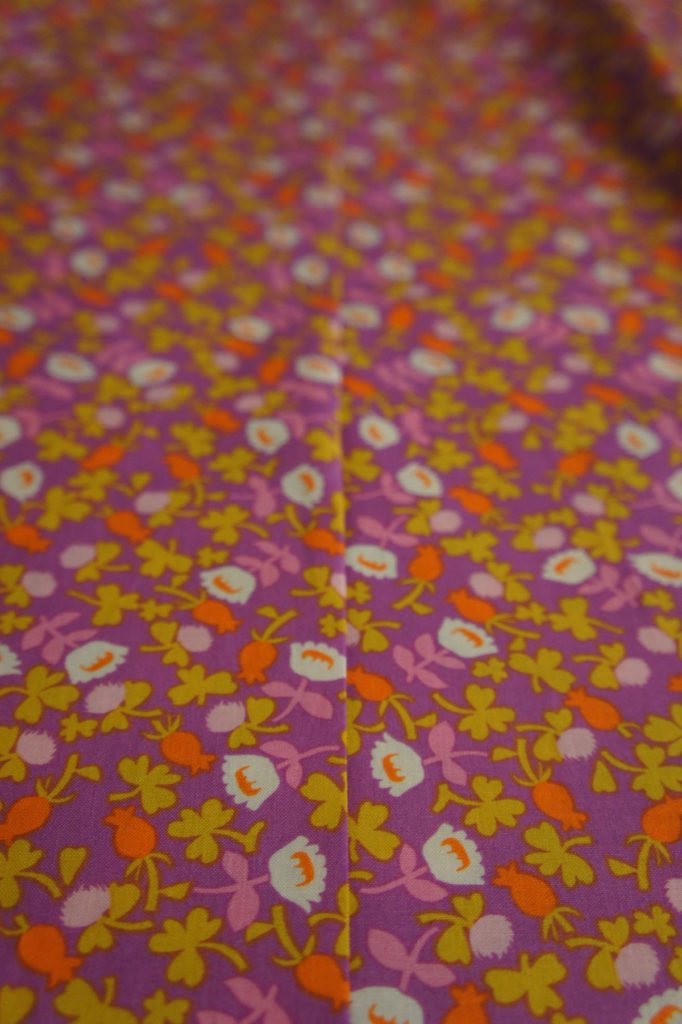
The last step is just to press the seam open or to the side per your preference and you are all set to go! As you can see, this works beautifully for small scale prints and solids especially. But I’ve done it with large motifs with great success as well.
And let me tell you that writing up this tutorial took far longer than actually making the quilt back. Heck, reading the tutorial might have taken you longer than actually making one…I do like to go on and on. 😉

So how does this work for width? Explain it to my spatially challenged mind… It seems quite brilliant!
Your resulting back will be 87" + or – by length of fabric divided by 2. If you have 4 yds, you might get as big as 72" x 88"; 6 yds would yield 108" x 88".
Thank you! I was having a hard time realizing how to get the really wide widths for the king sized one’s I’m making!
I found out much to my dismay, this doesn’t work well for less than 3yd cuts!
For very large quilts you may need a third width of fabric. If the smallest dimension of your fabric is more than about 76” two widths won’t “cover” you.
What about king size or queen size which are wider and in the case of kings, sometimes longer
The seams can also go side to side instead of lengthwise
I have used flat sheets that I have bought at Walmart. Twins are 4.97. More than enough fabric. If u can find the right color….fo a twin quilt. Any size , up to King….
Thanks for the reminder! I knew that, but had forgotten!
Sheets are okay for machine quilting but the weave may be tighter so harder to hand quilt. Also, if your quilt top is 100% cotton, make sure the sheet is also. If not, there may be problems after washing; there will be problems with top shrinking while backing will not.
What a great idea, never thought of that!
I’ve used sheets, too! An easy and fast back.
If the sheets aren’t 100%
cotton you may find pilling
occors
I was told by a quilting instructor to never use a sheet as a backing unless it was a vintage sheet.
If you buy backing fabric that is 102-108 inches (not 42-44) wide won’t that do it? then buy the length you need and if need wider double length and stitch one salvage, if you want to spit you could then sew to other selvage and split cut in half (length of fabric).
I bought 108″ fabric for my duvet. I liked not having a seam, but it was a pain to muscle all that cloth around for my super king. I’m still not sure if I want to give up on having no seams. Thanks for explaining with the piece of paper example. I was lost!
This does sound easy however as a long arm quilter, I find that pinning the selvage to the top roller keeps the quilt much straighter and a nicer finished product.
It works quite well. I have used this method for several years now.
Just tried this for the first time this morning…perfect and easier to handle the bulk!
I’m having a real hard time understanding this method. Could you please help me? Thanks Mary Griffin
It may no sense to me either.
Imagine a sheet of 8 ½ ” x 11″ piece of paper. Fold in half top to bottom. sew up one side of this folded piece. Then cut off ¼” along the folded edge. This opens the piece and you now have a sheet that is 5″ x 16″. Press open the seam and this seam will go approximately down the center of your bed lengthwise when completed. So if you used this method on a piece of fabric 44 inches wide by 6 yards long; you would end up with a piece approximately 88″ wide by 3 yards or 108″ long.
Sewing up a storm now, thanks. Love all these helpful hints.
Awesome, a great explanation.
Do you have to cut the fold after you have sewn? I am picturing two open sides, 1 folded side, and 1 sewn side. Or am I confused?
Now it makes sense. Thank you, Bonnie.
This helped so much! Thanks 😀
Very clear to me now—thank you!
me too, guess tonight I’m just visually challenged..Need a video I guess.
The method described leaves you with aprox 88” wide backing with a seam in the center
Awesome shortcut! 🙌
🌸 I always thought you needed to piece different patterns together and make use of scraps too, but you are RIGHT! I’ve got beautiful material I put away for QUILT BACKINGS! Time to bust it out!!! Thank you.
All I need is front and wrap quilt edge up and stitch over border seam. No more hand stitching part of back seam.😊
If your fabric is 44” wide then after trimming the selvage side you should have at least 82-83” width backing. If your quilt is wider than that then of course you will need another length for the quilt (which when sewing the two selvages together will give you width. Make sure you have bought enough fabric) and don’t fold in half, measure thirds. Check you tube for how to make a wuilt backing. There are several videos
Most of my quilts are wider than the 88″ or need to be wider for the extra over bit.
I don’t spend money on an extra three yards of fabric.
I do it differently. I work out the difference I need, and after I ‘ve cut the first length of the fabric, I add a border to each side of that length.
I then cut the second length and split it down the middle, adding one strip (usually about 22″ ) to each side.
This means that if you want to use the back of the quilt for a change, the two borders of the different fabric usually sit nicely down each side of the bed top. It makes it look reversible.
Your addition to this fabulous tutorial is super .. I’m going to use it today! Thank you!
I have prepared my backing like this for years . Definitely not necessary to cut all of that fabric before you sew! Makes it easy! makes it easy
The width of your fabric (which is now X2- or about 84 inches) becomes the length of your backing. The length of your fabric has been divided by 2 and if you had 4 yards of fabric, you’re backing would now be 72 inches wide.
I hope that makes sense.
I do this all the time EXCEPT I use the seam to create some beautiful detail with fabric from the from of the quilt and I sew those pieced in between the seams. The width of your quilt comes from the length of the backing. In other words the seam you sewed will run across from side to side of your quilt.
Now, why haven't I been doing this all along? Thanks for sharing.
hi this doesn’t always work because some fabrics have to be cut in half and turned around and sewn together because of the design . if not the design will be upside down on one side. I hope you understand what I mean, if not please message me.
You are correct for any fabric, half of the back will always be upside down. Even if it’s an all over print there is a top and bottom to the design. You should never match the white selvage edges together. I know it doesn’t seem like that however if you’ve ever wondered why the back looks dark on one side and light on the other half this is why. It’s not your imagination or the lighting in your room.
Sorry, I know it’s easier but it’s not the correct way.
You mean with a directiomal fabric- I was thinking the same thing. Otherwise, a great idea!
Great idea!
Super tip! Thanks so much for sharing – I am pinning this and also putting it on my crafting blog for future reference!!
Ooo clever! Might try this one day 🙂
That is so cool! It's one of those duh moments, why didn't I think of that??! Lol ;D thanks for the great tip.
Great idea.
This is a very good tutorial, Angela! It's exactly how I do it too. The only thing I also do is sew the seam with a walking foot, especially if I want large motifs to match up. I'm sure lots of your readers will use your method. Great job!
Brilliant! I dread making quilt backs, but of course I should do it this way! Thanks for sharing.
Great tip.
I did that last weekend for someone else, but, since it was her fabric, not mine, I stitched closer to the selvedge, and didn't cut the 'pretty' part off with the selvedge.
Excellent process! I will be using this one. Thanks for sharing.
I have never found a use for the selvedge. Ideas?
I believe Missouri Star Quilt Co. has a video tutorial.
I’ve been looking, but cannot find this tutorial on the site. Do you have a link?
I crochet them into throw rugs. Friends love them. After first washing they really soften
Now that is a good idea! Just my opinion, but I find those quilts, purses, etc made from the printed selvedges rather tacky looking.
Have been throwing away salvage butttt Will now crochet into rugs – can’t thank you enough . Wish I had known this sooner.
My quilting group saves all those little bits and salvages to use in dog beds to donate to dog rescue services
Check out Pinterest for lots of ideas!
I saw a string quilt made with them at a quilt show in Pigeon Forge TN & loved it, so now I’m saving mine 😂
I use mine to tie up my tomato plants to their cages which they always seem to outgrow. Can use for beans or other veggies.
this is brilliant and a bit mind boggling all at the same time… must try!
Such a clever idea! Thanks for sharing!
Such a great tip, I'll be using it in the future.
I hope you enjoy it and it speeds up the work of piecing the back. This works well for any time you need to piece long pieces of fabric together! Perhaps for curtains?
I sew down both sides ..as you do ..have made a tube..then tear down the middle…seams are at the sides and the middle of the quilt is the widest for strength and wear
I like the idea of having the middle piece the widest. Also, I prefer a 1.5″ seam pressed open.
Agreed this is the way I like to do it too
Well put, I tried to explain this same thing in a comment below but not as well.
I do the same – that way there is no smack in the middle of the backing
Great thanks for Sharing
Genius! that is all….
love. this. tip.
Thank you! It is truly something that I do all of the time. I'm so glad that I thought to share it with you all!
SO smart! I just sewed together a quilt back this morning and I wish I'd ready your tutorial first! I'm totally going to do it this way from now on!
You are a flipping genius.
That is an awesome tip. This is on my to do list for the tops sitting waiting to be basted.
Super, duper awesome! Why didn't I think of that?? Thanks a bunch!!!!!!
That's what I thought when I finally did it. Why hadn't I been doing it that way before?! lol
You are a genius!!! Thanks for sharing your bright idea!!
Great idea! As a longarm quilter, I have found that backing seams that are 1/4" leave more of a ridge than seams that are 1/2" – they just lay flatter…just something to consider. Also, thank you for NOT leaving the selvedge edge in that backing seam – those are miserable, deflecting the needle and not stretching at all!
This is how I always do backs….unless the backing is directional. Like, if all your sheep are facing one direction on the fabric, if you sew it together like this, their noses or butts will meet up in the middle. (I speak from sheep butt experience.)
LOL you are absolutely correct. Sheep butt experience here also..
Yep yep I do this too! Then I tear it open not cut. Even faster and the raw edge is trimmed off. I tear more and more these days.
I just don’t understand, lol
I’m chicken to tear
I've done it that way, too, but I haven't in awhile….Wonder why not? Oh well, you've stoked my memory fires now! THANKS!
Thanks for sharing this genius way of making quilt backs!!!
Genius!
Cool! I have uses a similar technique for other things, but never thought of using it for this! Thanks for sharing!
What a great idea! I did this same thing for a quilt, but didn't realize that my fabric was directional. Luckily it is a very busy pattern, so no one will notice the fairies going in two different directions! Thanks for the tip.
Yes! You definitely have to do a bit of extra work if you are working with a directional print. Then you will need to cut the piece in half before hand. But It's not too bad. And you can always say that the fairies are flying back and forth between destinations. lol
Great tip! Thanks! I loved the bit at the end were you said reading this took longer, haha. I sure appreciate your attention to detail it made it so easy to follow!
Love this idea…thank you!
Ah…. I get it! 🙂
You sew to selvages together from the same side and not the opposite side of the fabric!
Brain crunch this early in the morning, ha ha!
Esther
This is genius. I'm going to share the link to your blog post on our new group on Facebook … Late Night Quilters. The quilters on it will love this tip! Anybody who wants to join, please just send us a request on Facebook. It's a very supportive community, and we love to share ideas like this.
I'm slow here…just got out of the dang hospital with a 7 mm kidney stone which could be lodged in my brain. So, the seam will be in the middle? That's fine with me. It's one less seam to feel through and wonder, "What in the heck is that bump I feel?" while I quilt…just wondering. Not a good idea, BTW to have a kidney stone malfunction while traveling in the wilds of Utah with foreign visitors…never plan of this. Really. A very bad idea. But, YOUR idea. Brilliant!
oh my goodness! I'm both laughing at this and cringing for you at the same time! lol
Yes, the seam will be in the middle ideally…depending on how you run it and your fabric estimates, it may run the length of the quilt and it may run the width of the quilt.
If you sew BOTH sides you can cut one side through the middle and the seams will be evenly spaced from the center. 🙂
I often use two fabrics, sew both edges cut center of one depending on your choice, leave plain in center and edges patterned or vice versa.
trying to visual what you said cuz it sounds important and nifty but I just don’t understand what you mean. Could you please clarify?
what she is saying instead of sewing the same piece of fabric 6 or 8 yards of fabric starting with both ends right sides together and sewing the salvage edges together and then trim off the end at 1/8″ =there is nothing to square up, what Hager is doing she takes two different cordanating colors of yardage length needed -1 plain & 1 print, places them right sides together with the salvages matching and sew a seam about 1″ from the salvage edge from one end to the other end and sewing the other two salvages together, basically making a tube, then tearing nicely down the middle of one of the fabrics (plain looks nice) (tearing the fabric is easier/straighter and the raw edges will be cut off later before binding) open all three seams and iron open, your results will be (approx.) 22″ of plain, 44″ of print and then 22″ and plain = 88″ by length needed. hope that helps someone. I know pictures helped a lot….
Thank you for this tip; it came in very handy this morning!/
I can't wait to give this a try … great, detailed instructions … thanks for posting this!!!
do you trim the remaining selvage or leave it on?
I have 7 quilt tops that I completed while wintering in Florida this past year. Now that I have read your tip, I feel ready to finish each one. Thanks for sharing such detailed instructions and pictures. It made this so easy to follow. Thank you.
I’m a 70 yr old quilter & have always dreaded getting the backing ready…now I want to piece a quilt real soon so I can try this great tip. Iol! Never too old to learn something new. Thanks!👍
I am also 70 years young, and have been quilting for 50 of those years. Back in the day we tore all of our fabric! I just want to caution everyone that sometimes fabric can be quite twisted and it will tear crooked. I have had this happen to me.
Thanks for the great tip! Great timesaver!!
Only thing I would change is to leave the seam wider than a 1/4 inch. There’s a lot of pull put on this Seam when you quilt the quilt. I leave my backing seam at 1/2 inch.
I agree. Most longarm require selvedge cut off and 1/2″ seam allowance. I also require the seam to be pressed open, too.
I was thinking just the same. … why did I not think of that. I really never enjoy piecing the backings. The lady from my local quilt shop told me you don’t have to cut it and explain the above step to me but then at home i couldn’t remember. So I thought i google it and see if someone else had this brilliant idea and here you are with pictures and all (i am someone who needs to at least see pictures to get it) :-). Thank you so much for taking the time to post this. This is excellent 🙂
How do you measure and keep a straight line from the selvage?
I’ve been doing this for years. Seemed a natural thing to do
Super idea. Why didn’t I ever think of that. All lines up neatly and so easy. Thanks so much
Tried this and now I am ready to make the backings for all those quilt tops waiting to be put together, have always hated doing the backing…this so great and since the 104 to 108 backings are getting so expensive and there is not a large selection to chose from, this makes fabric sales more excting……
I love this tip!!!
Great tip, many thanks, always struggled to get the ends even. Love from Auckland New Zealand
Great idea. But isn’t widebacks the reason we don’t need 4-6 meters of fabric. Widebacks are 108’ wide so that covers the longest measurement. So you only need to buy 2-3 meters and you’ll have some leftover. Although the. choice is not as comprehensive. Just a thought. Fabric is really dear in Australia. Thanks for the tip cheers
I always struggle to cut it evenly so thanks for this great tip, will be using this.