
Sometimes I see a pattern someone else is designing and I just HAVE to make it. As a pattern designer myself, it can be hard to give up the extra time and energy to make a full pattern of someone else’s design. But it is also a really great way to improve my own pattern writing skills and just plain enjoy the fabulous designs out there that I see other wonderful designers make. And so I eagerly sought out the chance to pattern test the Avant Garden Quilt by Holly Clarke.
As Holly states, this quilt is “a fresh take on a traditional “Joseph’s Coat” quilt, this pattern includes oversized daisy petals and a unique equilateral triangle construction method for ease of piecing with no appliqué.” What that means in practical terms is that each piece is hand cut from a template with curved pieces, but the row and column piecing is straight line sewing…though to be fair, straight line sewing with A LOT of seam matching.
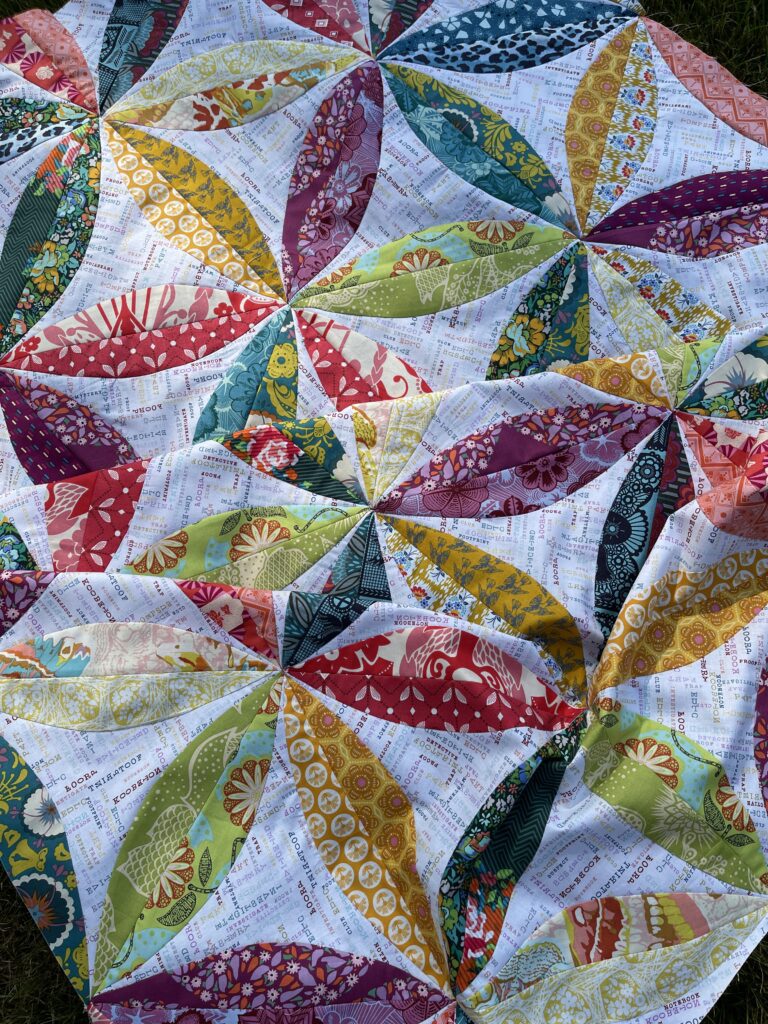
I dove into my stash to find the fabrics for this quilt and plundered my collection of Anna Maria Horner fabrics. I wanted the vibrant colors that a Joseph’s Coat pattern displays so beautifully. Then I forced myself to use my one of my own fabrics for the background fabric. I chose the multi color text fabric from my Clueless fabric line for Windham Fabrics. It has all of the colors in it that I had already picked from AMH’s fabrics. And even though it is a directional fabric, it shows off beautifully with the rotation of the blocks (so don’t be afraid of directional fabrics for the background!)
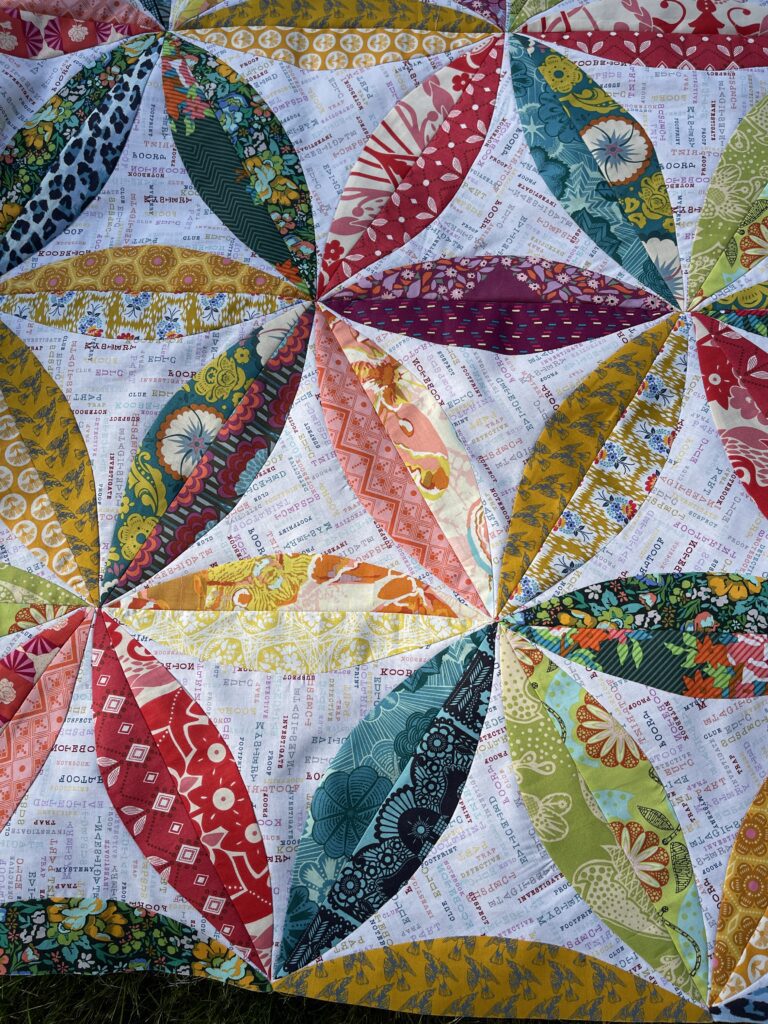
I laid out the entire quilt as inspired by Holly’s pattern on my design wall. I tend to be a bit particular about my fabric placements, so I rely on my design wall heavily to help me decide exactly where each fabric will be. I found it particularly helpful for this quilt pattern because there are so many pieces and fabrics I was using and trying to balance. In general, I’m trying to make sure that lights and darks are balanced along with warm and cool colors.
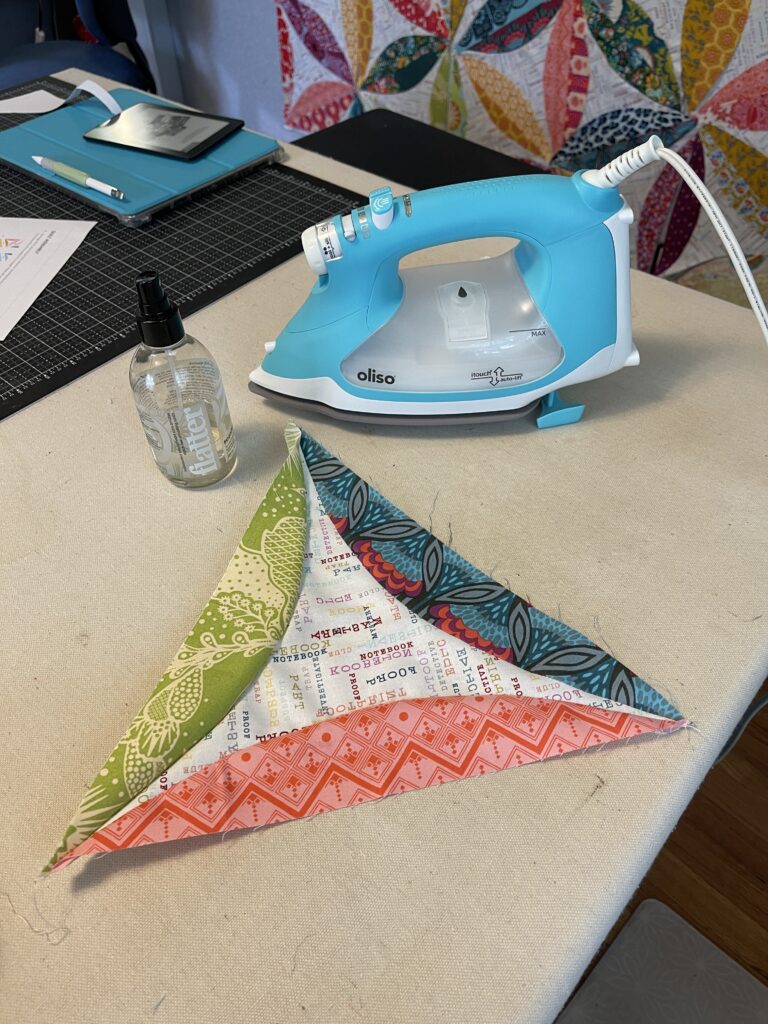
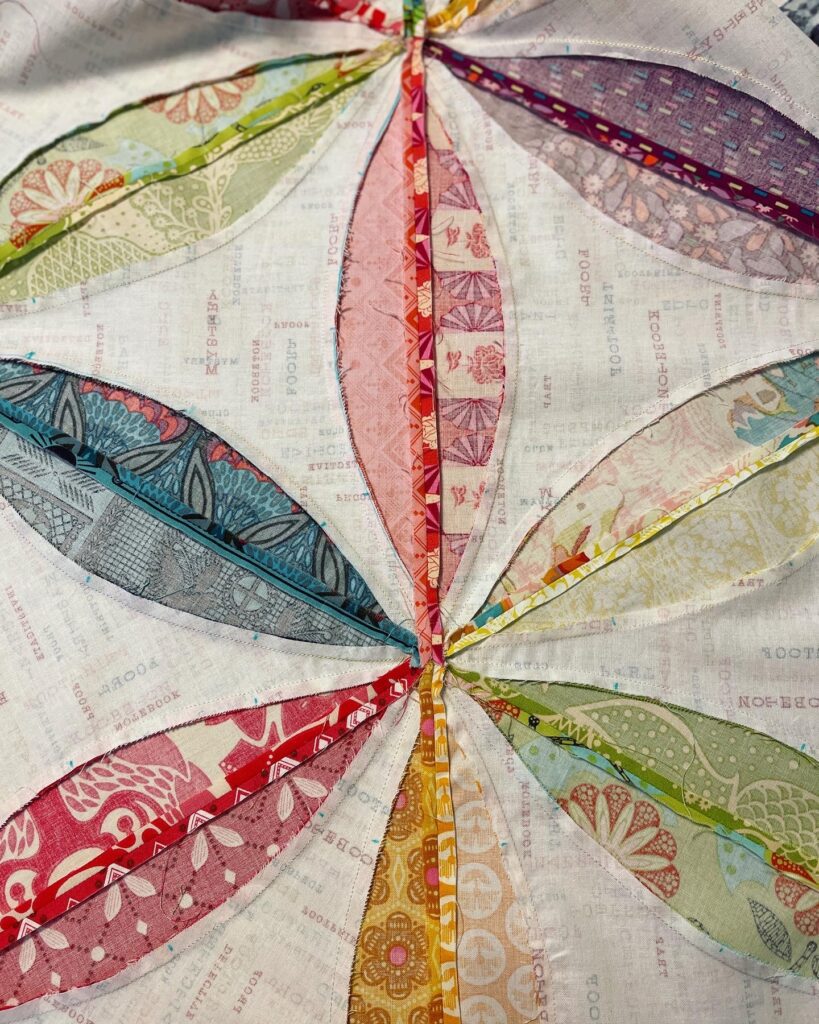
Without giving away any of the details of Holly’s pattern, I wanted to show you some of the steps involved in creating this epic quilt. Essentially one block turns out to be a pieced triangle with curves as shown above. So there is gentle curved piecing along with working with fabric on the bias quite a bit as any triangle quilt has. I find it helpful to be less intimidated by a complicated pattern to realize that it is the same shapes being repeated over and over. There are two template pieces (and half pieces) that all the pieces are cut from. Give yourself some time.
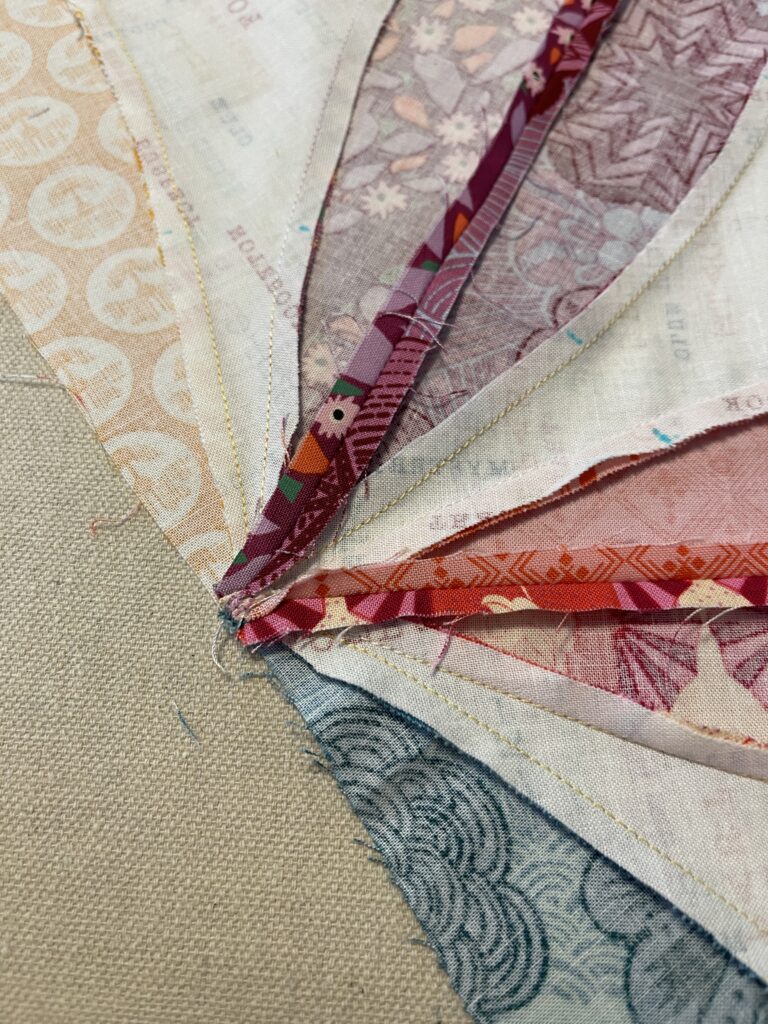
One of the things that I love about Holly’s pattern is her tips for ensuring that the seam matches are as accurate as possible. There is a bit of trimming of seam allowances and pressing notes that make a WORLD of difference. I’m not kidding. Do not ignore these. For me, it felt very reminiscent of garment sewing.
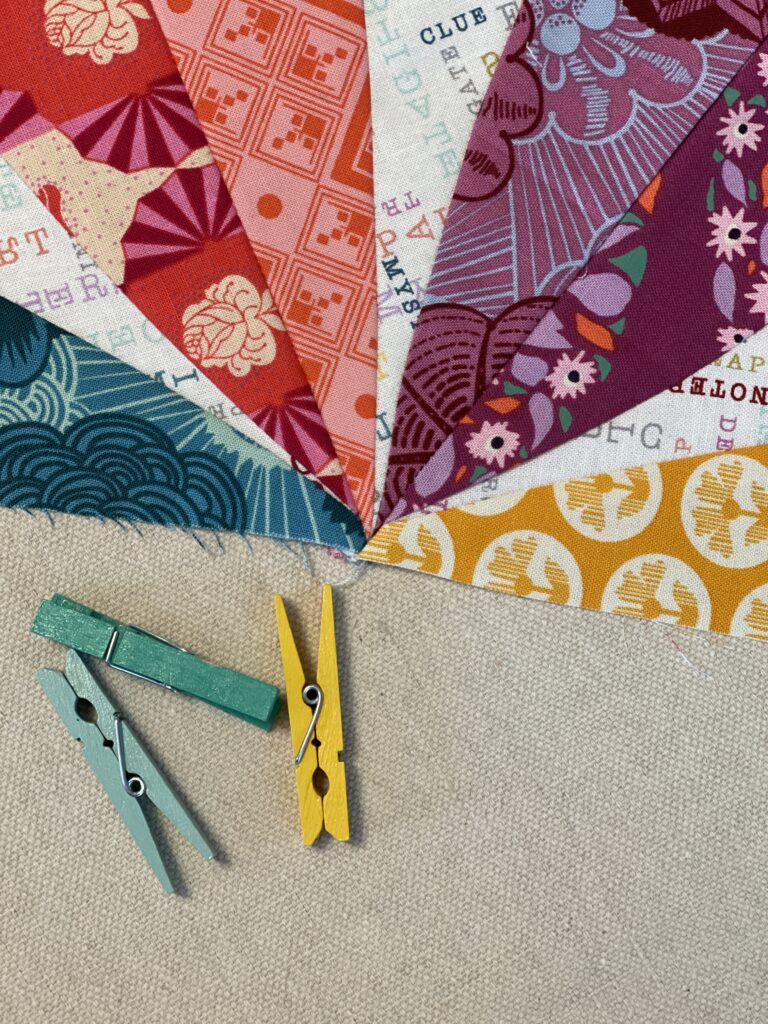
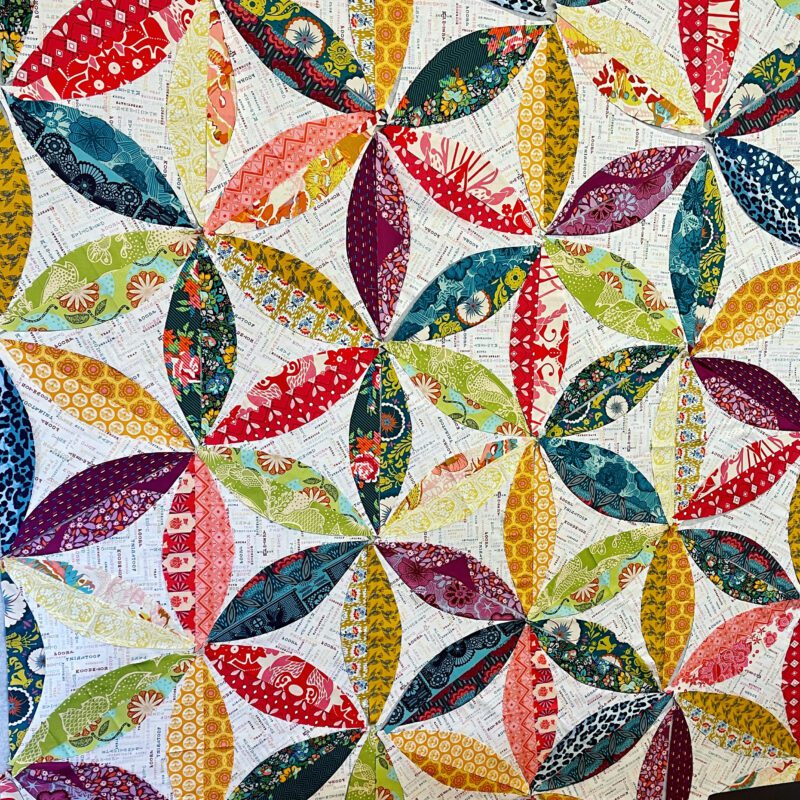
I just had to laugh when I realized that the major points were a total of 18 different fabrics meeting together (In that perfect point right?!) So let me just say right here, that you should decide from the beginning how important that is going to be for you. It is not for the faint of heart but is definitely accomplishable. I’ve done it before and I’ll do it again. I think I did a 24 fabric one years ago.
Remember that you are working with a 3 dimensional product, however flat fabric appears to be. Those hidden seams add bulk and change how you might approach this design with fabric vs glueing paper raw edges together.
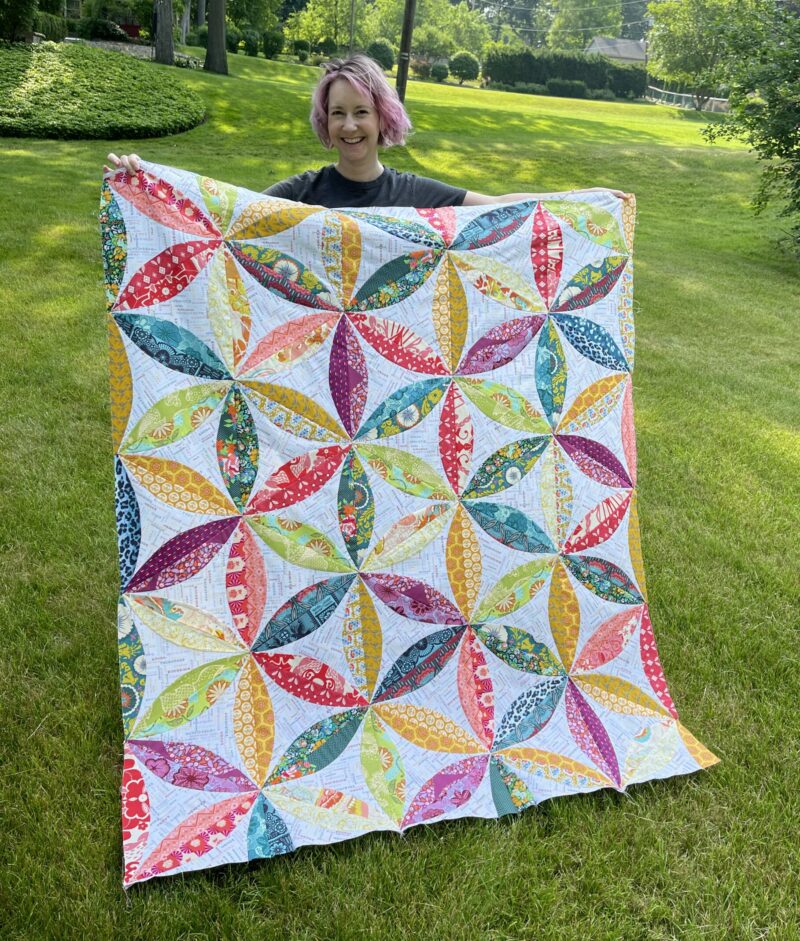
And give yourself a pat on the back (or 100!) when you finish putting one of these together in something that even remotely approximates the design you are going for. I know that some people love the challenge of this type of sewing and others just love seeing it sewn by others. 😉
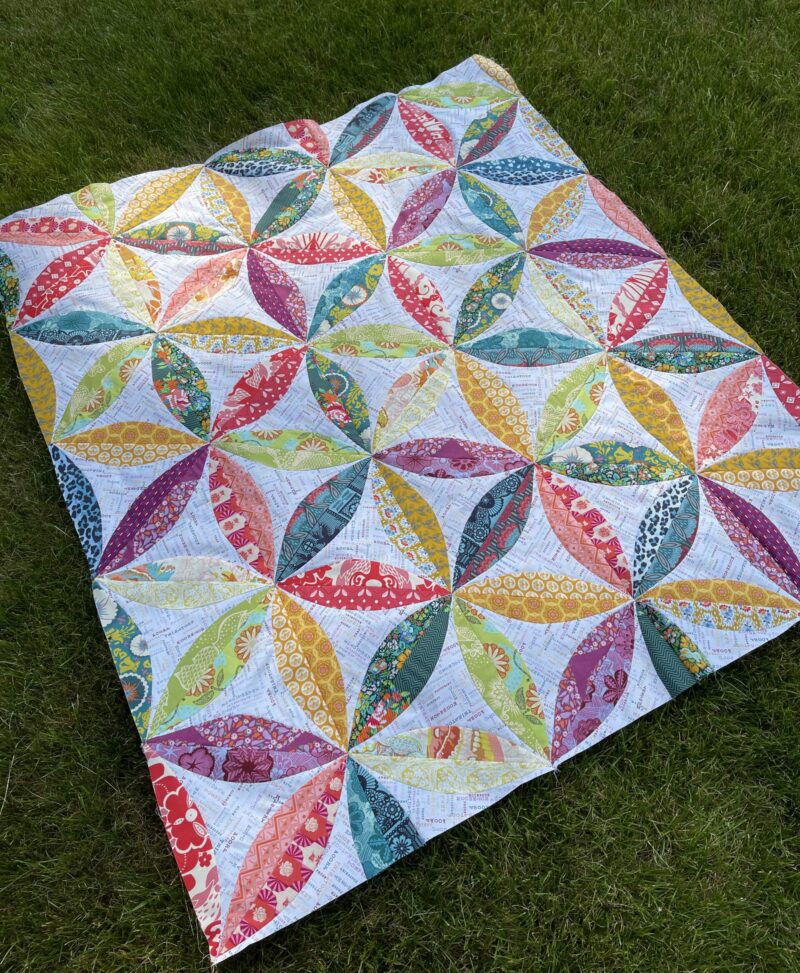
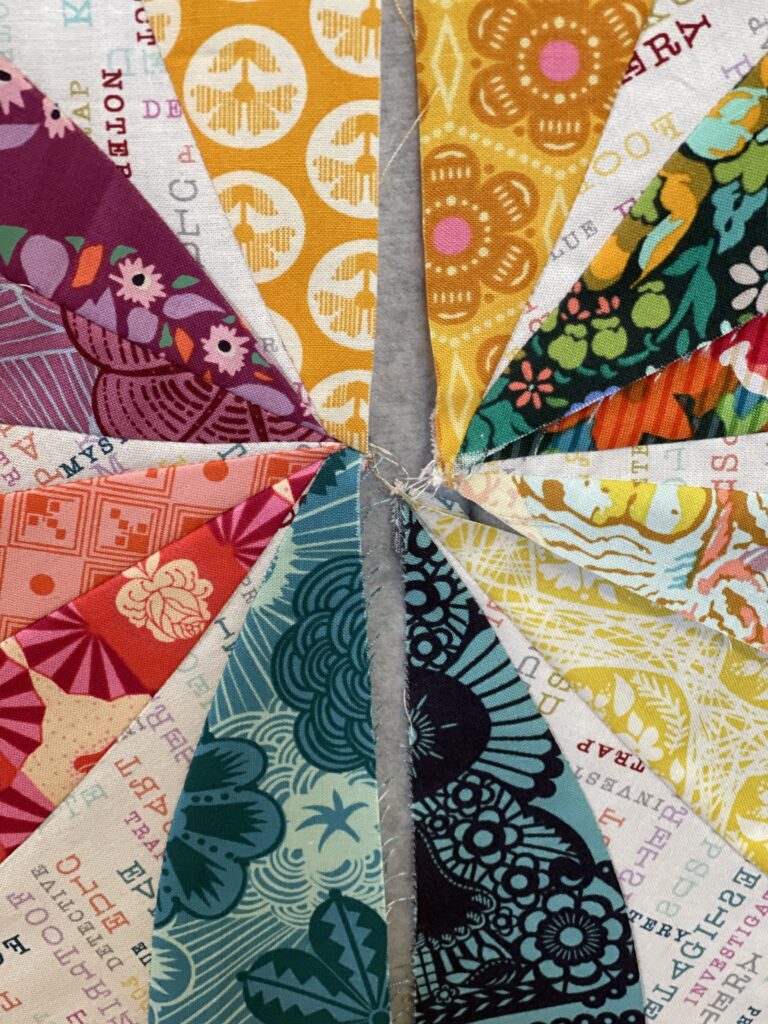
I wanted to include this back photo so that you can see that it truly is as lovely as the front. And for the front to lay nicely, the back needs to be consistent. But it’s simple enough to achieve…you take this one step at a time. I do suggest that you press your pieces with some kind of fabric stabilizer or starch to avoid distorting any bias cut pieces.
And then just sew those columns together. Again, I relied heavily on my design wall to keep pieces in place when I was sewing others. My brain just needs me to be able to focus on the one piece I’m sewing and not on the whole quilt design. Plus, I can take my time sewing it all together over a period of time rather than rushing to get this done in a certain amount of time. I would typically try to sew a single row together in one day. It’s a lot of seams and it can be hard to maintain the level of precision of I wanted if I start rushing to get it done.
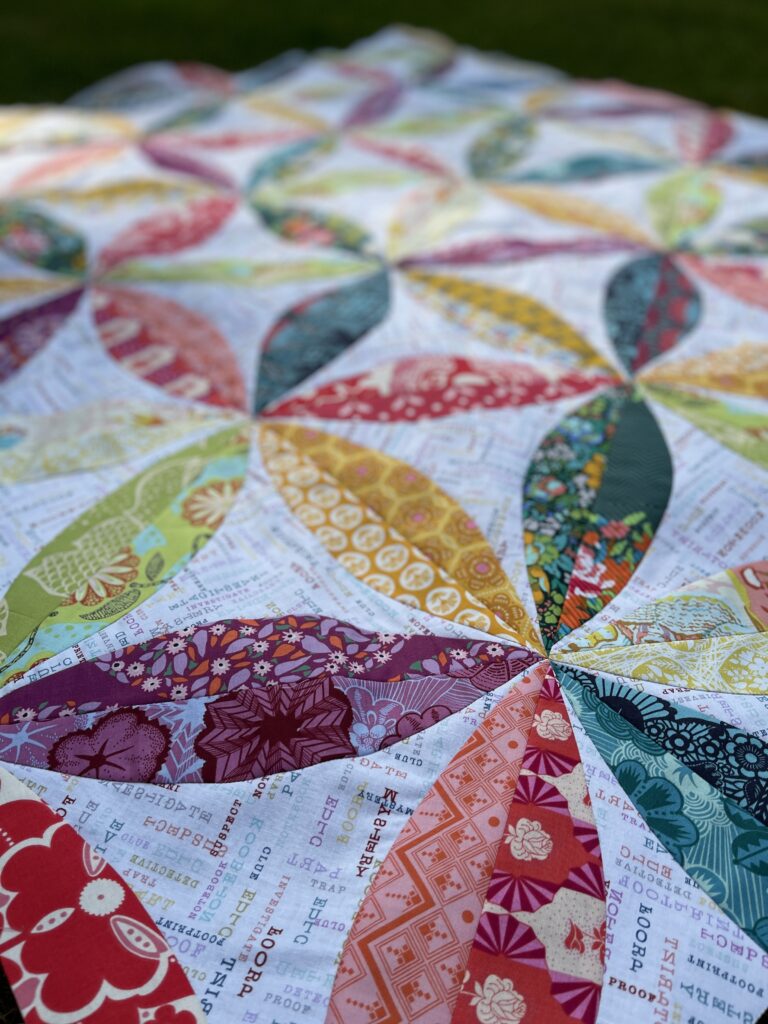
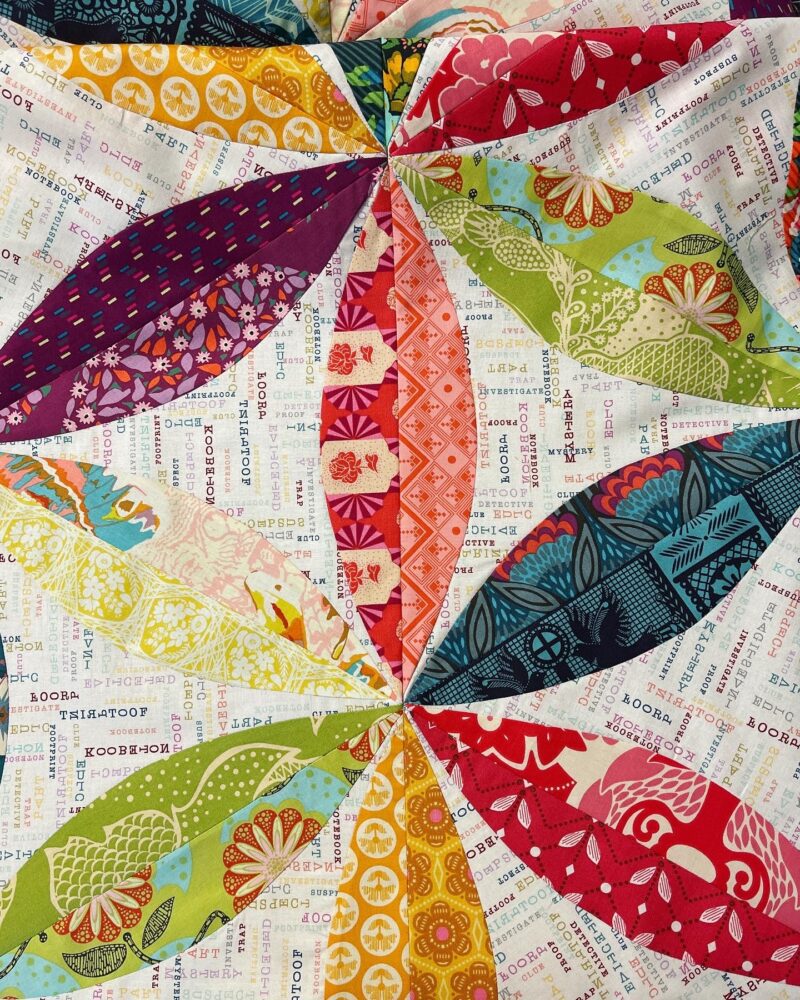
And then just sit back and enjoy! This is a quilt that gives you something to look at in every moment. I personally would suggest using prints or solid like prints vs straight solids because solids are super unforgiving. Tonal fabrics will set you up for success and solids would for me be a bunch of frustrating moments. But I know that I’m pretty partial to prints vs solids normally anyways.
I’ve sent this off to a long arm quilter to be finished and tried to choose a design that is somewhat geometric in nature, but that would not fight the design of the pieced top. I want it to compliment the piecing not compete with it. And I similarly chose a simpler backing for this quilt because there is so much happening on the front. This quilt finishes at 53″ x 61″ but could easily be expanded by continuing the pattern or by adding borders around this as a central motif. I chose to keep it the throw like size and think it will be the perfect lap quilt!
What do you think? Are you ready to tackle this pattern too?
This is gorgeous! Thanks so much for the review, it makes me really want to give this a shot!
You definitely should! It’s a really well written pattern. Just be patient and work with fabrics you really love!
Your attention to detail really shows. You did a lovely job with this one, and I love that you unashamedly posted pictures of those intersections. Excellent work! A number of years ago, I attempted this design as appliqué when Kellie Wulfsohn (DontLookNow) led a quilt along. Even when carefully hand-appliquéing those points, they didn’t come together well enough to satisfy me. I dropped out of the along, and eventually gave away that project. However, I think it’s still a pretty design, and what you did with it is smashing!
I do love some good details! It’s a blessing and a curse. And there is no way around the work of a design like this. Perhaps a raw edge applique method would be more doable. I’ve done hand applique for versions of this type of pattern as well and I don’t know that I could handle a full quilt. Maybe just a pillow. 😉
Wow this is so beautiful!! That is a pattern that I wouldn’t attempt but that’s awesome that you did!
It was a fair bit of work, but the pay off is really high. It helps that the quilt itself is not too large. It kept the project manageable.
This is gorgeous! I love the fabrics you chose! How did you decide on those fabrics?
Thanks Amberleigh! I chose fabrics from one of my favorite designers, Anna Maria Horner, and then used one of my own designs from my Clueless fabric line for the background. I love how the colors look!